Table of Contents
This guide provides a clear overview of windows 11, including When Should TPM Be Removed and Is It Safe to Do So, 4 Ways to Remove TPM on Windows 11. Use it to understand the topic, compare the available options, and make a more informed decision.
If TPM needs to be removed for any reason, you've come to the right place. This guide will show you 4 ways to remove TPM on Windows 11.
When Should TPM Be Removed and Is It Safe to Do So?
While TPM protects sensitive data and prevents hacking attempts from being generated through computer hardware, here are some situations where you should remove TPM on your computer.
- If you've checked your computer for malware and suspect it's infected, resetting the TPM will remove any malware that entered the computer.
- TPM stores important information about drivers and applications installed on your computer. Therefore, you must reset the TPM before selling your computer to protect your privacy.
- Removing TPM can also help you troubleshoot security, encryption, and authentication issues.
- It is recommended that you remove the TPM before a clean install of the new operating system. In this way, the OS can fully implement TPM-based functions such as authentication.
It is completely safe to delete TPM on your computer. However, keep in mind that this action will delete all TPM-generated encryption keys and associated protected data. This data contains information related to the virtual smart card or login PIN.
Therefore, it is important to back up Windows data protected by TPM to prevent any data loss.
4 Ways to Remove TPM on Windows 11
1. How to Delete TPM Using TPM Management Console
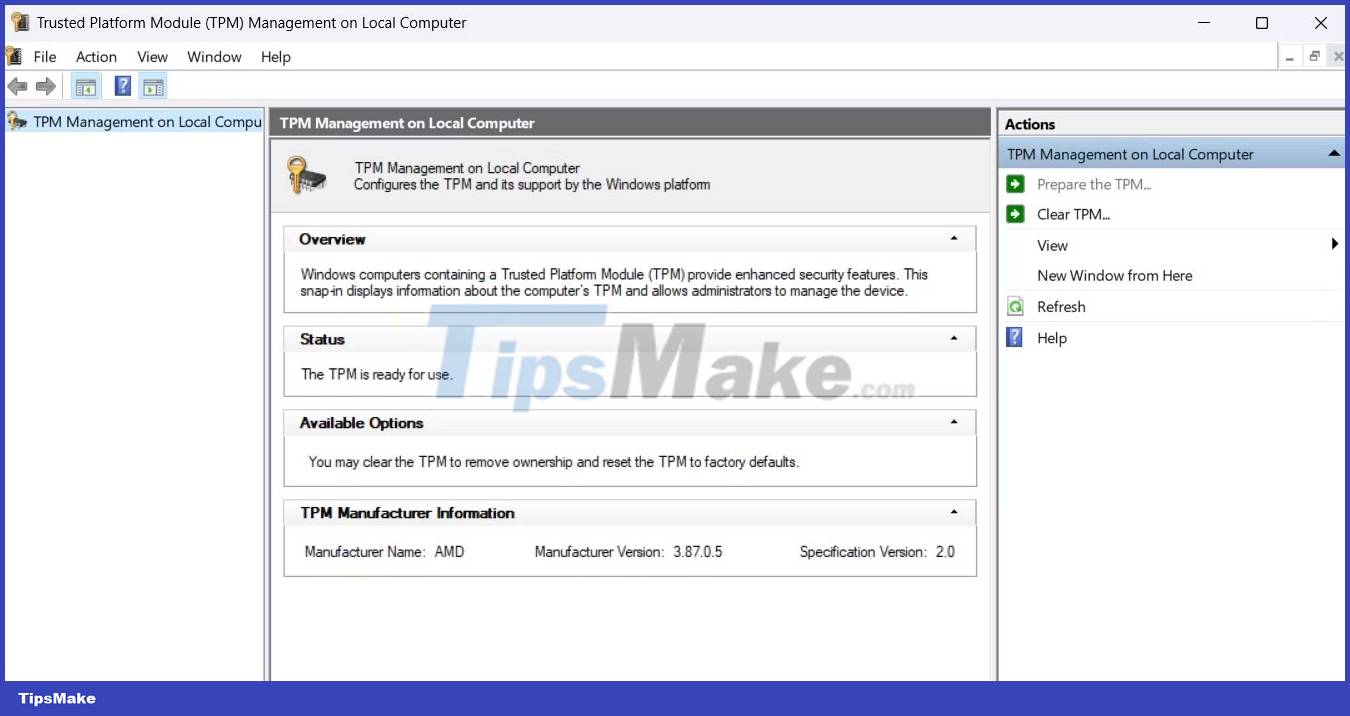
TPM Management Console allows you to manage the TPM installed on your computer. You can use it to enable or disable TPM, delete TPM and manage TPM keys.
To use it to clear or reset the TPM, follow these steps:
1. Press the Win + R keys together to open the Run dialog box.
2. Type tpm.msc in the search bar and press Enter.
3. Click the Clear TPM option in the Actions section.
4. Click Restart.
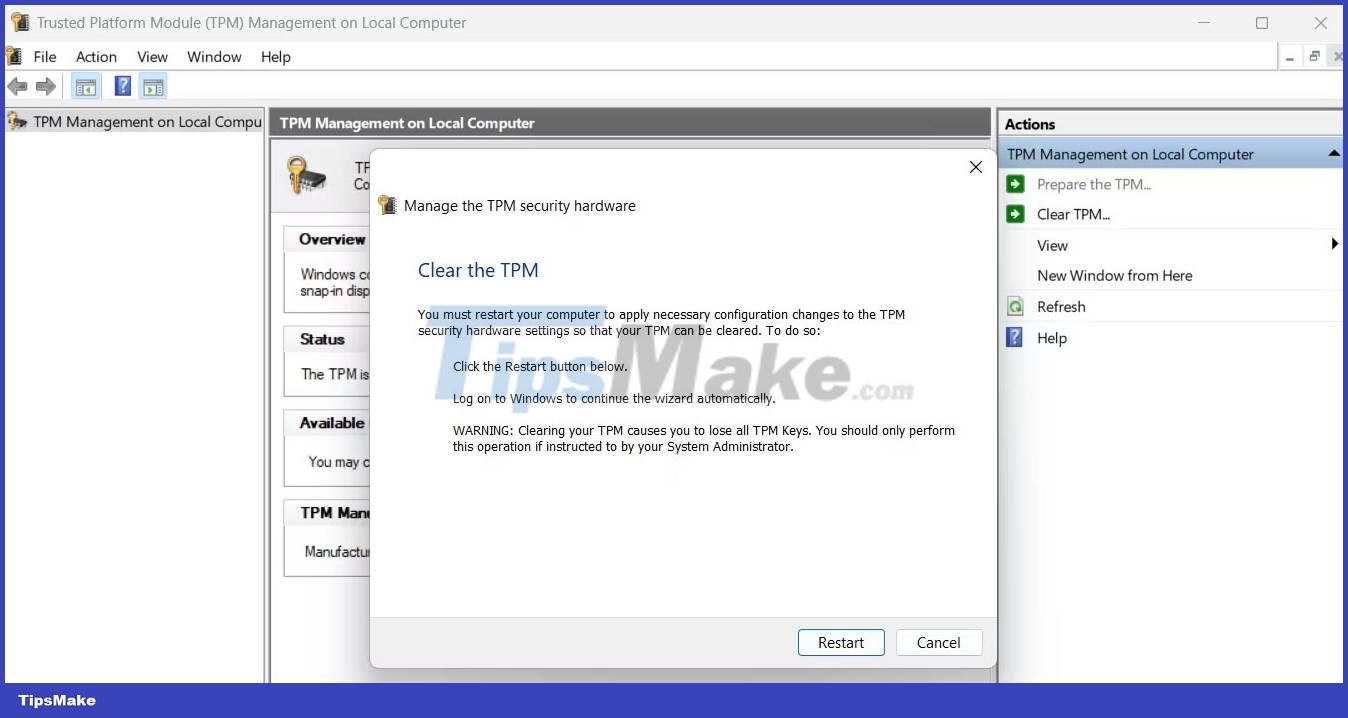
Your computer will now reboot to complete the TPM reset process.
2. How to Remove TPM Using Windows Security App
To remove the TPM using the Windows Security application, follow these steps:
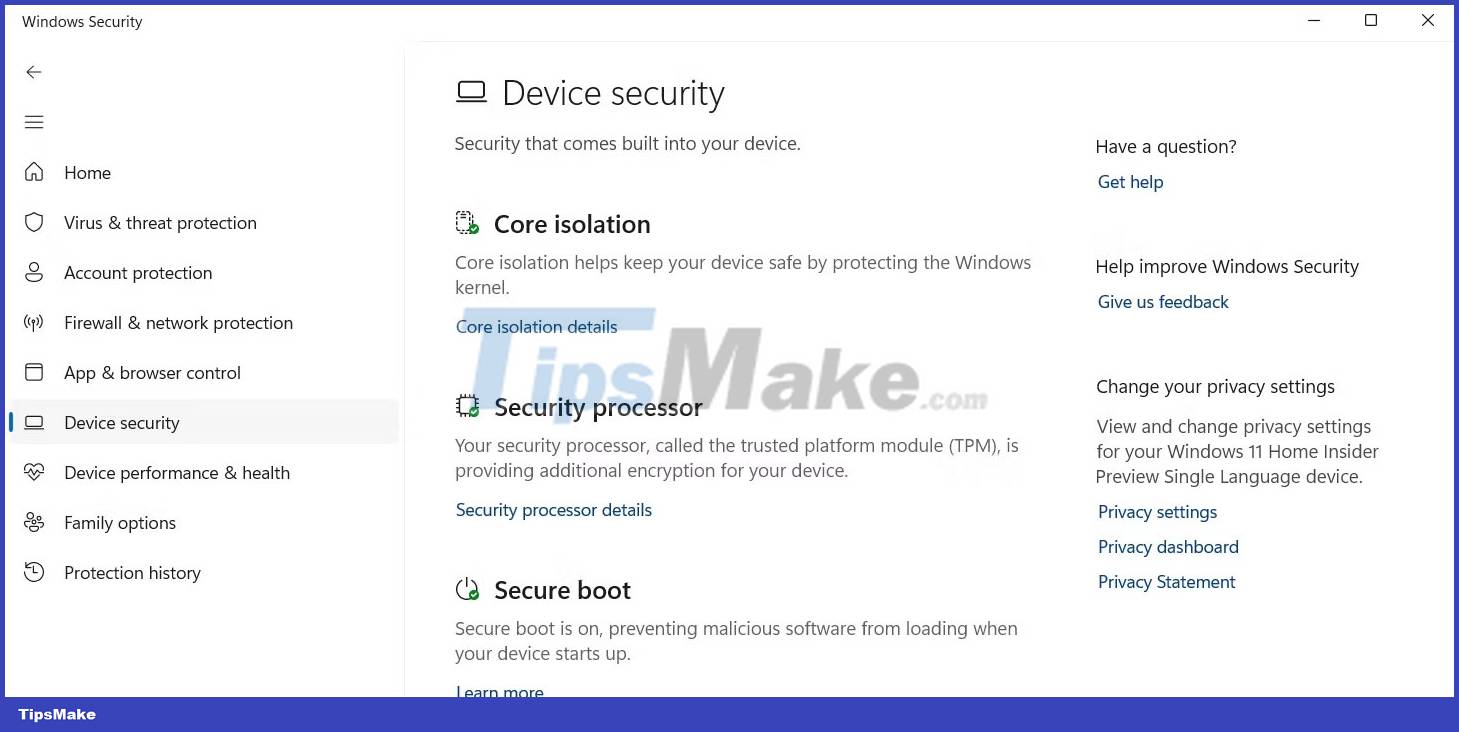
1. Open the Start menu, type Windows Security in the search bar and press Enter.
2. Select Device security from the left sidebar and click Security processor details
3. Click Security processor troubleshooting .
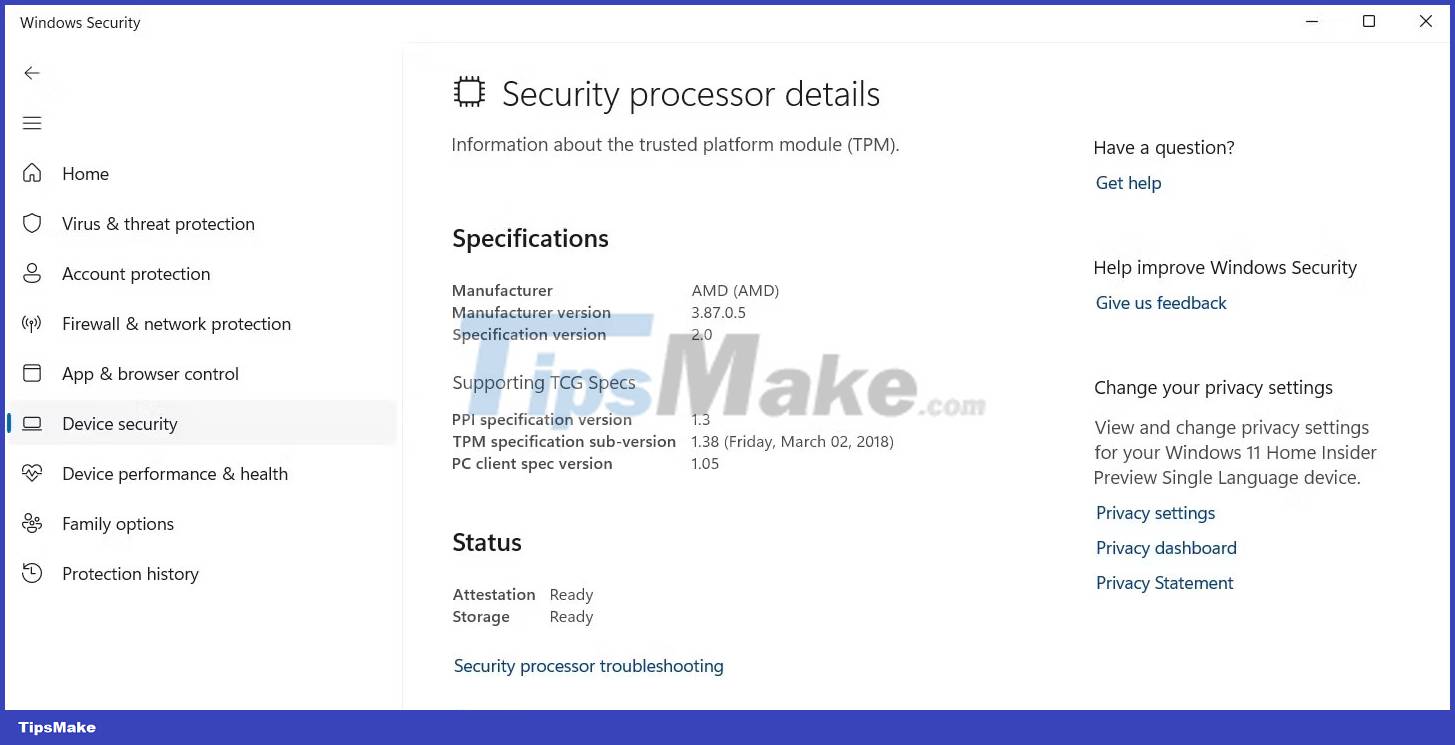
4. Select the reason to delete the TPM from the Select drop-down menu.
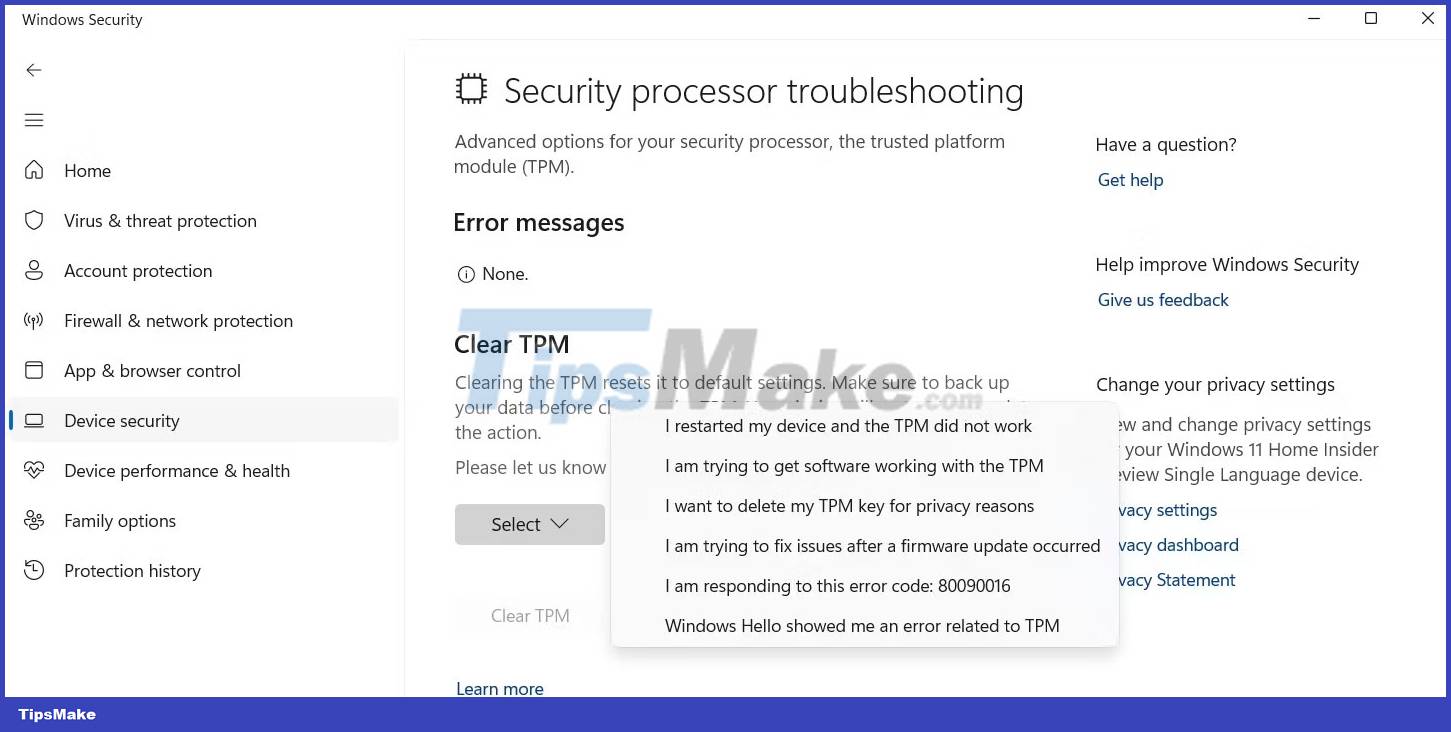
5. Click Clear TPM .
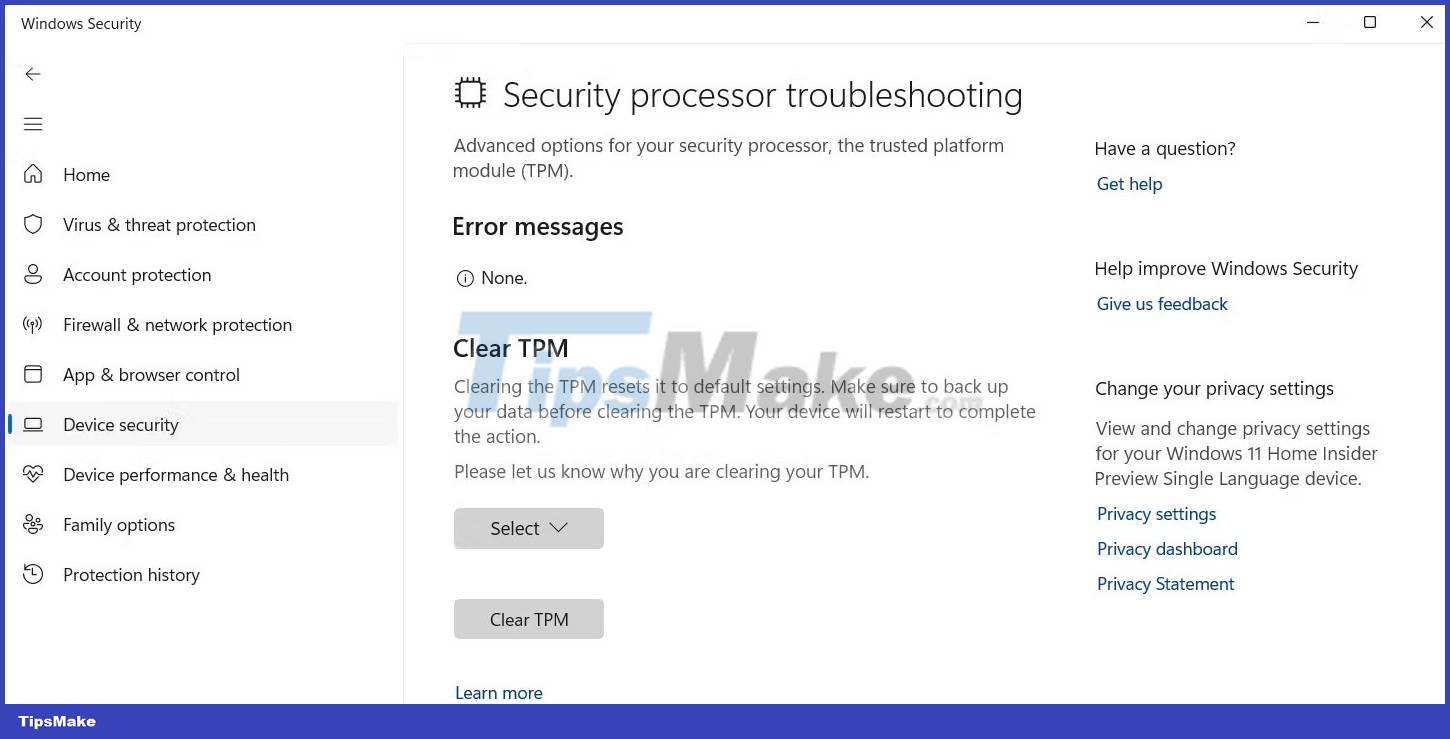
6. Click Clear and restart .
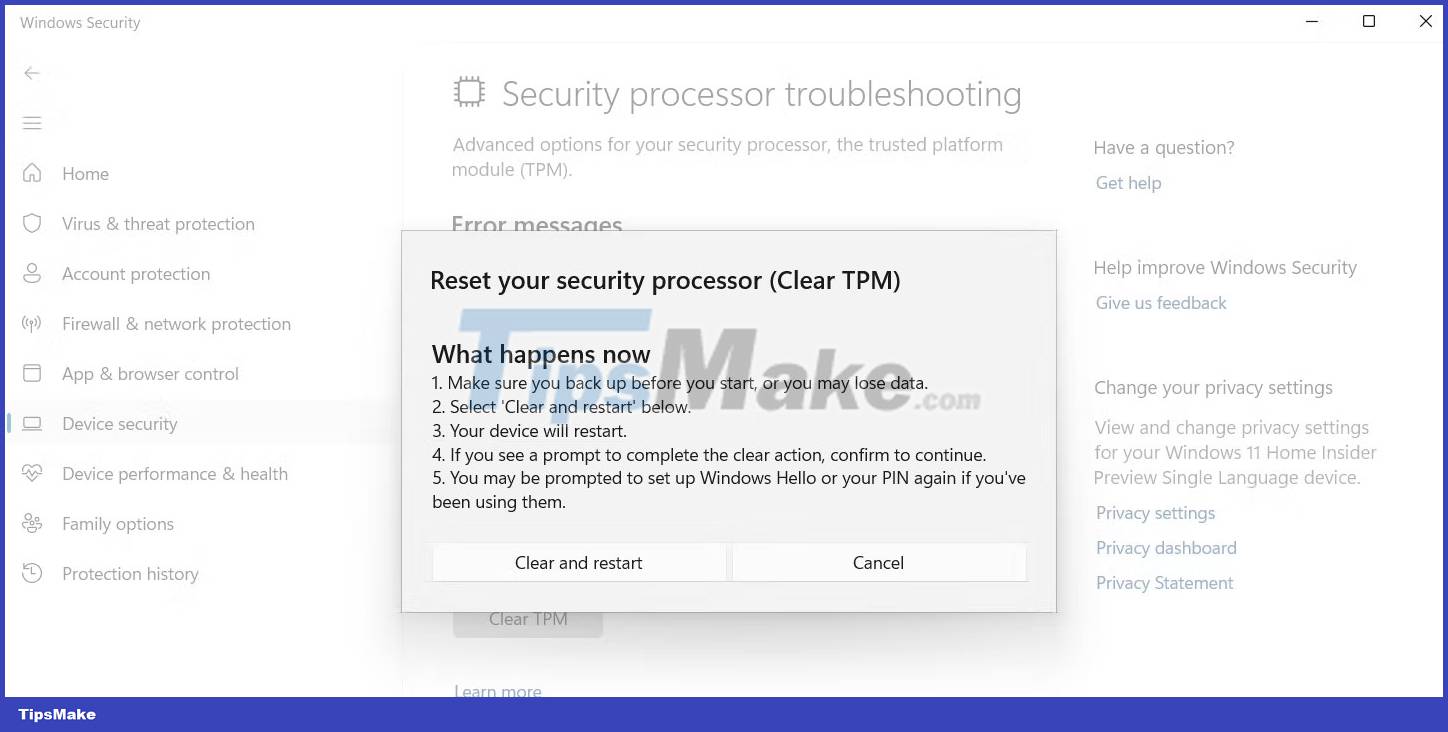
Your computer will now reboot. Then you'll have to set up Windows Hello if you've used it before.
3. How to Remove TPM Using Windows Powershell

Windows PowerShell is a command-line tool that allows you to perform advanced operations on your computer.
To use PowerShell to remove TPM, open Windows PowerShell with admin rights, type Clear-Tpm and press Enter.
4. How to Clear TPM Through BIOS
You can configure the computer's security layers, including TPM, from the BIOS. Here are the steps to reset TPM from BIOS:
1. Restart the computer and press the BIOS key (usually the F2 or Del key ) to access the BIOS menu.
2. Switch to the Security tab.
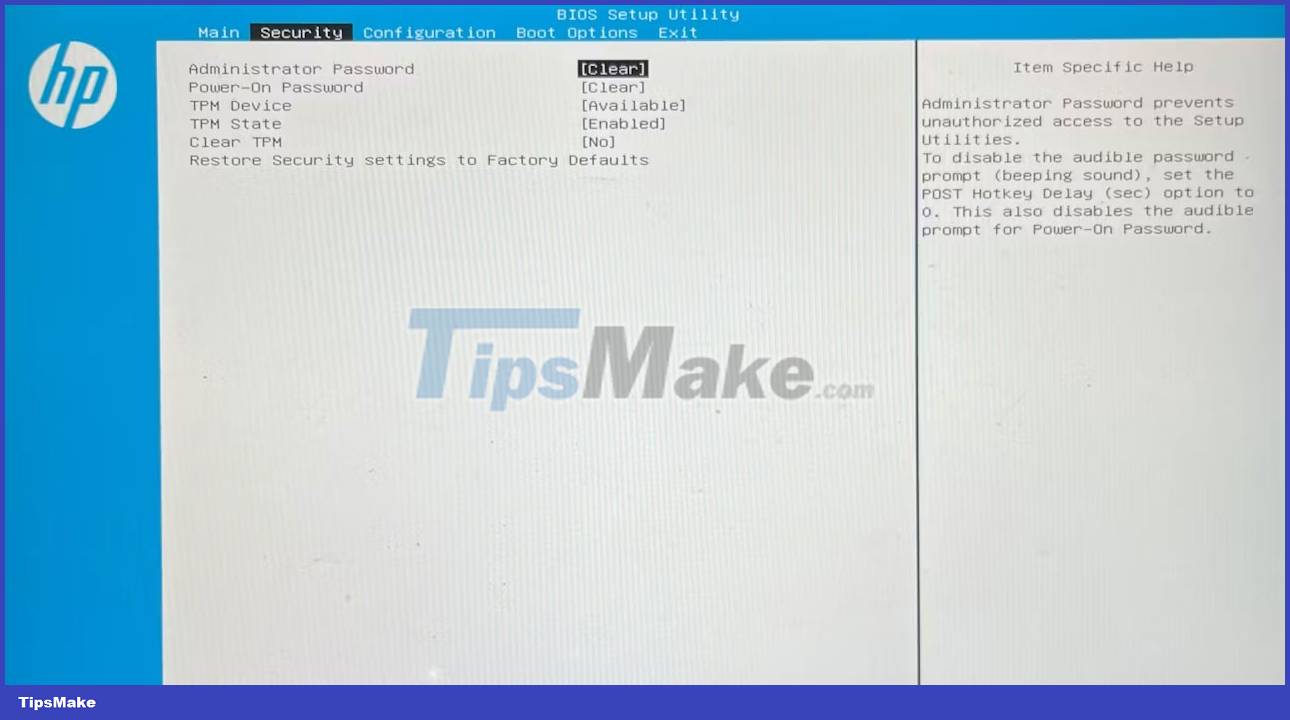
3. Click the Clear TPM option and select Yes from the prompt.
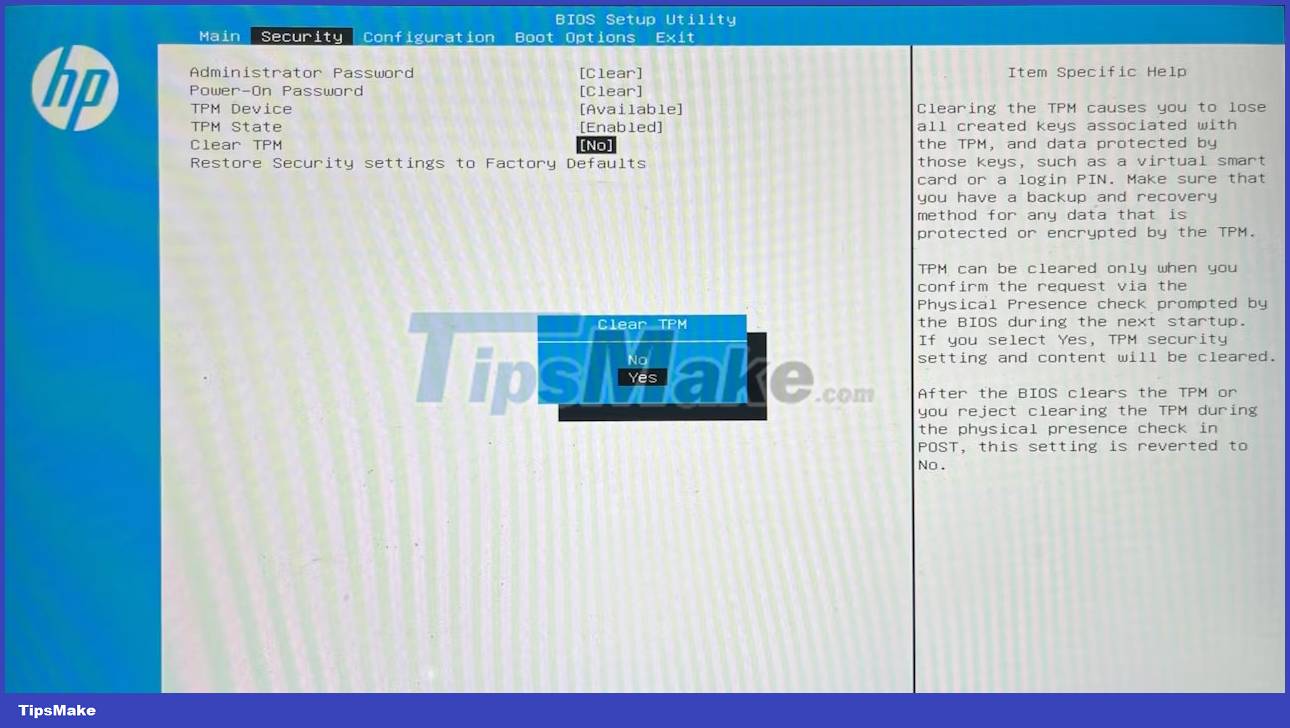
4. Switch to the Exit tab and select Save Changes and Exit . Then select Yes.
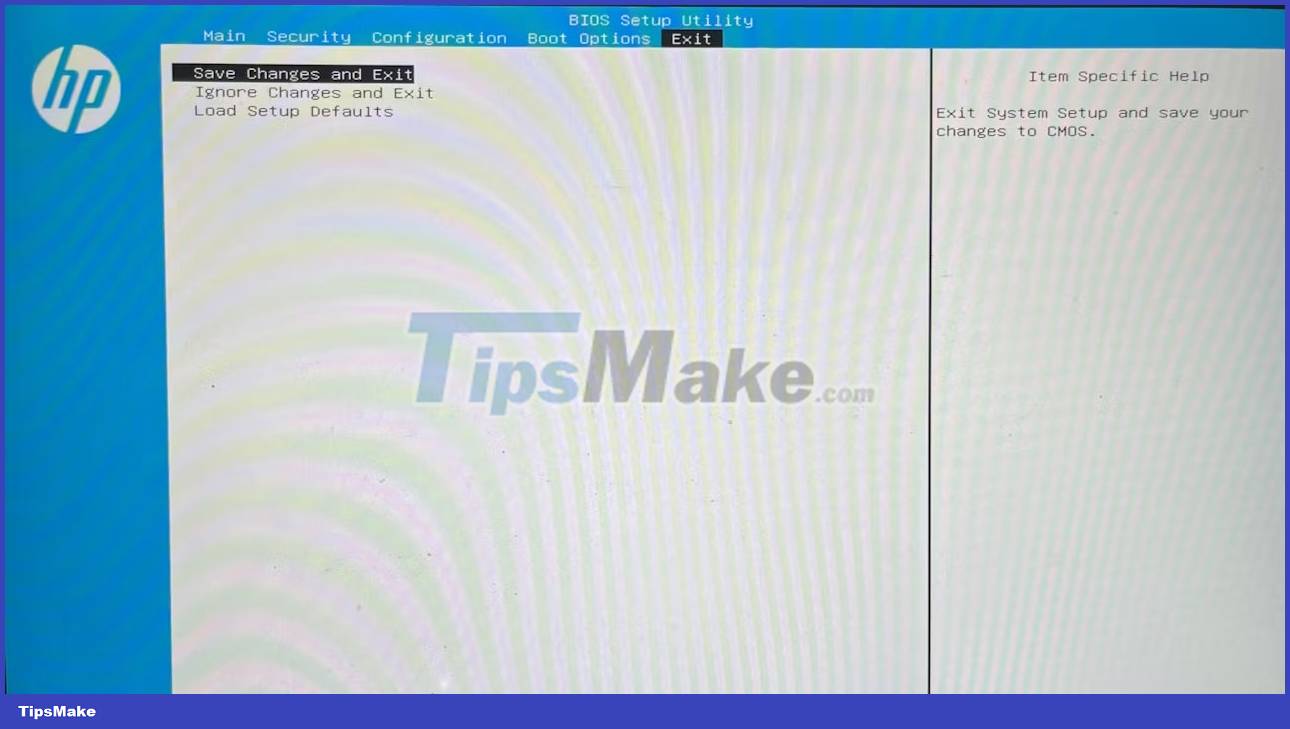
It is done! Your computer will restart and you will have the option to set up a pin on the login screen, indicating that you have successfully cleared the TPM.
Conclusion
Understanding Windows 11 makes it easier to compare options, avoid common mistakes, and apply the information in this guide more effectively. Review the relevant requirements before making changes or choosing a solution.
FAQ
What is Windows 11?
This guide provides a clear overview of windows 11, including When Should TPM Be Removed and Is It Safe to Do So, 4 Ways to Remove TPM on Windows 11.
Why is Windows 11 important?
Understanding Windows 11 helps you evaluate features, compatibility, performance, and potential limitations before you choose a product or follow a procedure.
What should you consider when using or choosing Windows 11?
Consider your specific goal, compatibility requirements, available features, cost, security, and the practical recommendations described in this guide.
Related Articles
 What Is Windows TAP? Ways to Remove It3 minutes read
 7 Ways to Remove Software and Applications on Windows 8 //7 minutes read
 5 Ways to Remove Default Apps on Windows 106 minutes read
 How to Stop Windows from Asking You to Remove Your GPU7 minutes read
 6 Ways to Clean Lipstick Marks on Your Shirt Quickly and4 minutes read
 How to Delete, Remove Software on Windows 10 Computers5 minutes read
Reader Comments 0
Sign in with email or Google to join the discussion.