Windows 11 still often throws the error of losing internet connection, and here are the ways to fix it
However, all will be bad if the internet connection you are using on your computer is always unstable, even though you have checked the Wi-Fi Modem many times.

And in recent reports, the internet connection on Windows 11 is quite bad, the connection is intermittent, unstable always happens whether you have restarted the computer or the Wi-Fi Modem. So is there a way to fix it while waiting for the fix update from Microsoft? This article will give you some suggestions to solve as follows, please read for reference.
Method 1 – Change the network configuration

Right-click the network icon in the Taskbar and select Network and Internet settings.

The Settings window appears, click Properties.

Change the option in the Network profile type section to "Private" and try again to see if the Wi-Fi connection is still intermittent.
Method 2 – Update Network Driver

Right-click the Start button and select Device Manager.
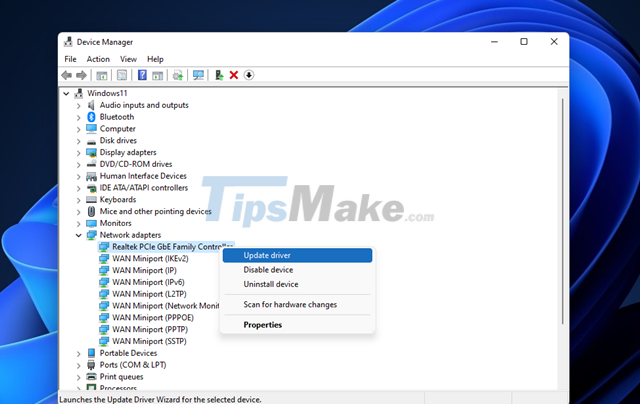
The Device Manager window appears, go to the Network adapters section, click on the expanded menu icon of this item. Then right-click on the driver line of the network card and select Update Driver.

The driver update window for the hardware you choose will appear for you to choose from. You can choose to update automatically or manually depending on your preference.
In case of using a discrete network card, right-click it and select Properties, then click the Power Management tab and uncheck "Allow the computer to turn off this device to save power", then click OK to save.
Method 3 – Restart the operating system's network service
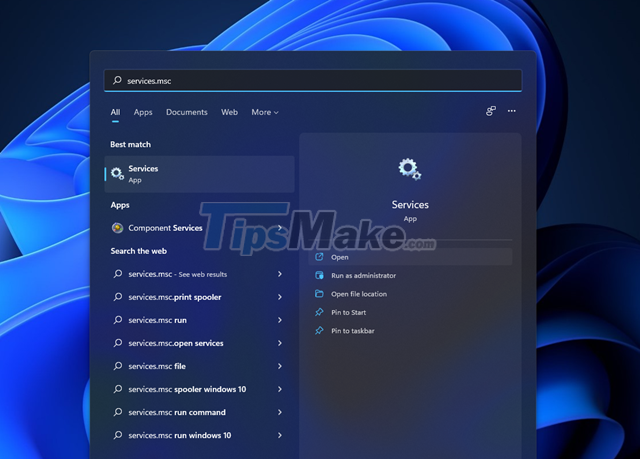
Enter the keyword "services.msc" in the search box and click on the result like the photo.
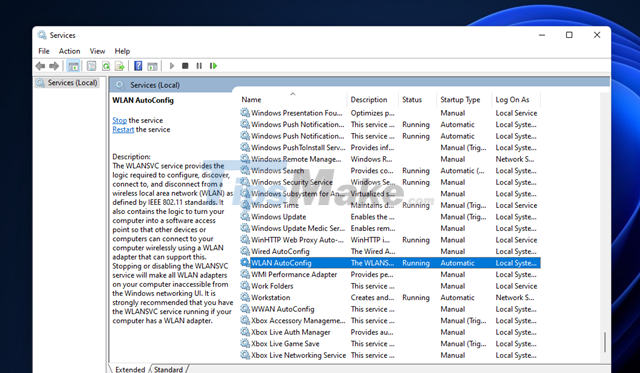
Find "WLAN Auto-Config" and double click on it.
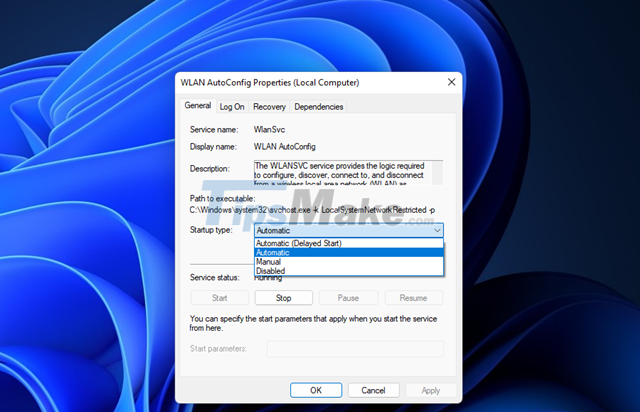
Change the setting in the Startup type section to "Automatic" and click OK to save.
Method 4 – Change DNS
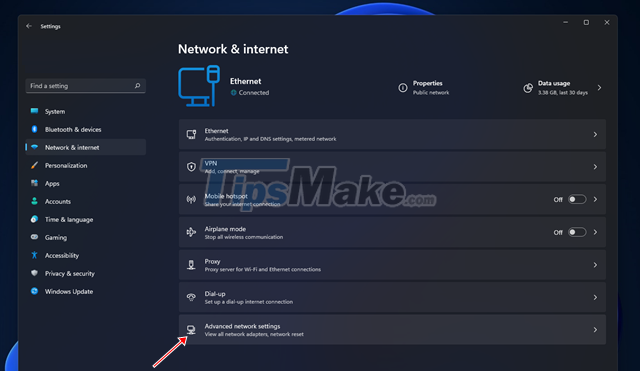
Open Settings and go to Network & Internet > Advanced network settings.
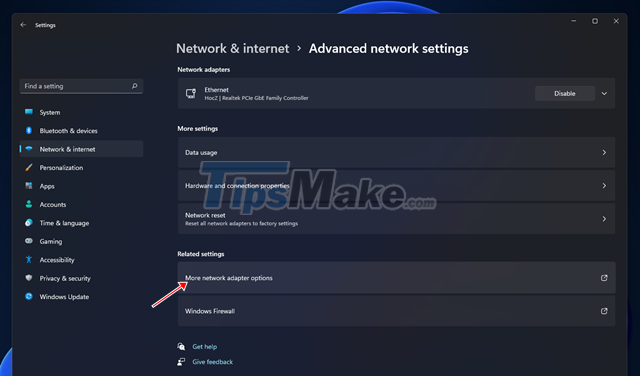
Find and click More network adapter options.
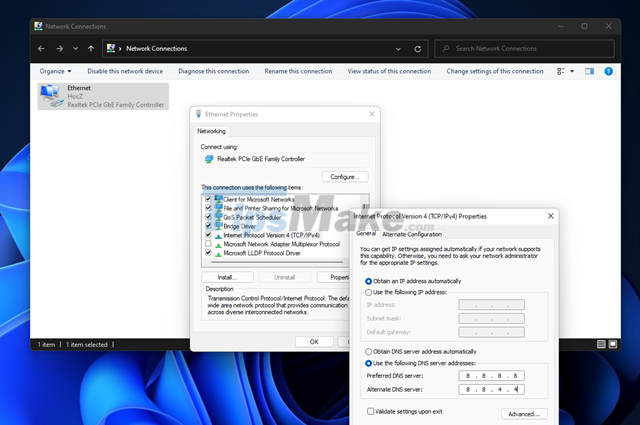
The network connection management window appears, right-click the network adapter you are using and select Properties. Then click on the Internet Protocol Version 4 selection line and proceed to enter DNS as shown. Finally, click OK to save.
Method 5 – Use Troubleshooting of Windows 11
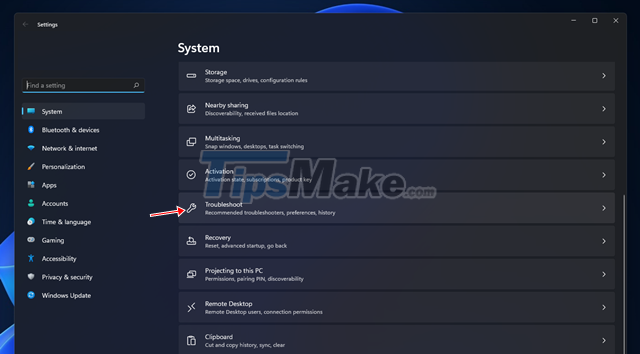
Open Settings and go to System > Troubleshoot.
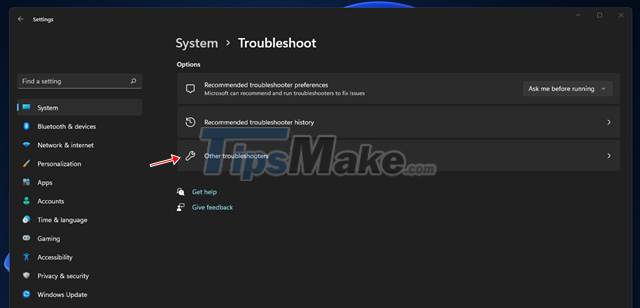
Click Other trouble-shooters.
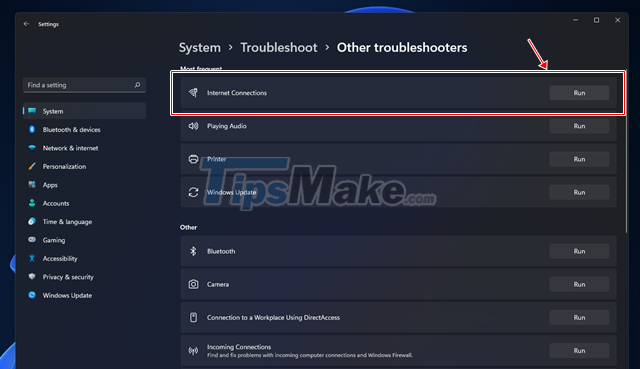
Click "Run" in the Internet Connections line. Windows will find and fix network connection problems for you.
Very simple, right?