What is Windows Superfetch (SysMain)? How to disable Superfetch?
Superfetch (called SysMain in Windows 10 and Windows 11) is a service loading and program prioritization that has been available since Windows Vista. It sits quietly in the background and evaluates the apps you use the most and how much RAM you use. Although designed to make your computer faster, SysMain is usually not needed and can be safely disabled to fix high memory usage on your PC.
1. What is SuperFetch?
Superfetch (SysMain) is a Windows Service Host process ('svchost.exe') whose primary goal is to allocate RAM to commonly used applications and programs. There is only one SysMain activity on a Windows computer that you can see in the Services tab of Task Manager.
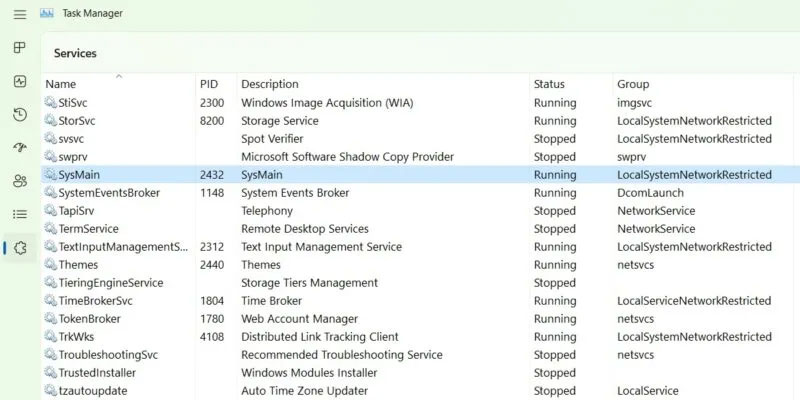
To quickly launch your favorite applications, SysMain loads their executable files through reusable code blocks called dynamic link libraries (DLLs).
Superfetch (SysMain) is designed to make your computer faster, as it maintains and improves system performance over time. It also reduces overall boot time. Every time you start your PC, all the necessary applications will be preloaded using your computer's unused memory.

2. Why does Superfetch (SysMain) consume so much memory?
Since the purpose of Superfetch (SysMain) is to prioritize programs you use frequently, it can easily increase memory consumption by 100%, especially with browser tabs and Office programs, because it doesn't really know how much memory you'll need, so the data is cached in additional pre-allocated memory.
While SuperFetch is a useful feature, it causes your computer to work in the background more, leading to higher CPU and RAM usage. Over time, unused memory continues to increase and you end up consuming a lot more space. This typically affects Windows systems with very low RAM capacity (~4 GB or less).
3. Is Superfetch really necessary?
For almost every situation, Superfetch is very useful. If you have a modern PC with average or better specs, Superfetch will most likely run so smoothly that you won't notice its presence. It's very possible that Superfetch is already running on your system right now and you don't even know about it.

But there are some problems that can arise with Superfetch:
- Because Superfetch always runs in the background, the Superfetch service itself always uses some CPU and RAM.
- Superfetch does not give up the need to load applications into RAM. Instead, it moves the loading process to an earlier time. Whenever loading occurs, your system will still experience slowness as if you were launching the application without Superfetch.
- The system boot process can be slow because Superfetch is preloading a bunch of data from the hard drive to RAM. If your hard drive runs at 100% for several minutes every time you start or restart your computer, Superfetch may be the culprit.
- Superfetch performance may not be noticeable when Windows 10 is installed on an SSD. Because SSDs are so fast, you don't really need to preload them. If this interests you, check out TipsMake 's guide on how to move Windows from a hard drive to an SSD.
Superfetch is also known to cause performance issues when gaming, especially on systems with 4GB of RAM or less. It's unclear why this happens because not everyone experiences it, but it's possible that RAM-heavy games continually request, then release, memory, which causes Superfetch to repeatedly load and stop loading data. .
Is it safe to turn off Superfetch? The answer is yes! No problem if you decide to disable Superfetch. It is recommended that if your system is running fine, leave this feature enabled. If you're having problems with hard drive usage, high RAM, or degraded performance during RAM-heavy operations, then try turning it off and see if that helps.
Note : To increase performance on systems with little RAM, the article recommends adjusting Windows virtual memory limits and visual effects. You can also try these tips for faster startup and shutdown.
4. Disable SuperFetch on Windows
Superfetch (SysMain) is definitely useful for loading some programs faster. But if you're using a new Windows PC, this may be redundant. Disabling SysMain completely seems more effective. Since Superfetch (SysMain) is not an essential service, you can go ahead and disable it whenever you want. There are 4 ways to do so.
Use Windows Task Manager Services
Windows Task Manager is the standard implementation of SysMain and its svchost.exe program.
1. Go to the Services tab in Task Manager.
2. Locate the SysMain task and right-click to select the Open Services option.
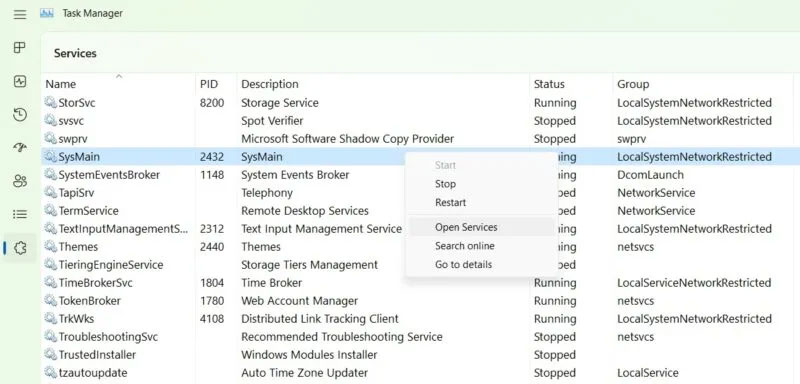
3. Find the SysMain service and right-click on it to open its Properties . If it is running and the startup type is set to Automatic , you can easily turn it off from here.
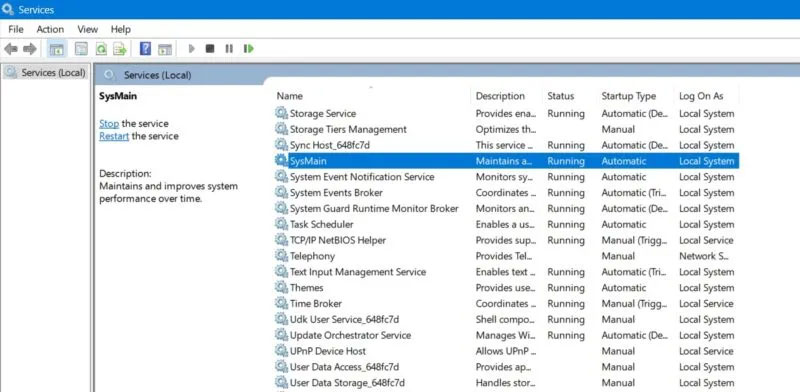
4. In the pop-up window, you will see the Startup type option in the General tab. Click on it to see additional options.
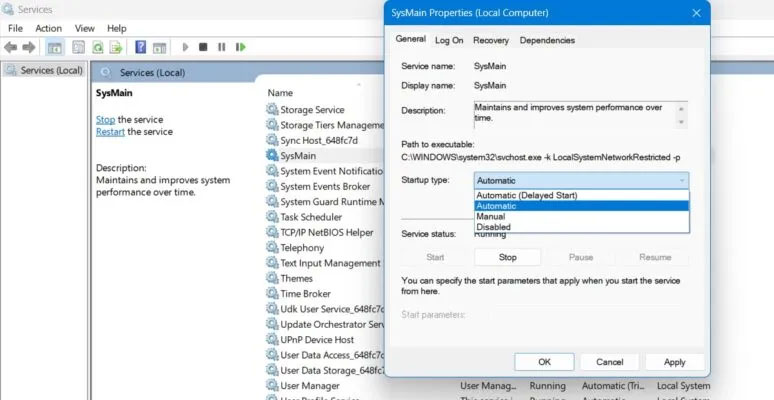
5. Select the startup type as Disabled , apply the changes and click OK.

6. Restart the computer for the changes to take effect.
Use Registry Editor
A more permanent way to disable Superfetch (SysMain) functionality is to edit its Start value in the Registry Editor.
1. Create a restore point so that if something unexpected happens, you can return to the starting point.
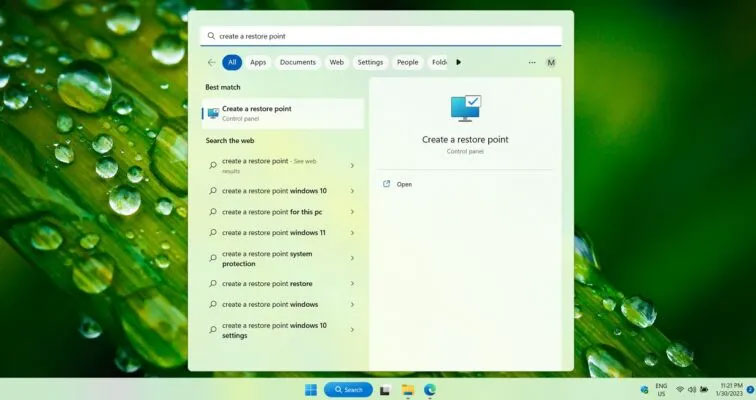
2. Write Create a restore point in the Windows search bar and select Best match below.
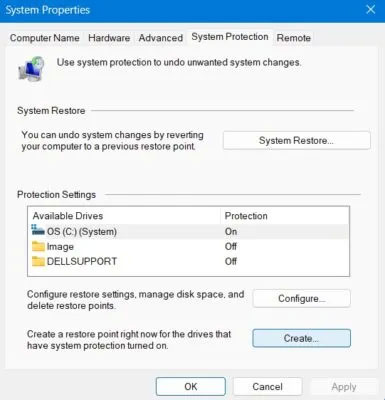
3. Once the System Properties window is launched, navigate to the System Protection tab. Click the Create button at the bottom of the window.
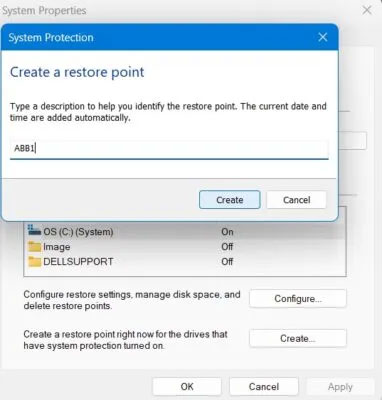
4. Name the restore point. Add any identifying details that may help later. The current date and time are added automatically.
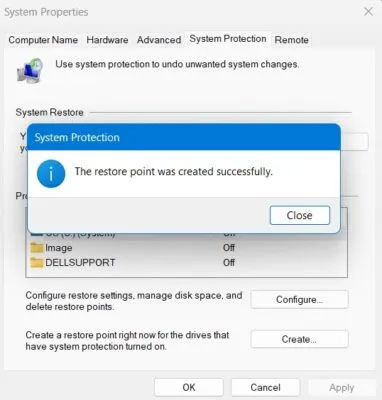
5. The restore point has been successfully created and you can freely edit the registry values as shown below.
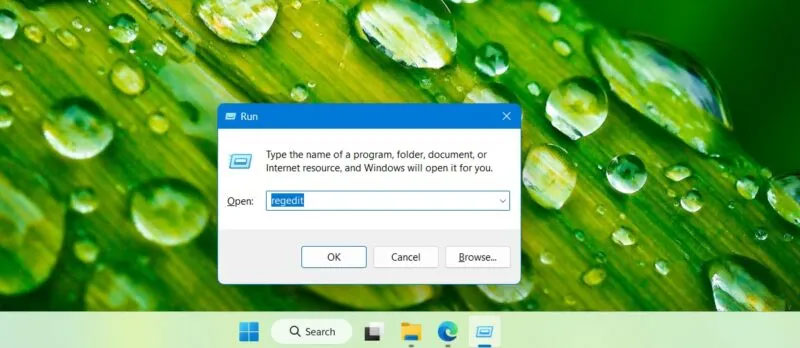
6. Using Windows Run (press Win + R ), open Registry Editor by typing regedit. It will launch in Administrator mode by default.
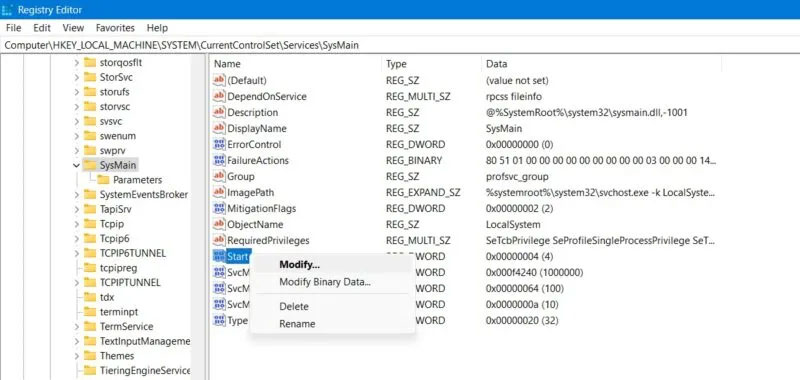
7. Navigate to the following path in Registry Editor:
ComputerHKEY_LOCAL_MACHINESYSTEMCurrentControlSetServicesSysMain8. Double-click or right-click the Start item on the right panel to modify it.
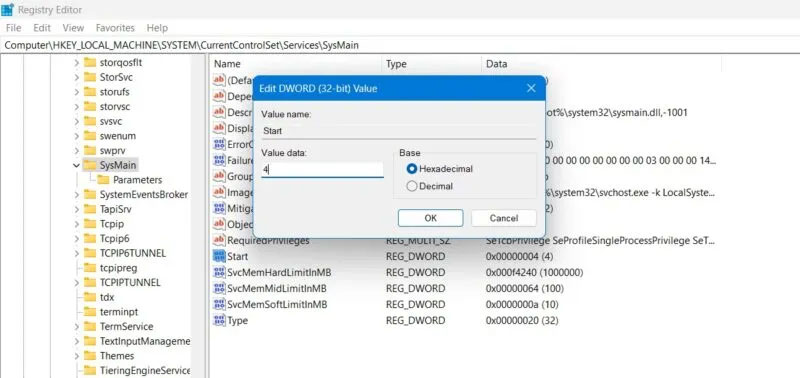
9. Set the value data for the Start item to 4.
10. Restart your PC for the changes to take effect.
Use PowerShell
The PowerShell window is one of the fastest ways to disable and enable SysMain.
1. Open a PowerShell window from Run, Win + R , by typing powershell in the window.
2. Instead of pressing Enter or OK , enter Ctrl + Shift + Enter on the keyboard. This will launch PowerShell in admin mode.
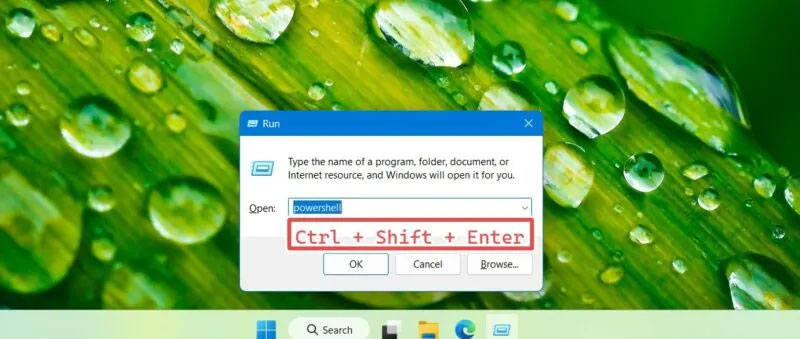
3. Enter the following commands to disable or enable SysMain as desired. The following window shows both commands together, but you will need to use them one at a time.
Stop-Service -Force -Name "SysMain"; Set-Service -Name "SysMain" -StartupType Disabled Set-Service -Name "SysMain" -StartupType Automatic -Status Running 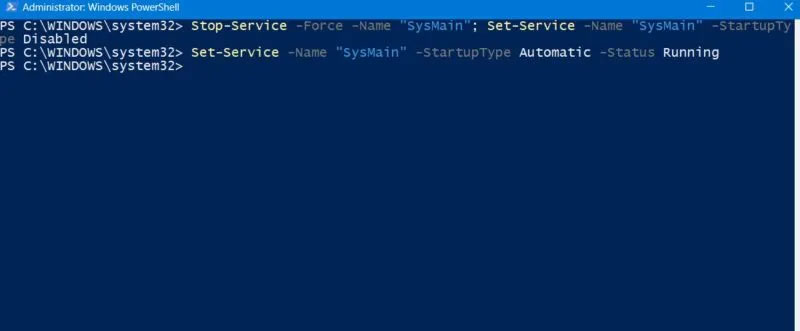
4. Type exit in PowerShell to close the window. Restart your PC for the changes to take effect.
Use Command Prompt
Like PowerShell, Windows Command Prompt is a classic way to instantly disable or enable SysMain.
1. Open a Command Prompt window from Run, Win + R , by typing cmd in the window.
2. Instead of pressing Enter or OK , enter Ctrl + Shift + Enter on the keyboard. This will launch Command Prompt with admin rights.
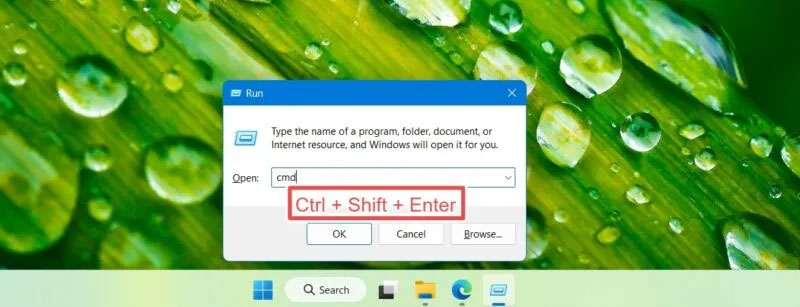
3. To block SysMain on your computer or to re-enable it, enter the following commands as needed.
sc stop "SysMain" & sc config "SysMain" start=disabled sc config "SysMain" start=auto & sc start "SysMain" 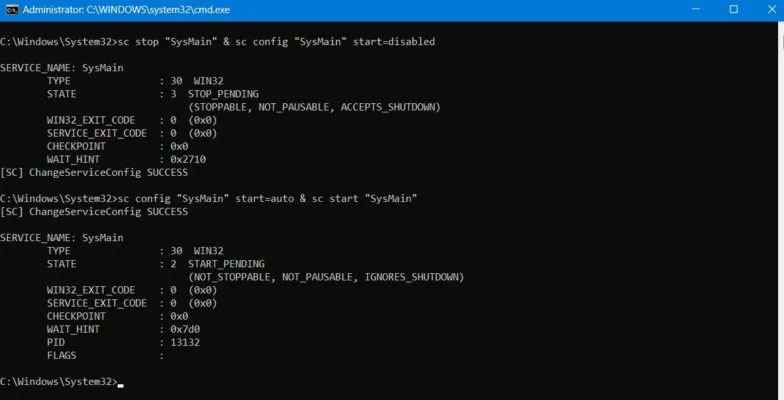
4. Enter exit in Command Prompt to exit, then restart the device.
Good luck!