Table of Contents
This practical guide explains how to change the Name (letter) of a Windows Hard Drive in a clear sequence, including preparation, key settings, common mistakes, and troubleshooting steps.
What This Guide Covers
- How to rename hard drive on Windows 11/10
- Method 1: Rename hard drive using Disk Management
- Method 2: Rename the hard drive from the context menu
Everyone knows that C: is the drive containing the Windows installer or at least the Windows boot drive. If you are wondering why the default drive on a Windows computer is C and not A or B? Then read TipsMake's other article.
Although the default hard drive name is C, E, D, F, if you have admin rights (log in to the computer with an administrator account), you can completely rename the hard drive, more precisely, assign a different letter to the hard drive. . Below is a general way to do it, applicable to all Windows operating systems with integrated Disk Management, from Windows XP to Windows 11.
How to rename hard drive on Windows 11/10
Method 1: Rename hard drive using Disk Management
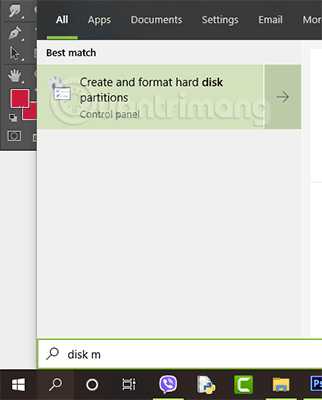
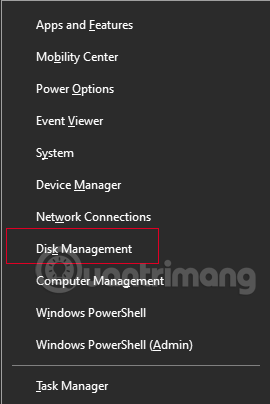
Type " Disk Management " into the search bar and click on the first result, which is usually " Create and format hard disk partitions ". Or press Windows+ Xselect Disk Management .
The Disk Management window appears, you will see a graphical list of drives on the computer, partitions on each hard drive. Remember, the drive letter is the partition, not the actual drive label. But if there is only one partition on the drive, then the correct drive letter is the actual drive label.
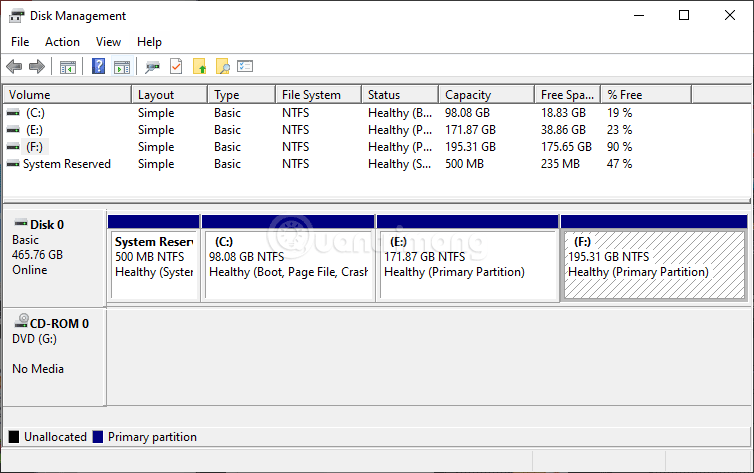
Make sure the drive containing the partition you want to change is listed. Also, check to see if any partitions or devices already use the drive letter you want. If so, you will have to change the drive name to another character first. For example, if you want your data partition to be T: but the optical drive is already T:, you must change the optical drive to another letter (for example, E: or O:). That will free up T: and allow you to make the change you originally wanted.
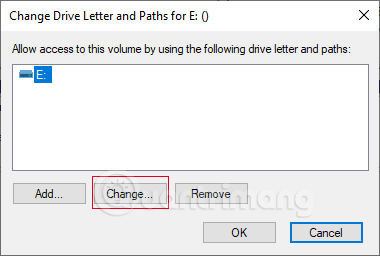
Select the hard drive you want to rename and right-click on it > select Change Drive Letter and Paths.
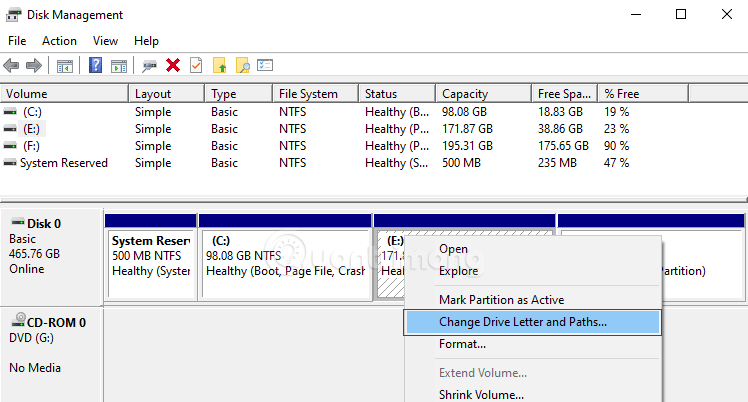
In the window that opens, select Change.
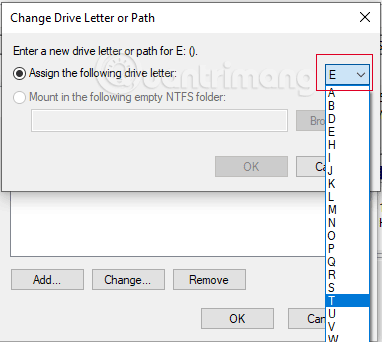
Click on the down arrow next to the hard drive name, select the letter you want to assign to your hard drive > click OK to close the window.
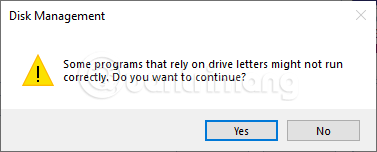
A prompt message appears saying: "Some programs that depend on the hard drive name may not run. Do you want to continue?" , click Yes to continue:
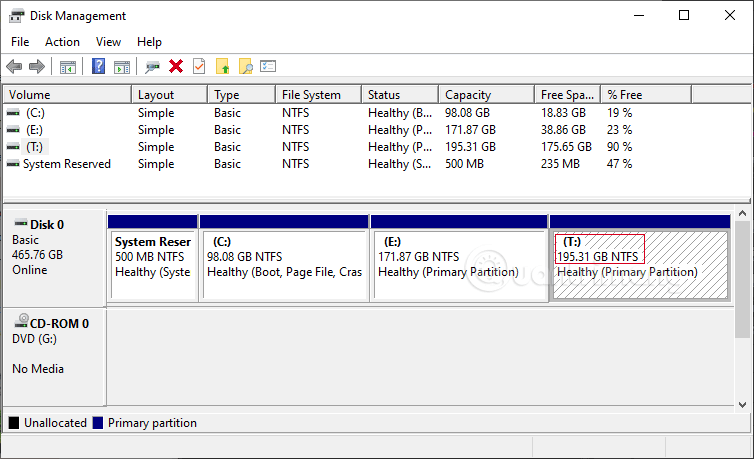
Note: If the drive you want to rename contains software installers, these software may fail when running and may even need to be reinstalled. Initially, I intended to rename drive E, but because this drive contained many installation files of important software, I changed the name of drive F to drive T. The results after changing are as follows:
Method 2: Rename the hard drive from the context menu
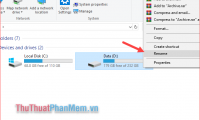
1. Open File Explorer and select the drive you want to rename, then click F2, or right-click the drive and select Rename from the context menu.
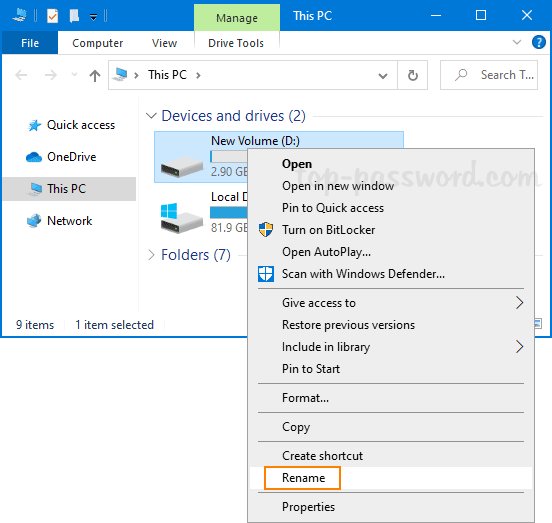
2. Enter a new name and click Enterto apply changes.
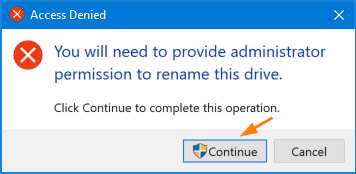
3. When you receive a message that says: 'Access Denied – You will need to provide administrator permission to rename this drive' (Access denied - You will need to provide administrator permission to rename this drive). Click Continue.
Method 3: Rename the hard drive from the drive properties
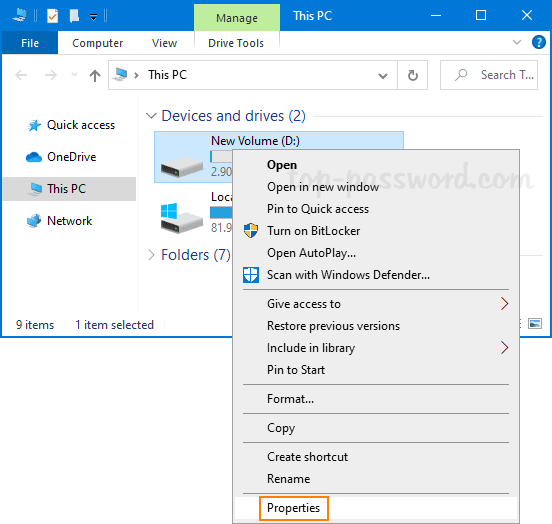
1. Right-click the destination drive in File Explorer and select Properties from the context menu.
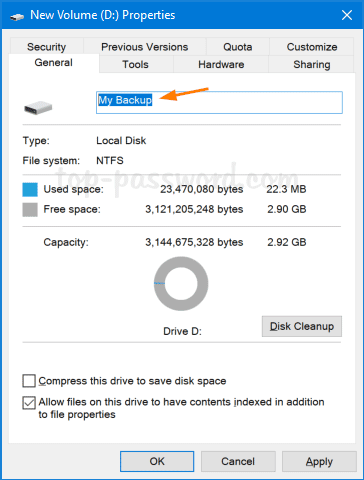
2. When the Properties window opens, enter a new name in the text box and click OK.
Method 4: Rename hard drive from Command Prompt
1. Open Command Prompt with admin rights.
2. Enter the following command and press Enter. Do not add quotes even if the new name for the drive contains spaces.
label drive_letter: new_name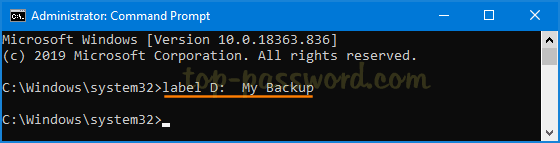
3. This step will change the hard drive's label immediately.
Method 5: Rename hard drive from PowerShell
1. Open a PowerShell window with admin rights and run the following command. Replace D with the actual drive letter and My Backup with the new drive name.
Set-Volume -DriveLetter D -NewFileSystemLabel "My Backup"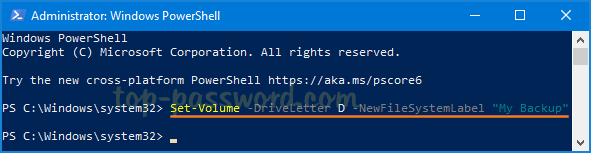
2. When done, open File Explorer and you will see the drive with a new label.
How to change drive letter on Windows 7/8/XP
First, turn on the Disk Management tool on Windows 7, 8/8.1. If you are using Windows 7, XP or Vista, click Start > right-click Computer (in Windows XP right-click My Computer) > select Manage . After the Computer Management program appears, click Disk Management in the left pane, under Storage.
You cannot press Start in Windows 8 , so press Windows+ X> select Disk Management.
1. Right-click on the partition you want to change and select Change Drive Letter and Paths.
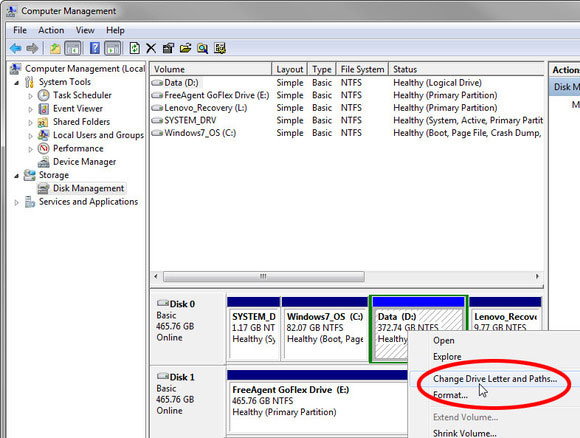
2. In the resulting dialog box, select Change. In the next dialog box select the desired drive letter.
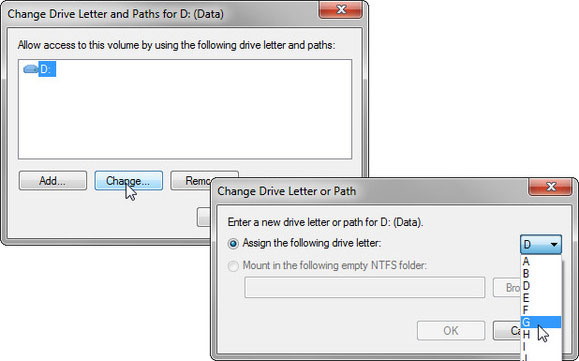
After clicking OK, a dialog box will warn you that some programs may not work. If problems arise, you can go back and change the letters again.
Bonus: How to assign a letter to the hard drive using cmd
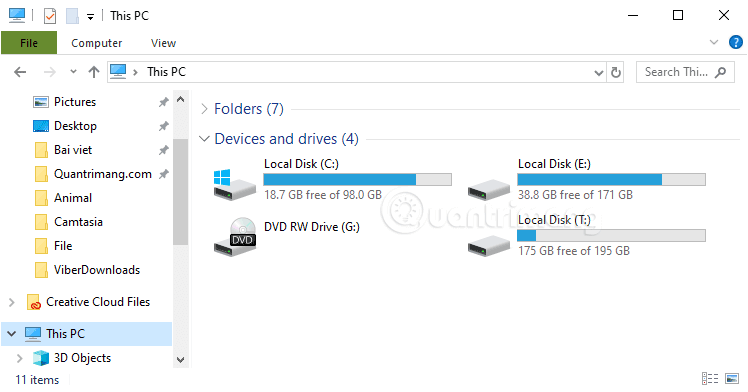
Open the This PC/Computer/My Computer window to see a list of available drives:
Open cmd with admin rights, enter the command diskpart > Enterto launch the Diskpart command line utility.
Next, enter the list volume command to list all available volumes on the computer.
Look again at the This PC/Computer/My Computer window and compare it with the list of volumes just listed in the results of the above command to select the correct volume/drive you want to rename, then enter the command select volume ###, select # ## corresponds to the volume you need, suppose here I want to rename drive T, corresponding to volume 4, the command will be select volume 4 .
Enter the command assign letter=A . You can replace the character after the mark =with the letter you want, but you should avoid characters that have been assigned to other drives.
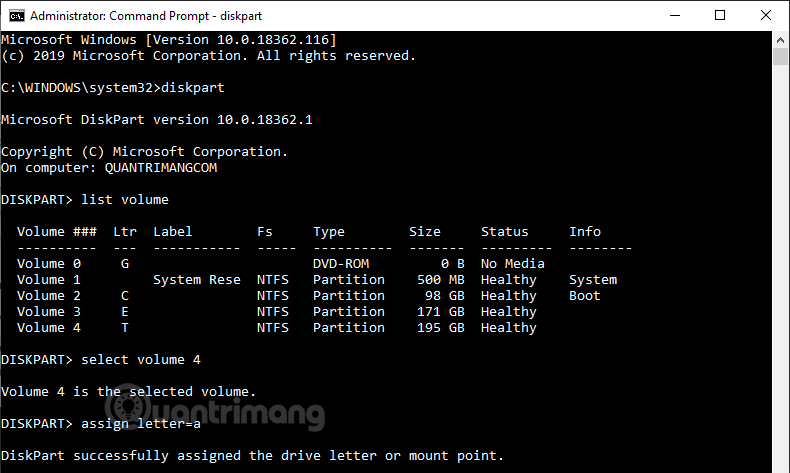 Complete process of renaming hard drive using cmd
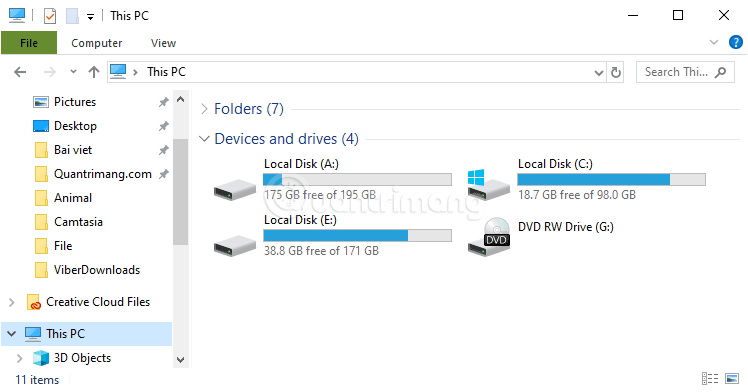
After receiving the notification of successfully assigning a letter to the drive, enter the exit command to exit Diskpart and close the cmd window. After renaming, the hard drive will be rearranged in order a, b, c, as below:
Note: You can change the letter of your external drive, but the change will not be permanent. Every time you plug a storage device into a USB port, Windows gives it the first available drive letter.
Final Thoughts
Use the instructions and checks above in order, verify the result after each major step, and keep a backup whenever the process changes important files or system settings.
FAQ
What should I check before starting?
Confirm that your device or software version matches the instructions, save important data, and note the original settings before making changes.
What should I do if the steps do not work?
Restart the app or device, install available updates, review any error message, and repeat the steps carefully in the same order.
Can I undo the changes?
Many changes can be reversed, but the exact method depends on the feature. A backup or restore point gives you the safest way to recover.
Related Articles
 How to Change Drive Letters4 minutes read
 How to Rename a Drive, Change the Drive Letter in Windows3 minutes read
 Drive Letter Is Not Available on Windows: Causes and Solutions5 minutes read
 How to Delete Drive Letter in Windows 105 minutes read
 How to Identify Hard Drive Failure, Hard Drive Failure, Bad Hard Drive7 minutes read
 How to Allocate a Drive Letter3 minutes read
Reader Comments 0
Sign in with email or Google to join the discussion.