Table of Contents
This guide explains Cache, why it matters, how it works, and how to evaluate or use it in practical situations.

I. Information about Cache
1. What is cache?
Cache is a technical term, it means caching. This is considered a place to store all the data that is waiting for applications and software to use when needed. The purpose of Cache is to increase data processing speed faster.
2. Why does cache increase processing speed?
This is easy to understand because the necessary files are already stored out. When you need to use it will turn on right away without spending time looking for those Files in all data on the computer.

3. How was cache born?
Cache on the computer is born during the process of working and using your application. When you use applications, the system will automatically understand what you use most and put the related files into the Cache to be able to boot fastest.
4. Does cache affect anything?
Cache on the computer only makes the speed of the application faster to use. Besides, you lose some space on your computer's hard drive (because caching the file).
II. How to clear Cache in Windows 10
On the Windows Supported operating systems, the Cache is generated from many different applications and software, so there is only one way to use specialized tools to delete quickly. If you delete it manually will be very time consuming. In this article, I will show you both ways.
1. Delete manually
Clear the Browser Cache
Clear Browser Cache: Apply Google Chrome, Coc Coc, Firefox, Edge
You start the browser and press Ctrl + H to open History. Then you select Clear history and tick Cache images and Files and click Clear browsing data .

Clear the Cache on the computer
Step 1: Enter Disk Cleanup in the Start Menu and press Enter to open Disk Cleanup .

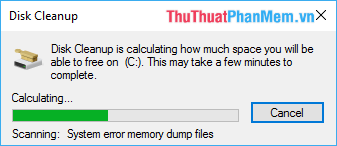
Step 2: The Disk Cleanup software will then automatically scan the data on your C: drive (All caches are only on the main C: drive ).
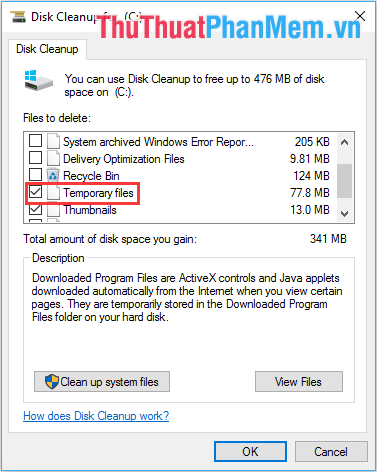
Step 3 : Then you select Temporary files and click OK to delete the entire Cache on the computer.
Clear Explorer history cache
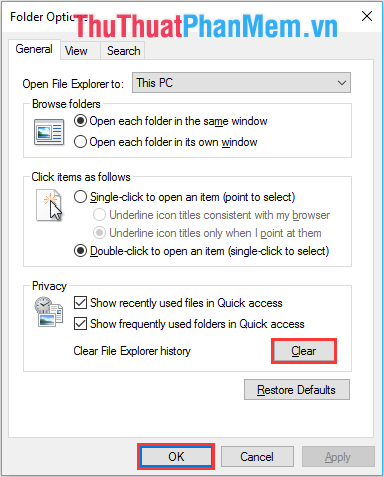
Step 1: Open the folder on your computer and select View -> Options tab.

Step 2: Then you find the Privacy tab and select Clear and click OK .
2. Delete automatically by software
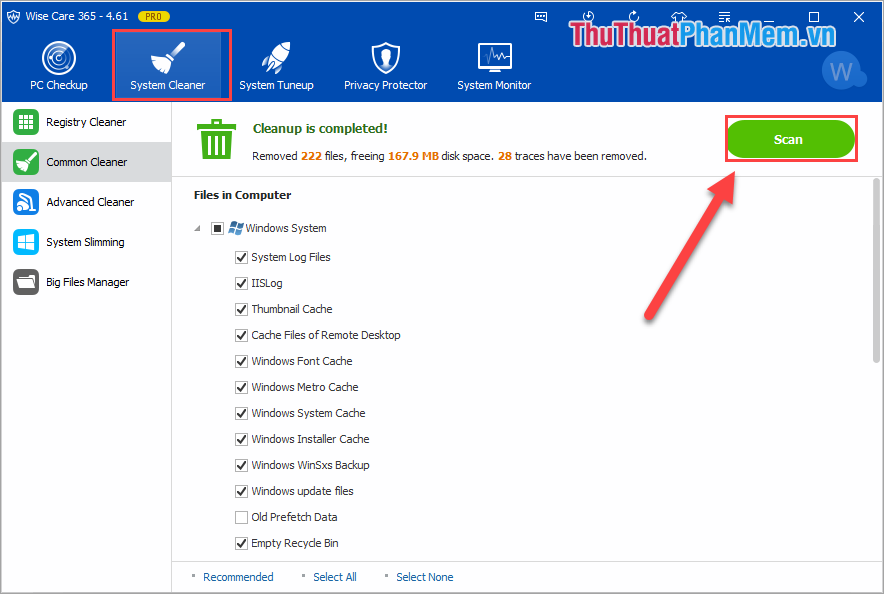
One of the useful tools to delete Cache data is Wise Care 365. Wise Care 365 supports cleaning Cache on the computer extremely effectively and clean.
Download link: http://www. wisecleaner. com/wise-care-365. html
For using this software, you just need to install the software and select System Cleaner . Next, click Scan to scan Cache and delete.
In this article, Software Tips introduced you to Cache and how to clear Cache effectively on Windows 10. I wish you success!
FAQ
What should I know about Cache?
Focus on the key features, requirements, limitations, and practical use cases explained in this guide.
How do I get the best results with Cache?
Follow the recommended steps, use current software or information, confirm compatibility, and review settings before major changes.
Are there any risks or limitations?
Potential limitations depend on compatibility, data quality, cost, privacy, support, and how the product or method is used.




Reader Comments 0
Sign in with email or Google to join the discussion.