Table of Contents
Virtual Machine on Windows 11 will support users to run an operating system other than Windows right on your computer. Then we can install and use software and applications on the virtual machine without affecting the main system in use. Below are instructions for activating the virtual machine on Windows 11.
How to enable Windows 11 virtual machine via Settings
Step 1:
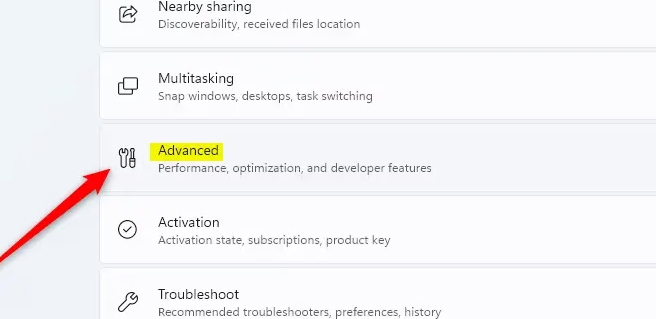
You open the Settings interface on your computer, then select System and look to the side, select Advanced to open advanced settings on your computer.
Step 2:
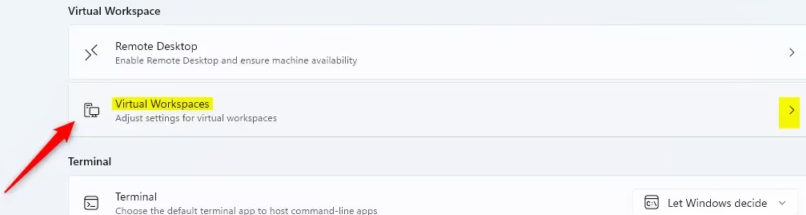
Next, select Virtual Workspaces to launch the virtual machine on Windows 11.
Step 3:
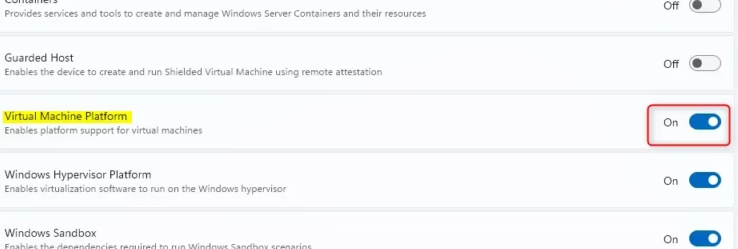
Next, you need to activate Virtual Machine Platform to turn on the virtual machine on Windows 11.
How to turn on Windows 11 virtual machine via Control Panel
Step 1:
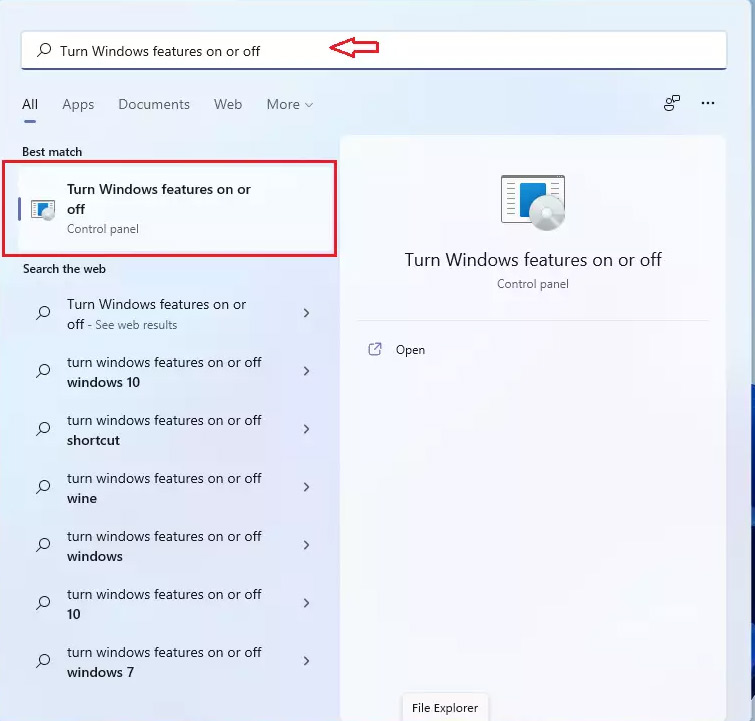
Type Turn Windows features on or off into the search bar and then select the result.
Step 2:
Switch to the new interface, select Virtual Machine Platform to turn on the virtual machine on Windows 11.
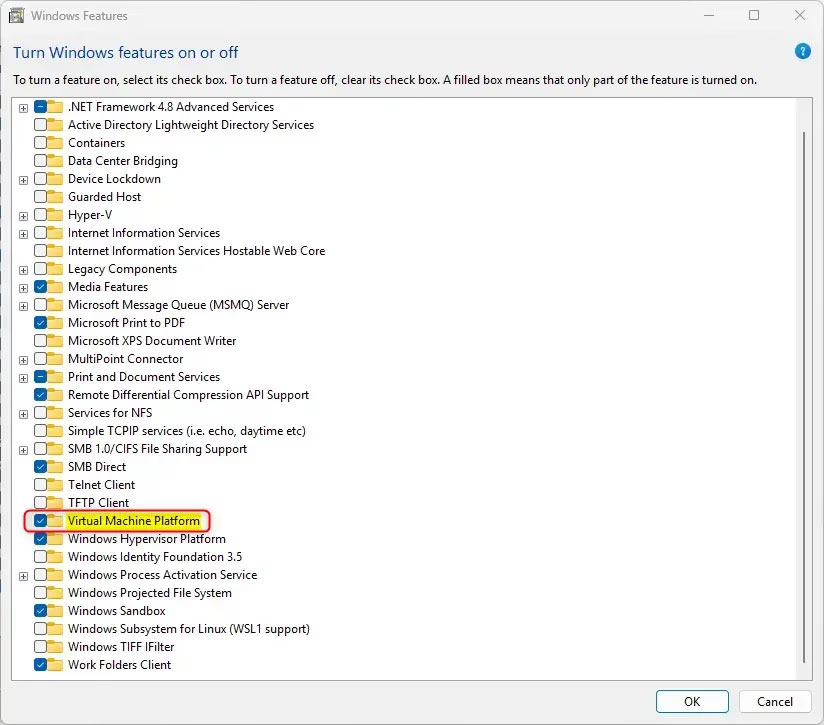
After rebooting, Hyper-V will be enabled, allowing you to create virtual machines and run multiple operating systems.
Activate virtual machine from Command Prompt Windows 11
We need to open Command Prompt with Admin rights, then you enter the command below to launch the virtual machine.
DISM /Online /Enable-Feature /FeatureName:"VirtualMachinePlatform"If you want to turn off the virtual machine enter the command below.
DISM /Online /Disable-Feature /FeatureName:"VirtualMachinePlatform"Power on virtual machine via Windows PowerShell
We also need to open PowerShell with Admin rights and then enter the command below.
Enable-WindowsOptionalFeature -Online -FeatureName "VirtualMachinePlatform"To cancel virtual machine mode, enter the command:
Disable-WindowsOptionalFeature -Online -FeatureName "VirtualMachinePlatform"Final Thoughts
Following the steps in order and checking version-specific settings should make it easier to Activate Virtual Machines on Windows 11. If an option looks different, verify the device, app, or operating-system version before changing additional settings.
FAQ
What is the best way to Activate Virtual Machines on Windows 11?
Start with the requirements described in the article and follow the steps in order. Virtual Machine on Windows 11 will support users to run an operating system other than Windows right on your computer. Then we can install and use software and applications on the virtual machine without affecting the main system in use.
What should you know about How to enable Windows 11 virtual machine via Settings?
You open the Settings interface on your computer, then select System and look to the side, select Advanced to open advanced settings on your computer.
What should you do if the instructions do not match your screen?
Check the device, software version, account permissions, and regional settings. Interfaces can change after updates, so use the closest matching option and consult the official support documentation when necessary.
Related Articles
 Create Virtual Machines with Hyper-v on Windows 8 and Windows 1016 minutes read
 Instructions on How to Install Virtual Machines with VMware3 minutes read
 How to Import Hyper-v Virtual Machines in Windows 1014 minutes read
 How to Export Hyper-v Virtual Machines in Windows 106 minutes read
 Create Virtual Machines in Hyper-v on Windows Server 20082 minutes read
 How to Speeding up Virtual Machines in Full Set10 minutes read
Reader Comments 0
Sign in with email or Google to join the discussion.