Create a virtual hard drive, turn the real machine into a virtual machine with Disk2vhd
TipsMake.com - Have you ever dreamed of a way to turn your real machine into a virtual machine for testing? Today we will look at Disk2VHD as a simple solution to convert real Windows machines into virtual machines .
Disk2VHD is a tool for converting real machines to Microsoft virtual machines, one of Windows Sysinternals tools. It is very light, simple interface and easy to use.
Disk2VHD runs on Windows Vista, Windows Server 2008 or later, supporting both x64 versions.
Run Disk2VHD 
Disk2VHD allows you to create a Virtual Hard Drive (VHD) of the real machine while the real machine is running, using 'volume snapshot' technology . This utility does not require installation and you can run it from USB if you wish. Just open the Disk2vhd folder and run the executable file. 
Agree to the terms of registration .

Now select the real drive you want to switch to a VHD, give it a name and locate the path to create and store it. You need to select a path that is large enough to store the VHD you just created. In this example we create VHD from an IBM ThinkPad machine running Windows XP. Note the required capacity under the Volumes to include section specifying 6.48GB and drive E: left to 8GB. Also, if you create a VHD from Windows XP or Server 2003 and will run it on Virtual PC, check the box Fix up HAL for Virtual PC . After everything is done, click the Create button.

You will see the progress bar while the VHD is created. The XP virtual machine from an IBM Thinkpad G40 machine used for testing in this case will take about an hour to complete. The amount of time to create VHD will be different for each system.

Install on Windows Virtual PC
Here we look at how to run a new VHD created on Virtual PC in Windows 7. We need to create a new machine first, so we need to open Windows Virtual PC from the Start Menu.
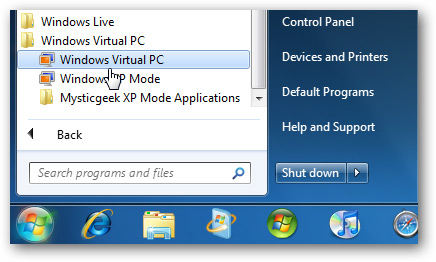
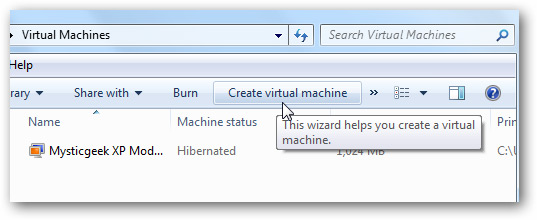
In the Virtual Machine folder, click Create Virtual Machine to start the process
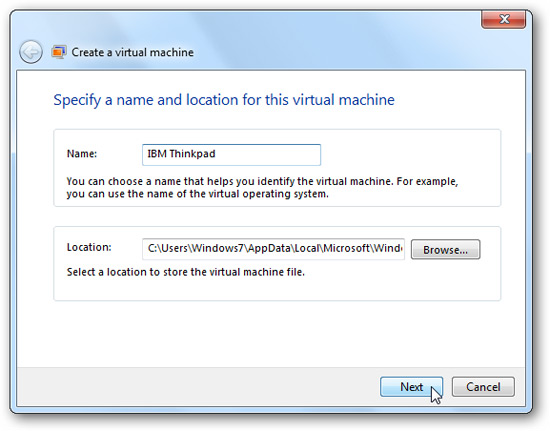
Then give it a name like the one below:
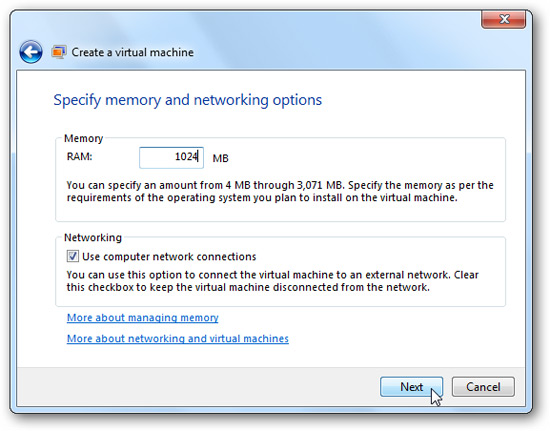
Select the amount of memory allocated to the virtual machine and select the network setting.
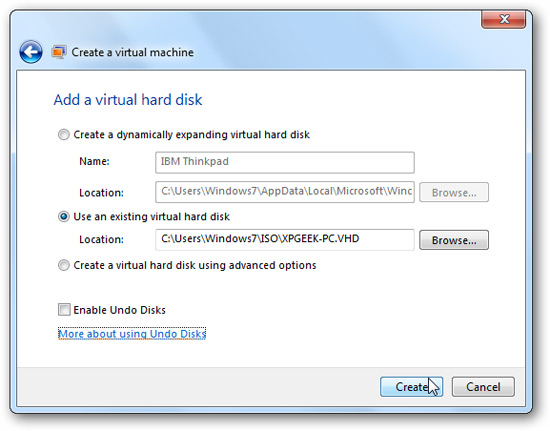
In the next step of the process, we need to point to the VHD path and click Create .
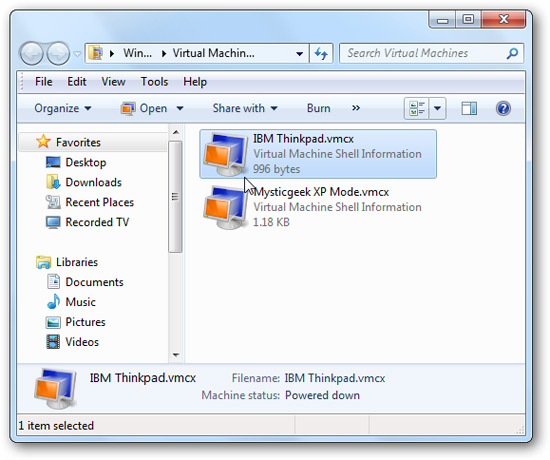
The newly created virtual machine will be replaced in the Virtual Machines folder
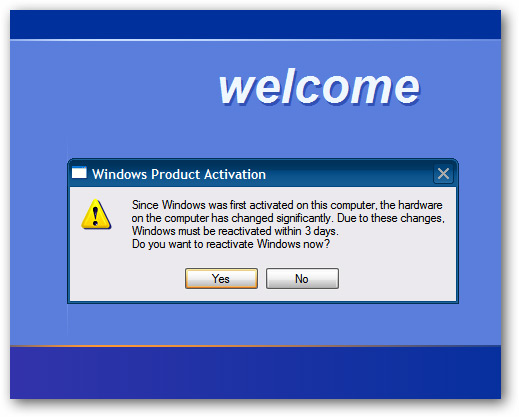
There are a few things to keep in mind in this XP virtual machine: because we transfer it from another computer, we need to re-enable the XP registration code.
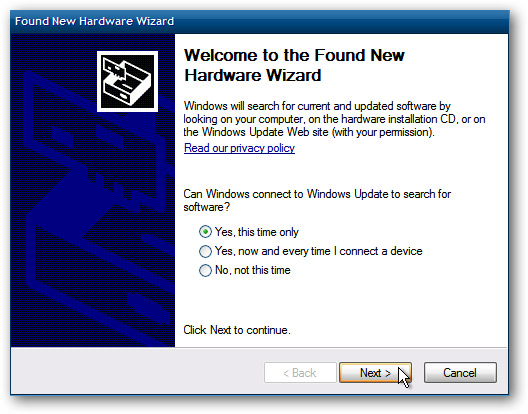
The "find new hardware" process will appear when XP starts to indicate that it detected other hardware on the virtual machine. We can skip these processes and the virtual machine still works fine.
Then run Enable integration Features from the Tools menu on Virtual PC
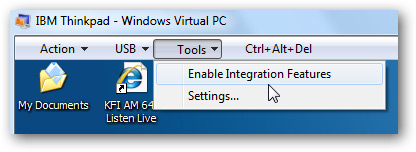
A process will appear in the virtual machine until it is completed, then restart the virtual machine.
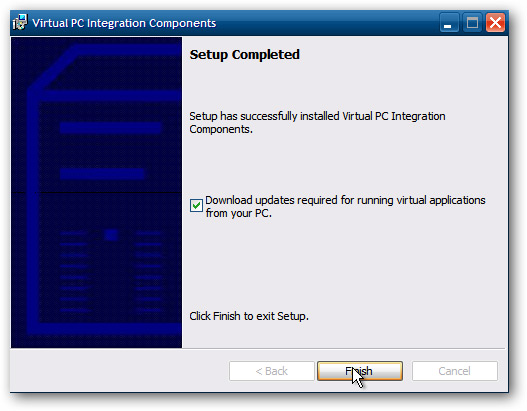
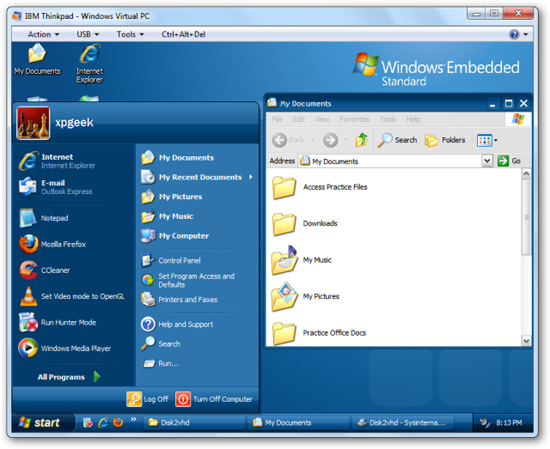
After the boot is complete, you can start using it.
Note when using Disk2VHD
Some versions of Windows allow you to mount a virtual hard drive on your computer just by double-clicking on the virtual hard drive, from which you can access the contents of the virtual drive. So be careful with the virtual hard drive file you just created with Disk2VHD.
This sounds quite convenient, in theory, you can create a virtual hard drive, open it, add some drivers, and then remove the virtual drive, attach it to the virtual machine and use. However, you need to keep in mind that: When performing a real computer conversion to a virtual machine, Disk2VHD does not destroy the contents of the real machine, the server remains intact and works normally after conversion. This is the problem.
The Windows operating system creates a signature for each drive, which is used as a mechanism to help Windows identify the drive. Because the virtual drive correctly copies the physical drive, it also contains the same signature as the physical drive it copies. Therefore, if you attach the virtual drive to the real machine used to create the virtual disk, a signature conflict will occur. Windows will try to resolve this conflict by creating a new signature for the virtual drive. When you do, Windows will render to a virtual hard drive that cannot be booted. If you attach this virtual drive to the virtual machine, the virtual machine will not be able to boot because the Boot Configuration Database of the drive referring to a drive signature no longer exists.
Another important note is that you must be careful when using this tool on running systems. Disk2VHD works similar to how backup applications work. It uses Volume Shadow Copy Service (VSS) to create snapshots of the drive to be converted. As a result, do not change the contents of the drive during the conversion process, ensuring the integrity of the virtual hard drive, but the downside is that any data created or modified on the real drive takes place. During or after the conversion process will not be copied to the virtual drive. This can cause data loss, especially on systems running high transactional applications, such as Exchange Server. This server should use data replication to support virtualization, or manually deploy Exchange Server on a virtual machine rather than relying on Disk2VHD.
In addition, you may have to make some adjustments to the virtual machine before you can use it, such as installing Hyper-V integration services or changing the network configuration. This is because during the physical transformation the server will lose the IP address configuration, since the virtual NIC has a different name from the physical NIC. Therefore, you must record the server's IP address configuration before virtualization so that they can be assigned to the server's virtual NIC.
Conclude
You can also run the VHD on a Microsoft Hyper-V virtual machine on the 2008 server. In short, Disk2VHD can be used to create images of different machines for testing without worrying about damaging the real machine. . So it can be used in case of backing up your computer. It is completely free, requires no installation, and will create a VHD while the computer is running.
See more:
- Dual Boot Windows 7 with Virtual Hard Disk
- Here's how to create a Virtual Hard Disk on Windows 10
- Share files between 2 computers using Target Disk Mode
- Is it good to use USB as a virtual memory for the computer?
You should read it
- ★ Create virtual machines with Hyper-V on Windows 8 and Windows 10
- ★ Create virtual machines in Hyper-V on Windows Server 2008
- ★ Create clone virtual machine for current Windows hard drive
- ★ How to create a virtual drive on Windows with Simple VHD Manager
- ★ Create dualboot system with Windows 7 and 8 using VHD