Table of Contents
This guide provides a practical overview of Tips to Speed up Your Browser on Windows 10, including its main features, benefits, limitations, and important considerations.
1. Turn off P2P Delivery Optimization
Here's something you probably were unsure about Windows 10, and it sounds pretty intimidating. There's an option in Windows 10 that can be enabled by default, linking your PC to a P2P network handled by Microsoft, uploading installed Windows updates, and distributing them to speed up updates on the network. family and for strangers online.
Locally this means that if you have the Windows update installed on one PC, its bits can be passed over the update on another PC on the same network, saving bandwidth. The downside is that the system will do the same thing but for other Windows users all over the Internet, connecting your PC to a P2P network helps Windows increase the download speed for strangers but reduce the bandwidth of your computer. friend.
So you should turn it off. Press Windows + I to turn on Settings. In the list, open Update & Security .

Go to Delivery Optimization in the menu on the left. Pay attention to the Allow downloads from other PCs section :
- Change On to Off if you want to disable the feature
- Or you keep On and select PCs on my local network if you want to share bandwidth with other computers in your family
- Do not choose PCs on my local network, and PCs on the Internet .

2. Turn Windows Auto-Tuning feature off or on
Windows Auto-Tuning is a feature that caused various responses from users about the speed of Internet browsing. It is a feature that automatically adjusts buffer size and latency for applications based on TCP communication with the Internet.
Although Microsoft has said that disabling this feature will slow down your internet speed, users with older hardware and weak connections have reported that disabling it can improve Internet speed. On the contrary, other users (usually on powerful PCs) say that turning on Auto-Tuning greatly increases their Internet speed.
Therefore, you need to manually check if your computer is suitable for this feature or not. Here's how to enable / disable Auto-Tuning.
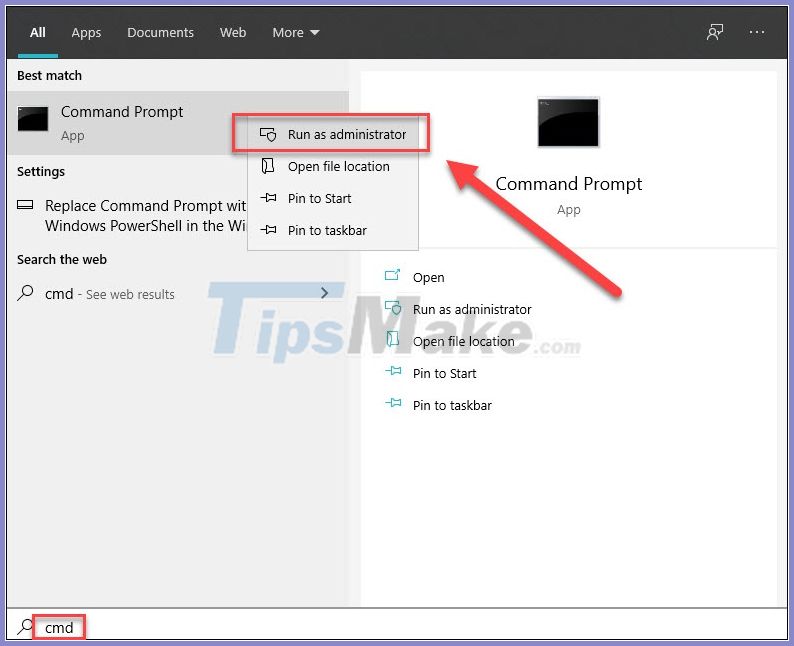
Enter ' cmd ' in the Start search box, then open the Command Prompt application with administrator privileges ( Run as administrator ).
When the Command Prompt window appears, enter the following command and then Enter :
netsh interface tcp show global
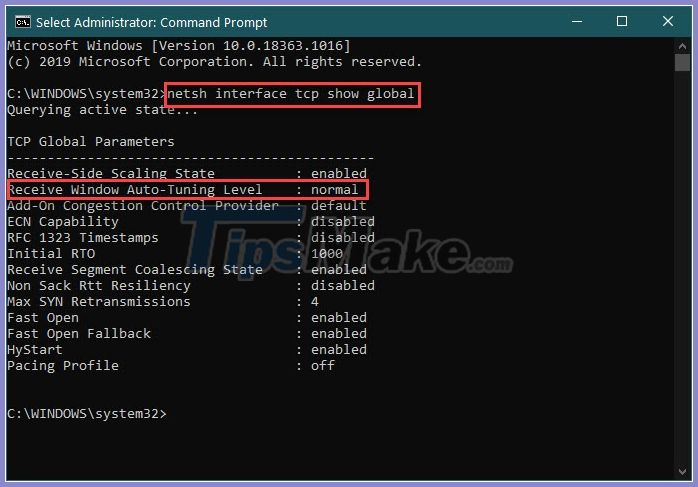
Check what status the Receive Window Auto-Tuning Level line is in.
If it says Normal and wants to turn it off, enter the following:
netsh int tcp set global autotuninglevel = disabled
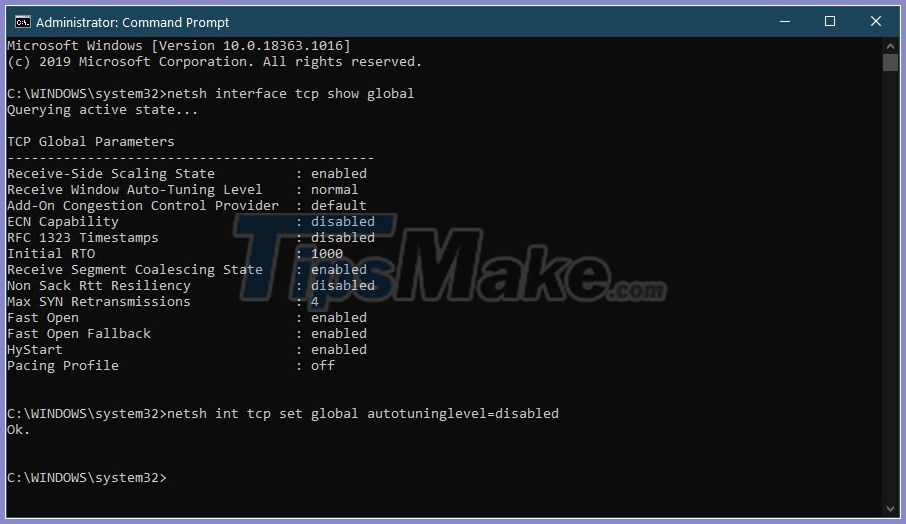
Otherwise, if Auto-Tuning indicates disabled and you want to enable the feature, enter:
netsh int tcp set global autotuninglevel = normal
Now run a speed test to see if it makes a difference. If it speeds up everything, great! If things slowed down, then just do the reverse command to get everything back to normal.
3. Use Resource Monitor to check network resources
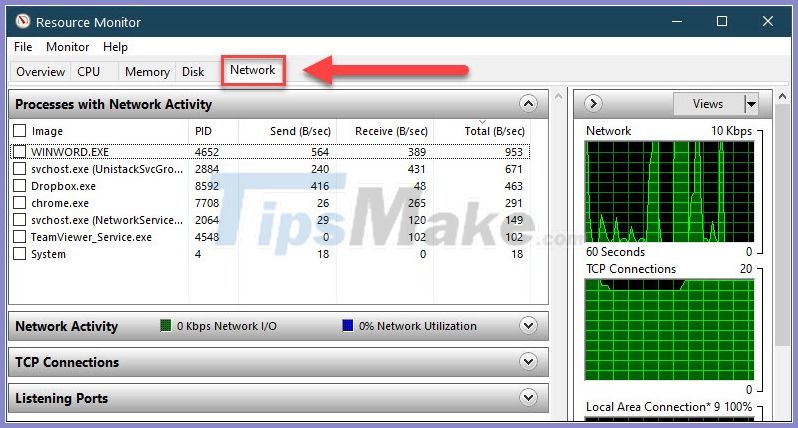
Resource Monitor is a good person. You can quickly and easily check which processes and apps on Windows 10 are using the most resources in terms of CPU, RAM, and - network bandwidth. You can find all of these in Resource Monitor.
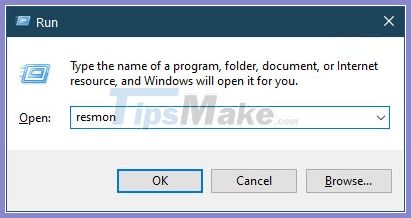
To open Resource Monitor, press Windows + R and type resmon in the box.
Switch to the Network tab and you will know which services or applications are consuming a lot of network resources (ranking from high to low).
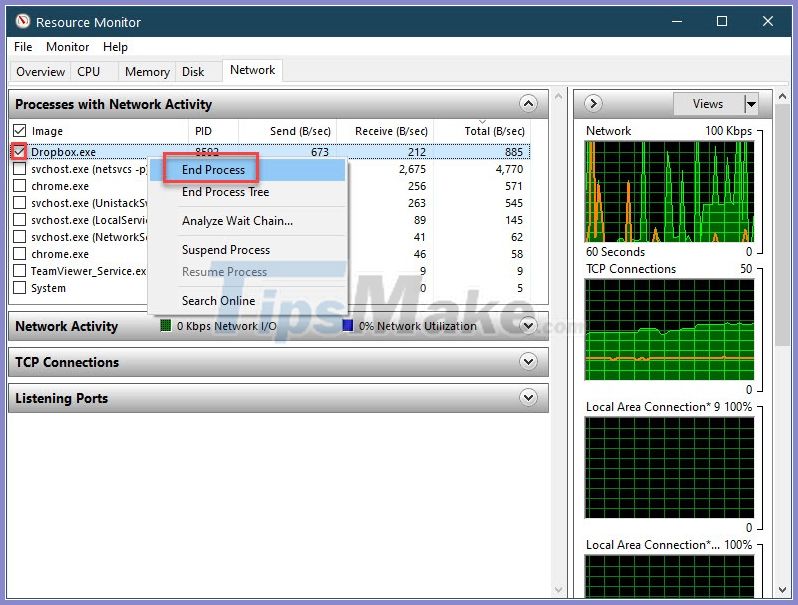
To turn off resource-consuming applications, just check the box next to it, right-click and select End Process .
4. Turn off background applications
The Windows apps that you download from the Microsoft store as well as the countless Windows apps that come pre-installed on your system are one of the biggest culprits in the background. By default, these applications are always allowed to use the Internet so that they can receive updates.
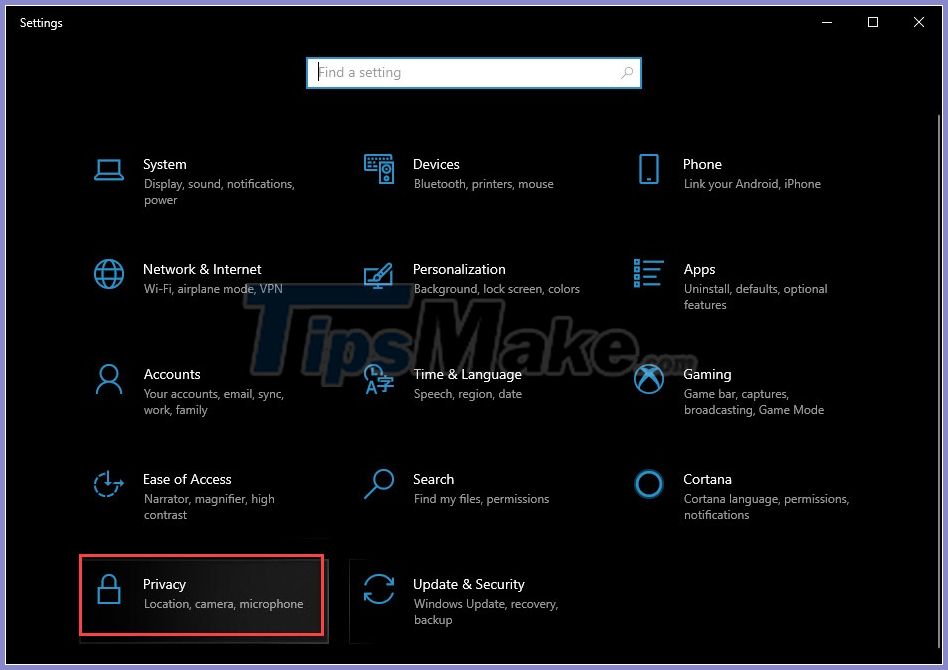
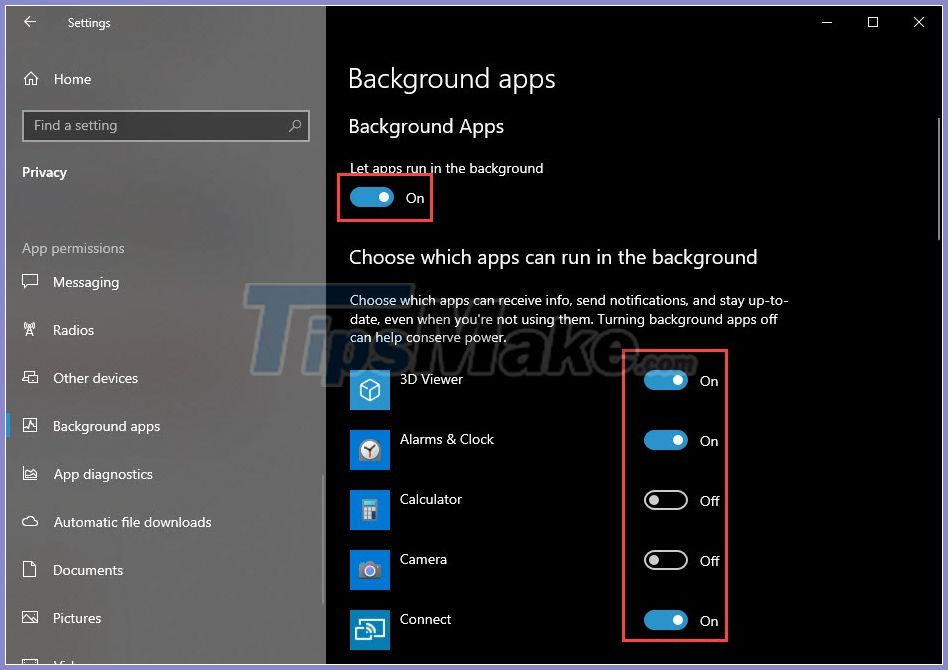
To stop these apps from running in the background. Open Settings (Windows + I) >> Privacy .
Scroll down the left menu and select Background Apps .
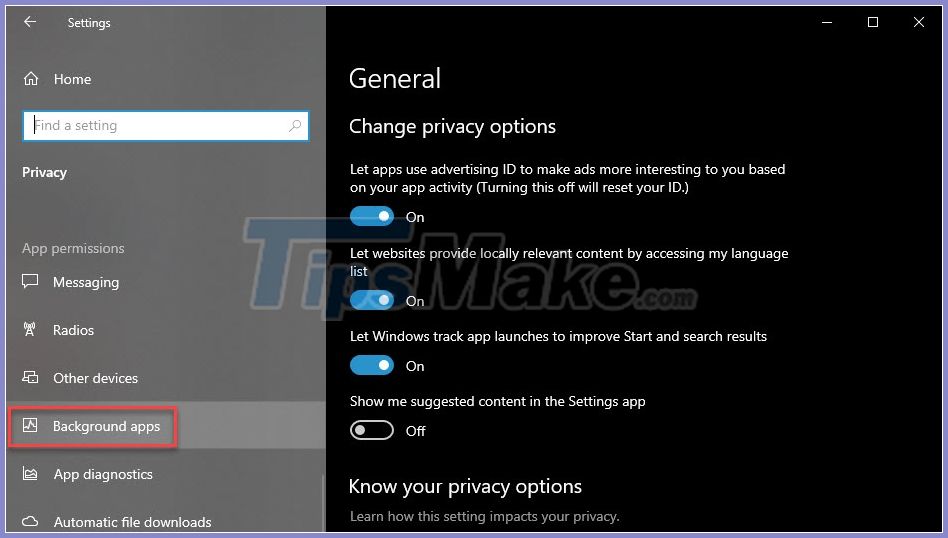
Here you can:
- Switch On to Off under Let apps run in the background to prevent all apps from running in the background
- Switch On to Off for a certain app to disable that app only.
Conclude
Above are some little tricks you can do to speed up your browsing (and internet speed in general) in Windows 10.
Good luck!
FAQ
What should I know about Tips to Speed up Your Browser on Windows 10?
Focus on the key features, requirements, limitations, and practical use cases explained in this guide.
How do I get the best results with Tips to Speed up Your Browser on Windows 10?
Follow the recommended steps, use current software or information, confirm compatibility, and review settings before major changes.
Are there any risks or limitations?
Potential limitations depend on compatibility, data quality, cost, privacy, support, and how the product or method is used.
Related Articles
 Firefox Users May Not Know All of These Tips When Using the Browser6 minutes read
 Improve Firefox Browser Speed with These Tips: Speed up Browser9 minutes read
 7 Tips to Speed up Tor Browser7 minutes read
 Speed Up Windows 7 Computers, This Is All You Need to Do16 minutes read
 Want to Load Page Speed on Edge Browser Faster, Enable This Feature2 minutes read
 How to Create Wifi Hotspot on UC Browser Web Browser5 minutes read
Reader Comments 0
Sign in with email or Google to join the discussion.