Table of Contents
This guide provides a practical overview of Stitch Text into Photos with Photoshop, Insert Text into Photos with, including its main features, benefits, limitations, and important considerations.
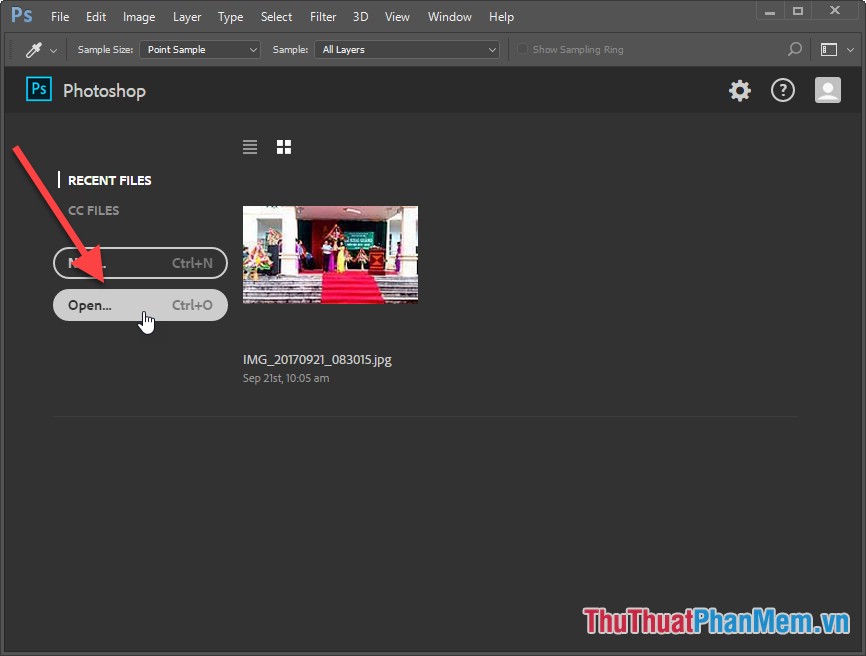
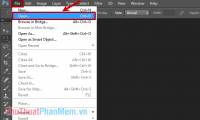
Step 1: Open Photoshop software -> click Open to open the image file to insert text:
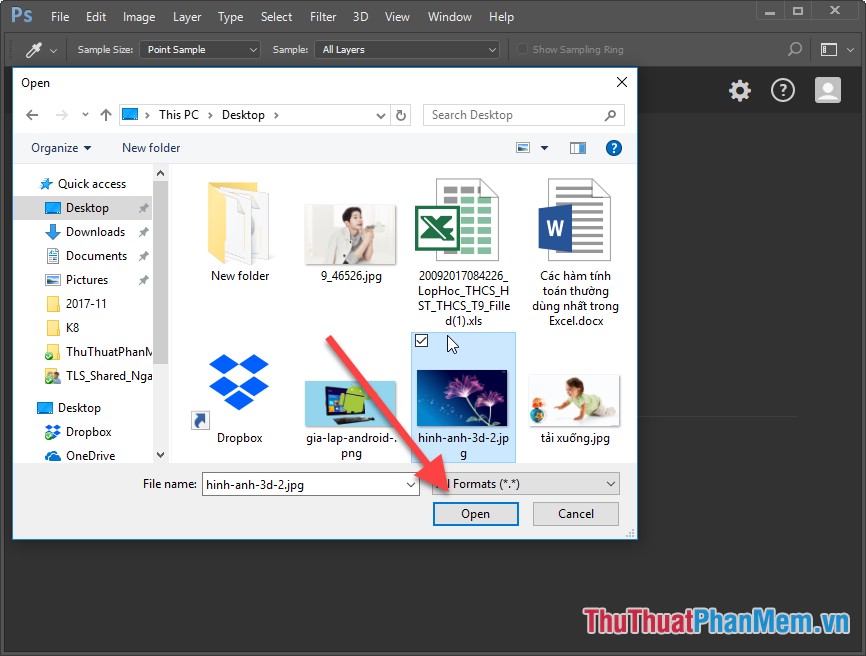
Step 2: Select the path to the image file to insert text:
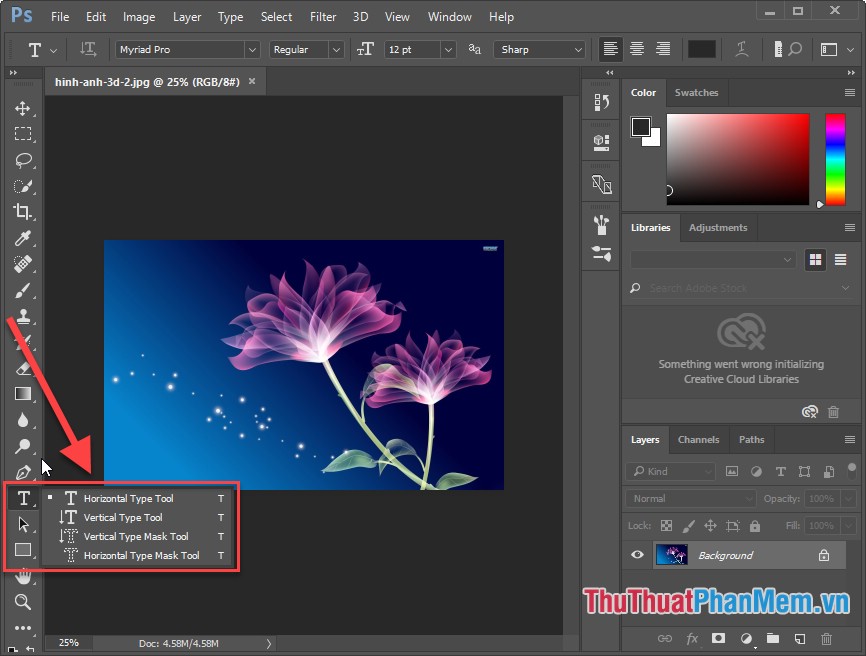
Step 3: Click the T icon to enter text content, if you want to choose the right direction of the text in the icon -> select the direction you want to match:
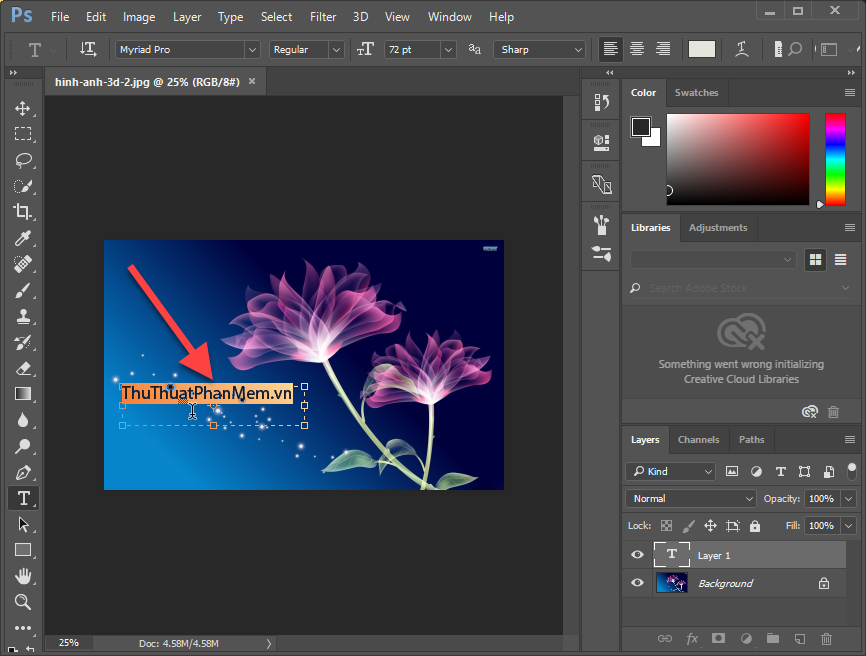
Step 4: Click on the position you want to match words -> type the text to match:
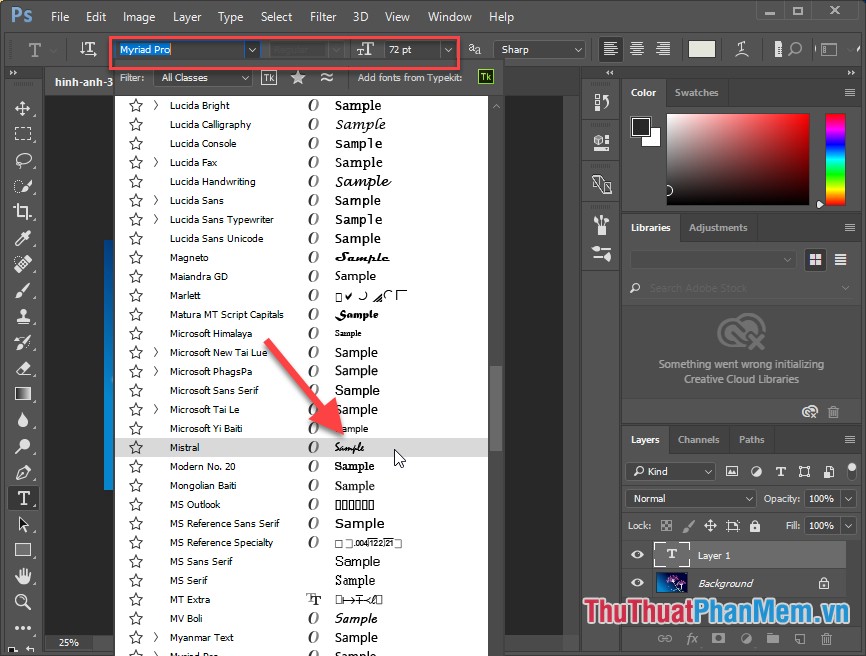
Step 5: Select text -> change font, font color. on the toolbar:
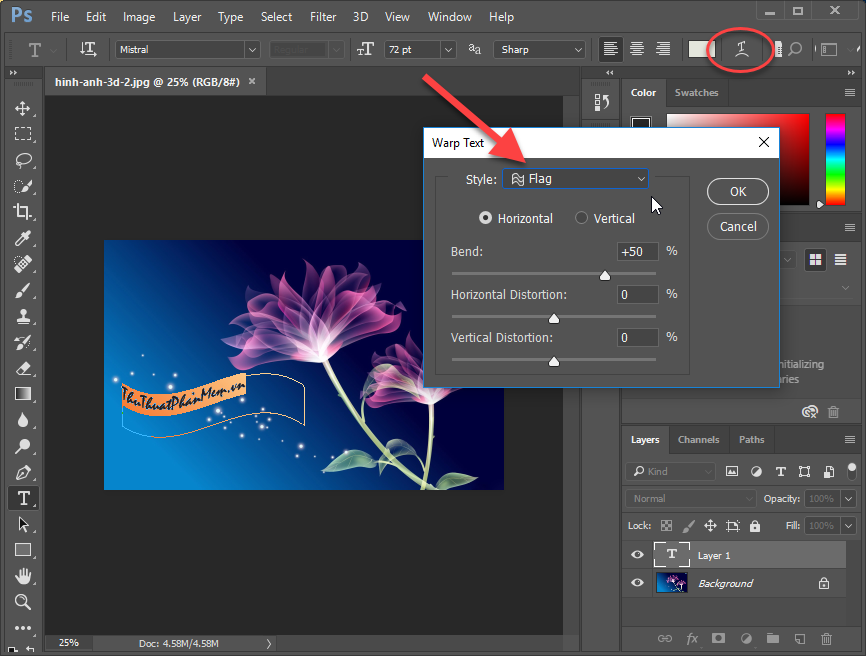
You can also create a wavy font by clicking on the Wrap text icon in the toolbar, for example, selecting the Flag style
The twisty font is as follows:
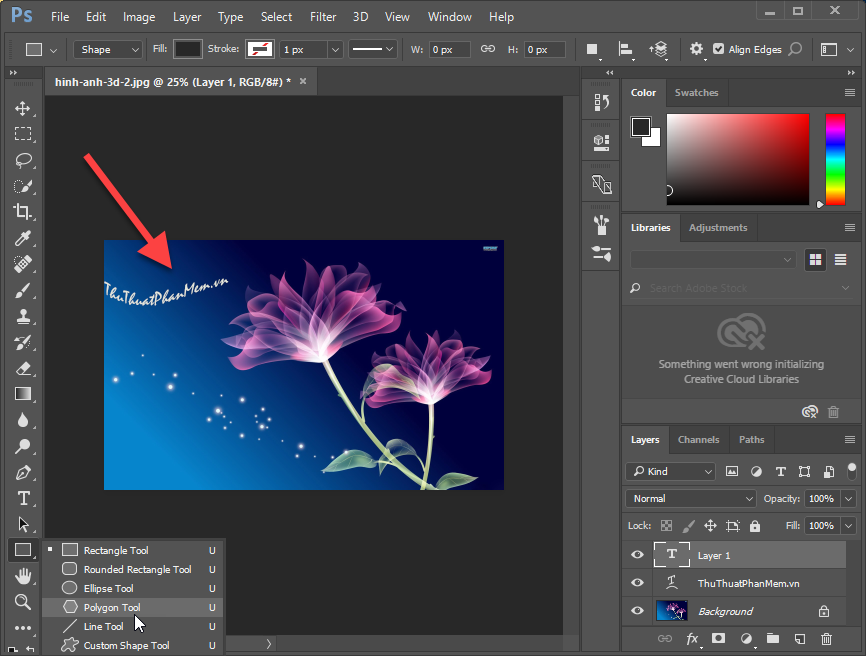
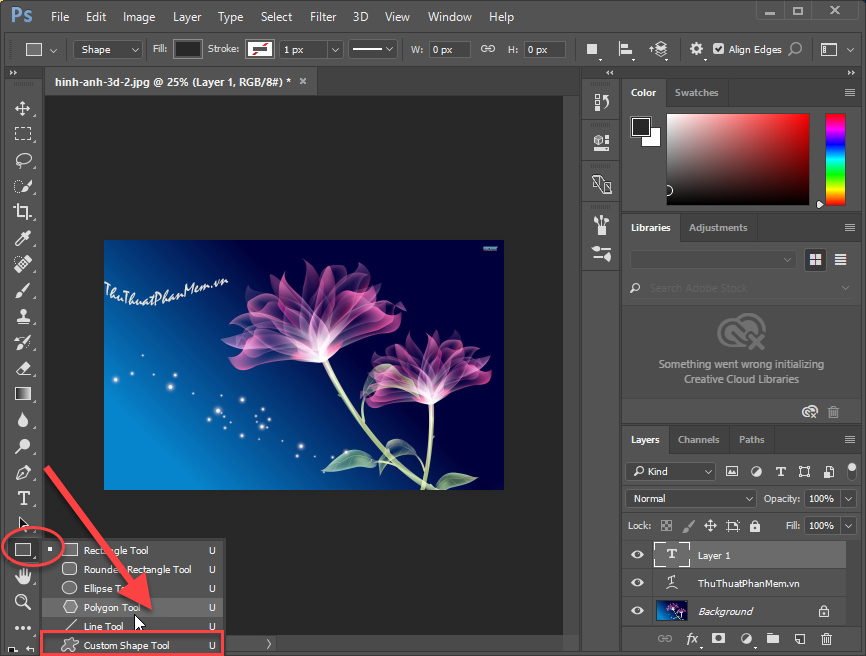
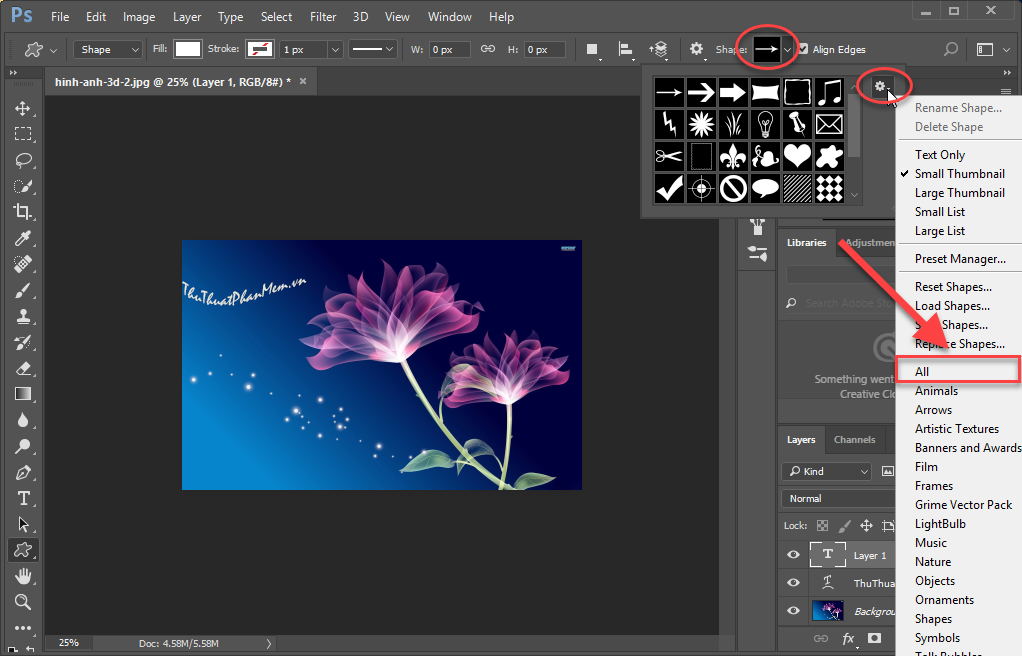
You can also add some of the existing symbols to decorate the text by selecting the Custom Shape Tool
Click on All to display all the shapes in Photoshop:
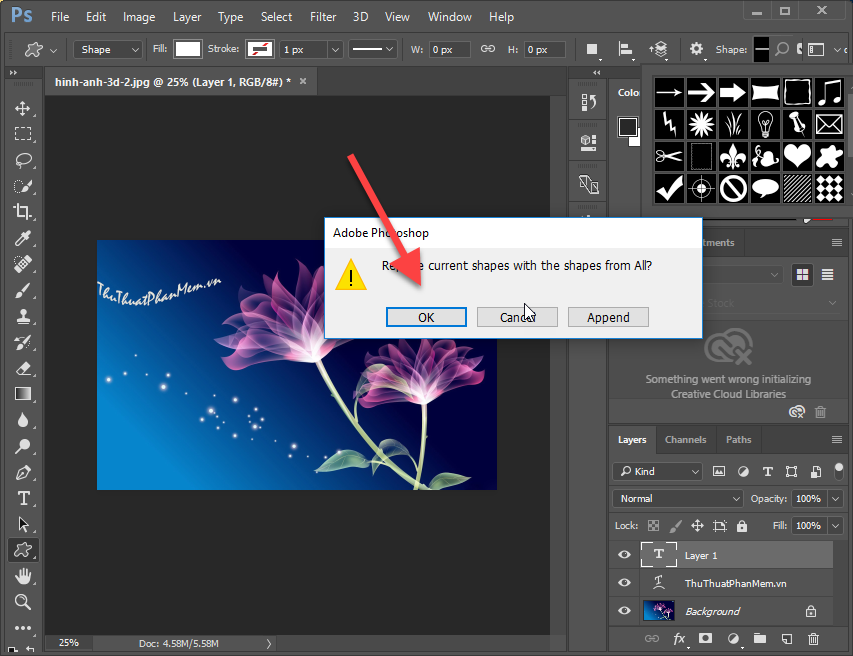
Click OK to confirm your selection:
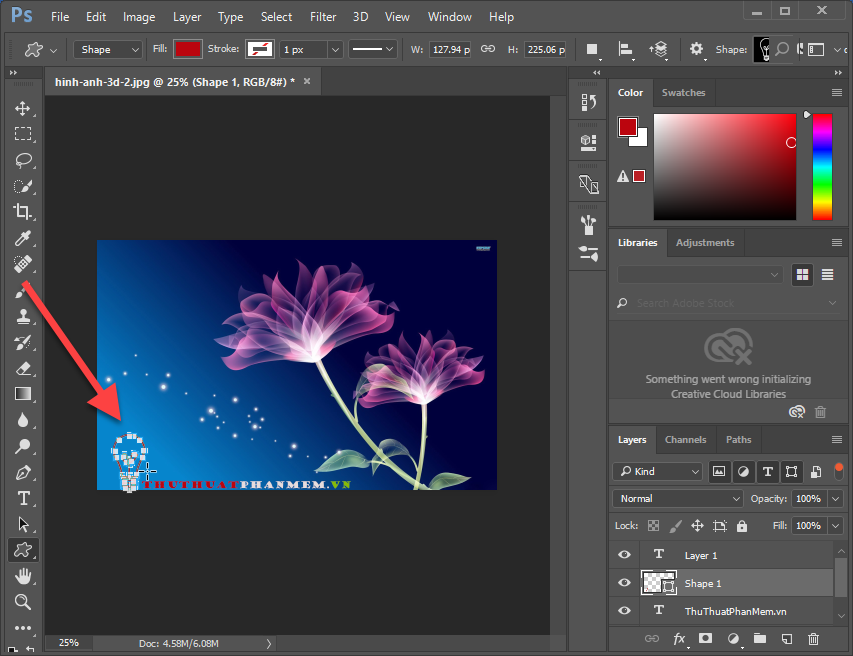
For example, here I inserted the Decoration Lightbulb icon for the word TipsMake. com
Finally put the words into the picture:
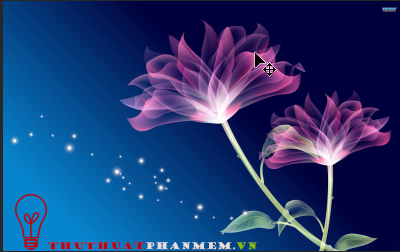
Above are the simple steps to put text into photos in Photoshop, In this guide, I will show you how to create some nice effects for text.
FAQ
What should I know about Stitch Text into Photos with Photoshop, Insert Text into Photos with?
Focus on the key features, requirements, limitations, and practical use cases explained in this guide.
How do I get the best results with Stitch Text into Photos with Photoshop, Insert Text into Photos with?
Follow the recommended steps, use current software or information, confirm compatibility, and review settings before major changes.
Are there any risks or limitations?
Potential limitations depend on compatibility, data quality, cost, privacy, support, and how the product or method is used.
Related Articles
 Insert Text into Photos Using Photoshop3 minutes read
 How to Write Text in Photoshop, Insert Text into Photos in Photoshop3 minutes read
 How to Insert Text in Photoshop: Step-by-Step Guide9 minutes read
 How to Insert 3D Letters into Images: Insert Text on Image5 minutes read
 How to Stitch Photos in Perspective in Photoshop3 minutes read
 How to Stitch Photos, Cut Photos with Paint7 minutes read
Reader Comments 0
Sign in with email or Google to join the discussion.