Share users and folders on the LAN in Windows 8
To share system and directory files on the network, you must create a network group and then allow sharing objects (such as HomeGroupUser in the article) to access shared files and folders.
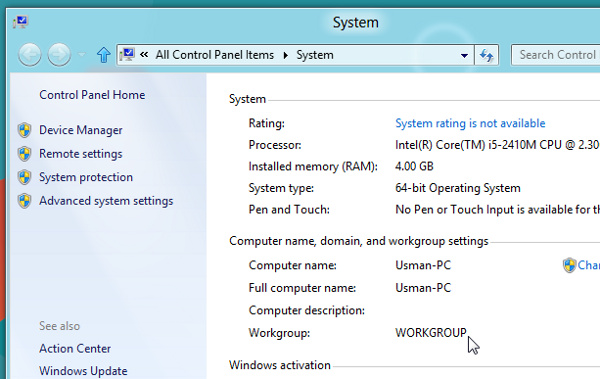
Before you start sharing files and folders, make sure you are logged into Windows with Administrator rights and that both computers are connecting to an internal network and the same workgroup.
To know the group (workgroup) that your computer is using, go to Control Panel> System . Your group name will be displayed in the Workgroup section below Computer name, domain, and workgroup settings.
Share folders from user profiles and system drives
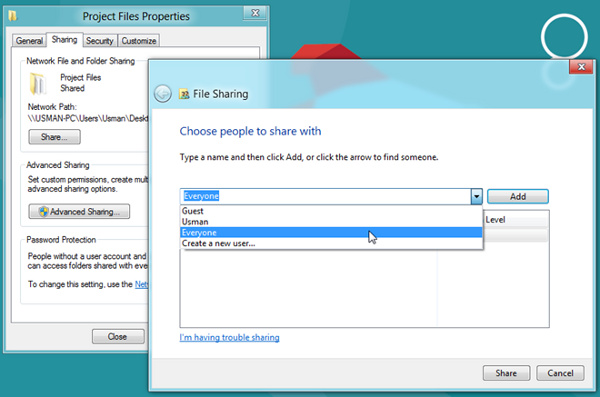
If you want to quickly share a folder in the drive or the User Profile folder (User Profile), right-click the folder and select Properties , in the dialog that appears you select the Sharing tab. Under the Network File and Folder Sharing section, click the Sharing button to open the Folder Sharing dialog box. Now select Everyone from the drop down menu and click Add .
This will add the Everyone group to the File Sharing list and allow you to change the access to the shared folder with the read (Read) or read and modify (Read / Write) options only and remove ( Remove) Everyone group from the File Sharing list.
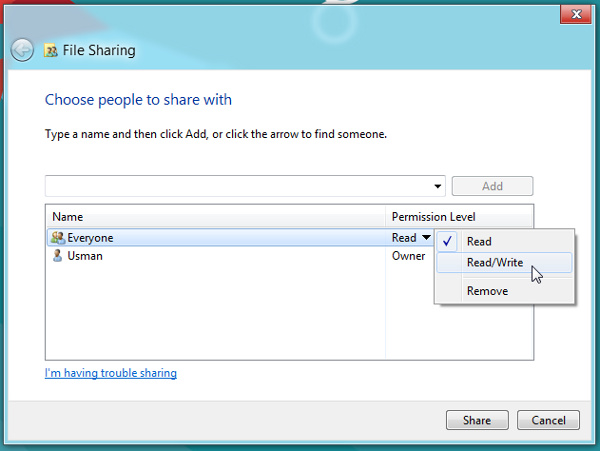
Once done, press the Share button to share the folder on the network. It will open a separate dialog, allowing you to email and copy shared folder links.
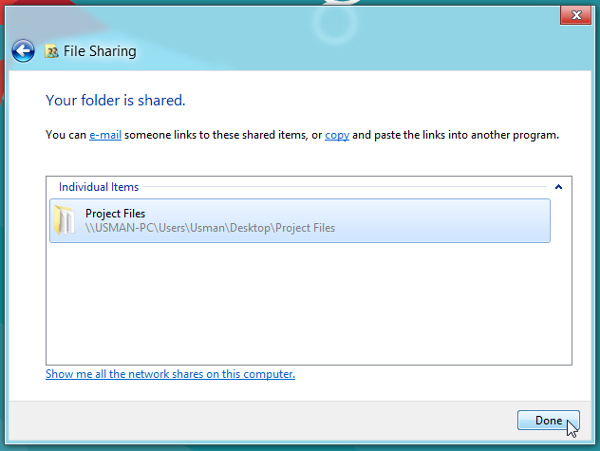
Now, you can access the shared folder from any computer connected on the network.
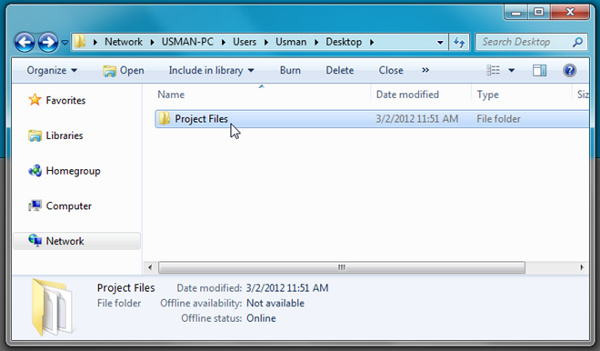
Share folders from System Wide Locations
This is the feature mentioned in Windows 8 when the system will require you to change the folder permissions to share with the system folders. You will notice that the Share file option in Properties> Sharing is disabled for system folders, you can only use the Advanced Sharing option to share the system folder with Homegroup users. This to require other users who want to access the system's shared folder must join a Homegroup (or other network group) before the folder sharing system starts. To do so, right-click the network icon under the system tray and select Open Network and Sharing Center.
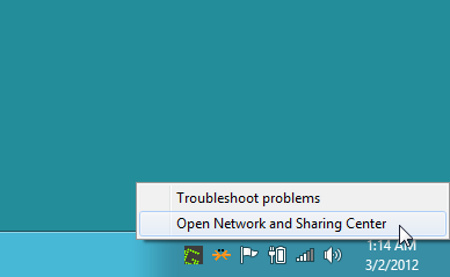
From the left, click on the HomeGroup item, then click Join now button. The HomeGroup Wizard dialog box will appear, asking you to determine the type of file you want to share with other Homegroup users.
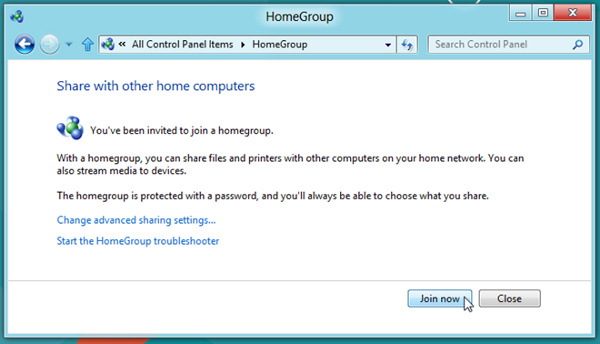
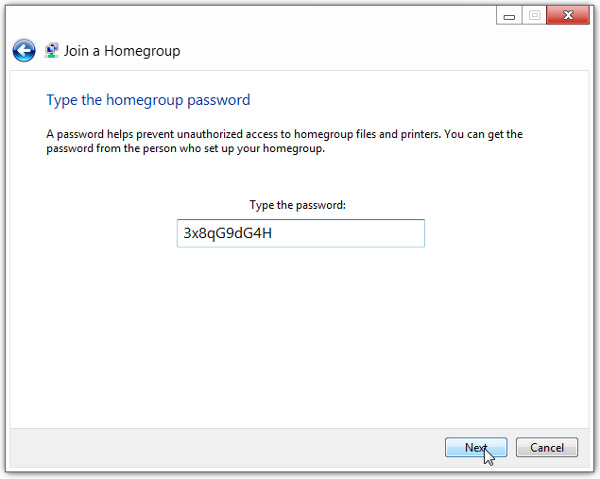
After you have specified the file types, enter the Homegroup password (used to access the created Homegroup from another computer) into the Type the password box to connect your computer to the Homegroup group, after Then click the Next button .
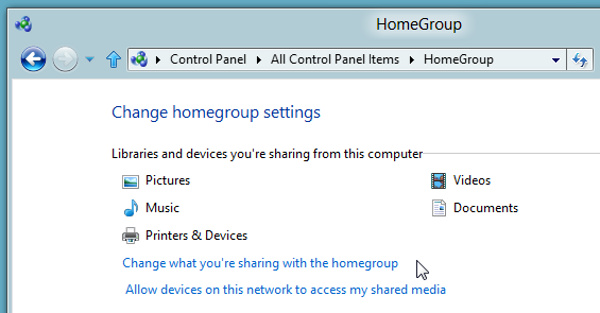
Once you are connected to the Homegroup user, you will see all the shared libraries, devices and file types.
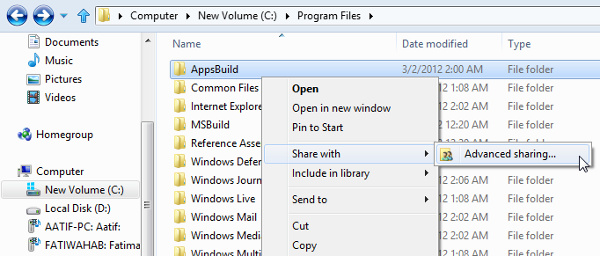
Now to share system folders with others, right-click on that folder and select Share with> Advanced sharing .
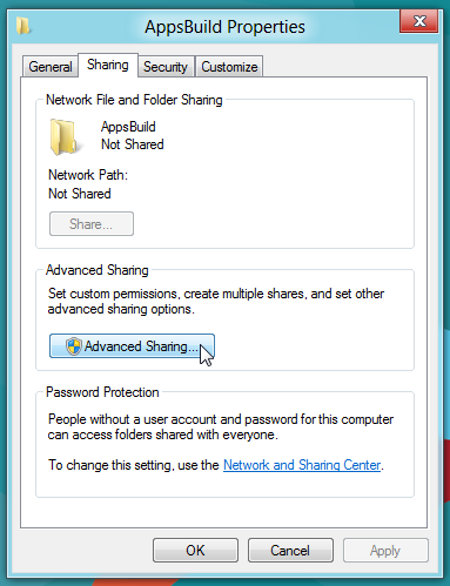
In the dialog box that appears, you will immediately access the Sharing tab. Now, press Advance Sharing button .
Next, click the Share this folder option from the upper left corner of the dialog box and then click the Permissions button.
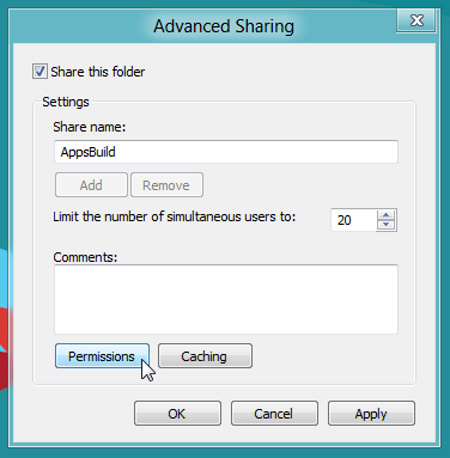
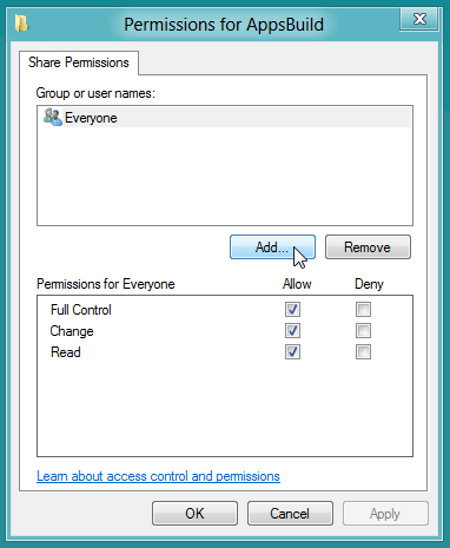
In the Permissions dialog box that appears, you can configure file permissions for existing groups and users, including users / user groups in the list of allowed access. Because we need to set the file access permission for the HomegroupUser object, so that users of the Homegroup group can access the files and folders. To start, press the Add button.
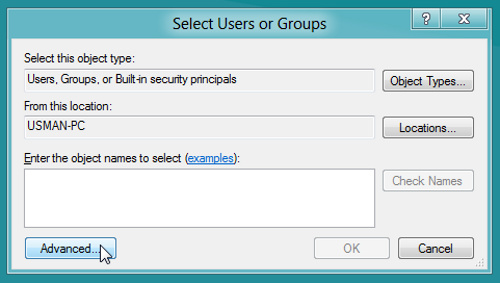
In the Select User or Groups dialog box . Here, you need to enter the object name you want to add to the allowed list by clicking the Advanced button.
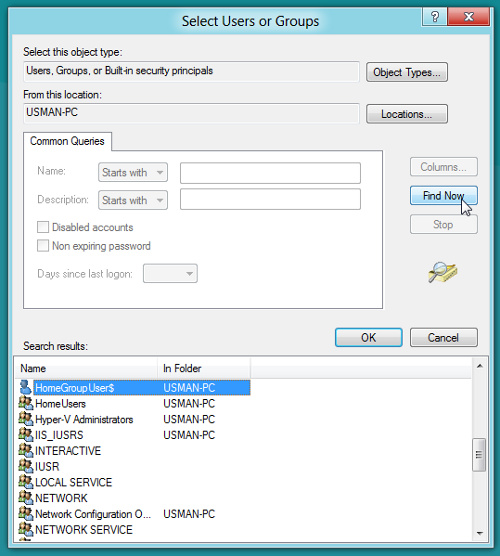
It will open the Advanced dialog of Users or Groups . Here, click the Find Now button and then select HomeGroupUser from the search results. Once done, click OK .
This will add the HomeGroupUser object to Select Users Or Groups. Now, click OK .
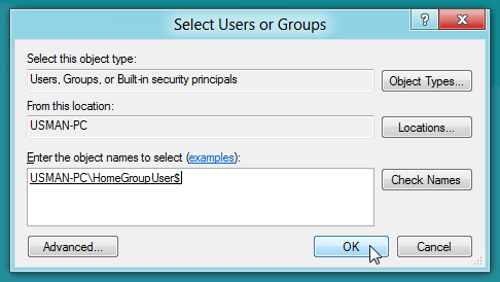
After clicking, it will add the HomeGroupUser objects to the File Permission list, allowing you to configure file permissions. Just select the HomeGroupUser group and click on the Full Control option from the Allow column to allow HomeGroupUser full access to the system folder you share.
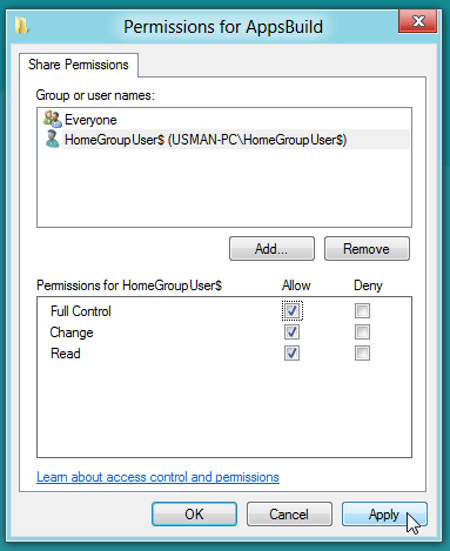
Once done, click Apply> OK . You will return to the Advanced Sharing dialog box . Click OK to share the system folders on the network. You may need to restart the computer in order for the Homegroup user to access the shared system folder.

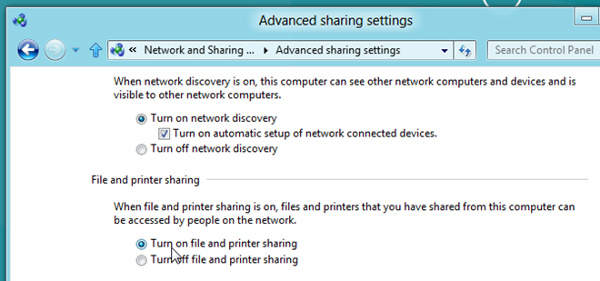
If you get the message Windows cannot access the . While accessing the shared system folder from another computer, make sure that Network Discovery and File Sharing options are enabled in Advanced Sharing (accessed from Network and Sharing Center ).
