Instructions for activating and using Admin Share on Windows 11/10/8/7
Admin Share is a feature on Windows that helps system administrators have remote access to folders and drives on the computer over the network.
Table of Contents
These folders are usually not publicly visible and can only be accessed using admin rights.
"Admin Share" folders typically include local drives (C$, D$, E$.) and system folders such as ADMIN$ (Windows system folder).
The purpose of Admin share is so that administrators can easily manage and maintain the system remotely without having to go directly to each computer.
1. How to enable default Admin Share on Windows 11/10/8/7?
Note:
Before using Admin Share, you need to ensure that the host computer (Host) and the client computer (Guest) must have the same Workgroup or Domain (both must have the same Workgroup name or Domain name). To find this information, open Windows Explorer, then right-click the Computer/ThisPC icon, select Properties and look in the Computer name, domain and workgroup settings section > workgroup name and computer name.
- Host computer: computer that has Admin share enabled.
- Guest computer: computers on the network will connect to the Admin share on the host computer.
Step 1: Activate the Admin account and set a password
If you want to access the Admin share on the computer (Host - server), you must first activate the Admin account, then set a password for the Admin account on the computer. To do this, follow the steps below:
Step 1: Press the Windows + R key combination to open the Run command window.
Step 2: On the Run command window, enter lusrmgr.msc there and press Enter.

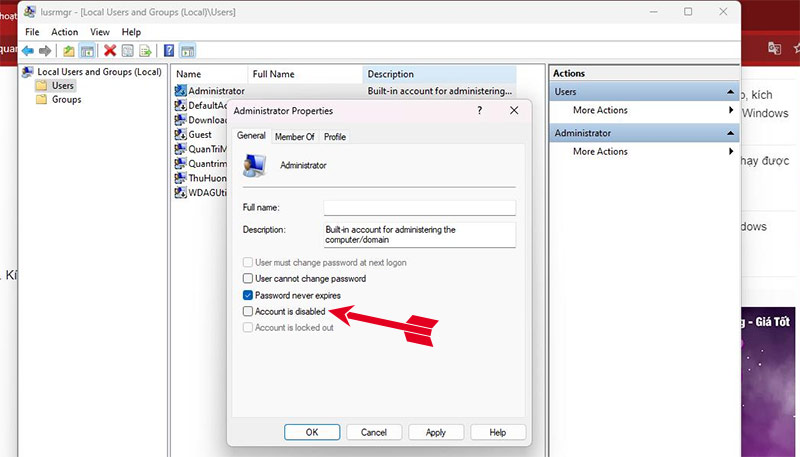
Step 3: Next open Users > Administrator > Properties.
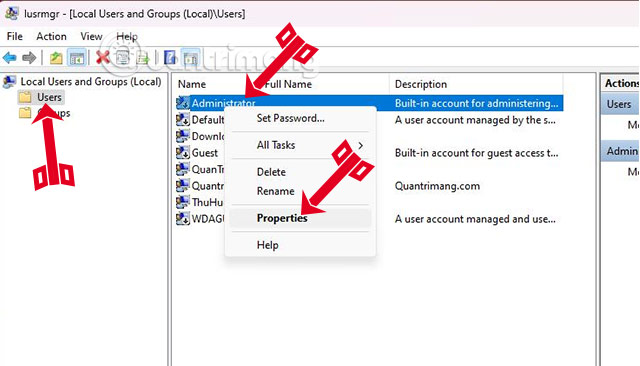
Step 4: Uncheck Account is disabled and then click OK.
Step 5: Next right-click on the Administrator account again and select Set Password .
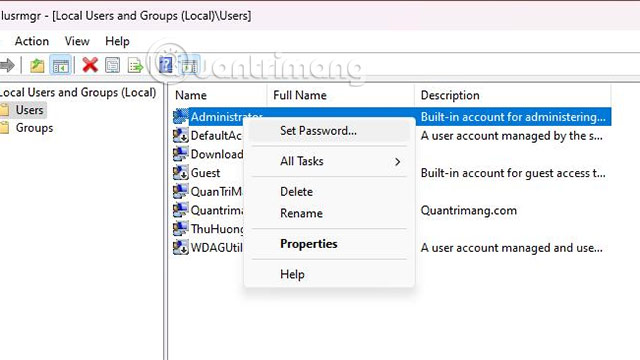
Step 6: Set a password for the Admin account and then click OK.
Enable File and Print sharing on Windows Firewall
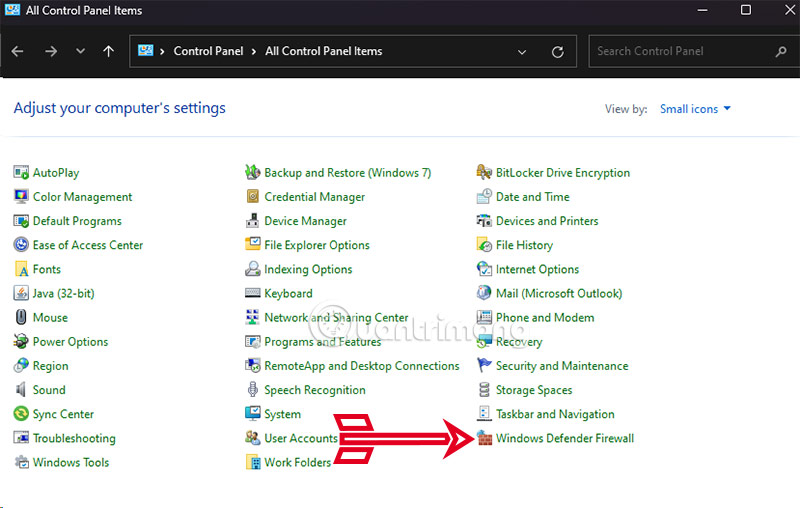
Step 1: Next is to enable File and Print Sharing through Windows Firewall on the server. Press the Windows + R key combination to open the Run command window. Next, enter Control Panel and select Enter, or you can search in the Windows 11 search bar and select the search result you just found.

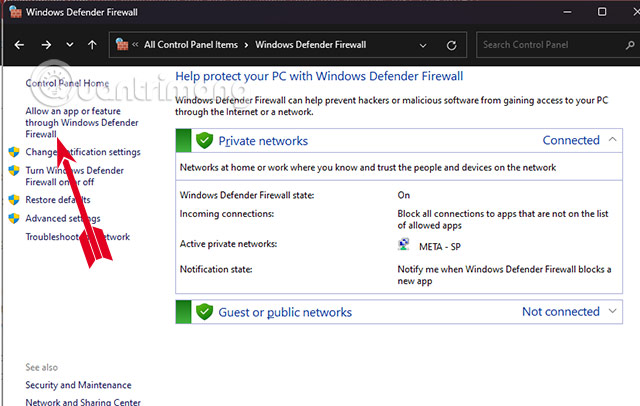
Step 2: Select Windows Defenders Firewall in the Control Panel feature list.
Step 3: Select Allow an app of feature through Windows Defenders Firewall.
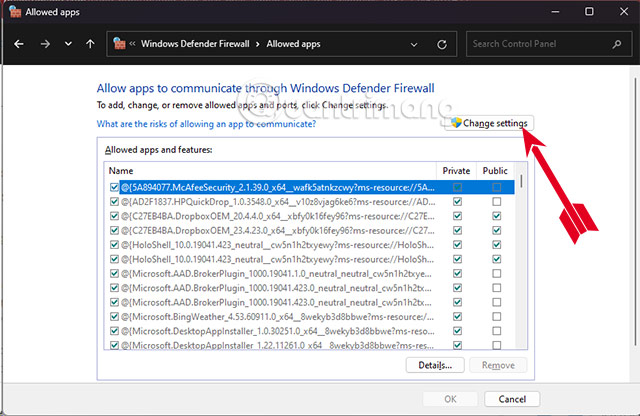
In the Allow an app of feature through Windows Defenders Firewall interface , select Change Settings.
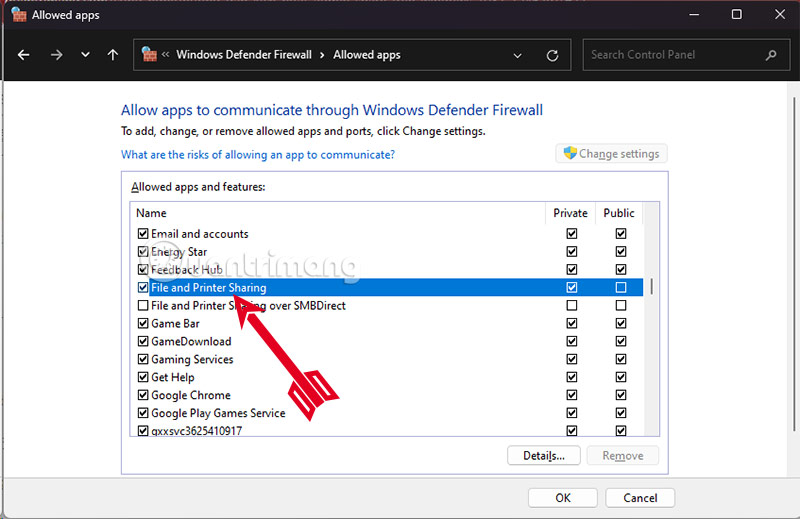
Find File and Printer Sharing and select it then click OK below to agree.
Add the LocalAccountTokenFilterPolicy value to the Registry
Step 1: Press Windows + R to open the Run command window, then enter regedit there and press Enter or click OK to open Registry Editor.
Step 2: In the Registry Editor window, copy the address below and paste it into the regedit address box and select Enter.
HKEY_LOCAL_MACHINESOFTWAREMicrosoftWindowsCurrentVersionPoliciesSystem
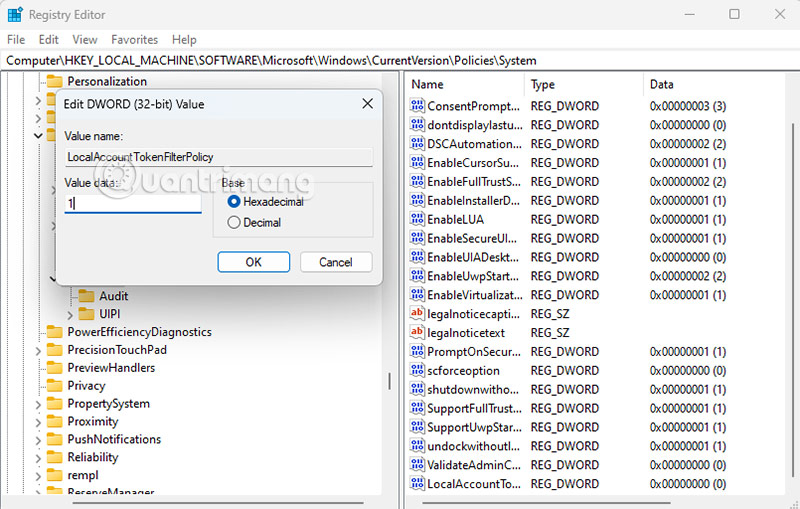
Step 3: Right-click the System key, select New => DWORD (32-bit) value .

Step 4: Name the new value LocalAccountTokenFilterPolicy and press Enter.

Step 5: Double click on LocalAccountTokenFilterPolicy and set the value in the Value Data frame to 1.
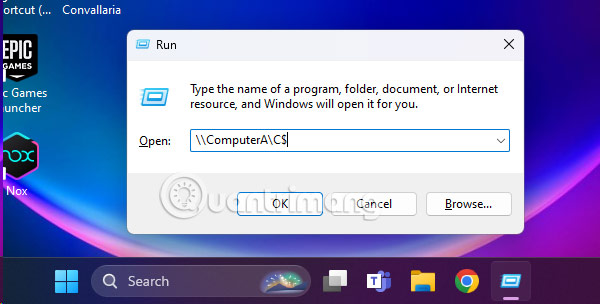
Next, close the Registry Editor window and restart your computer. When your computer finishes restarting, you can access the Admin share disk on the server from any computer on the system (Guest) by logging in to the Run command window or in the search bar. of the Taskbar by searching for the name or IP address of the server and the drive name you want to access, by adding the "&" symbol after the drive name.
For example, if you want to access drive "C:" on computer "ComputerA", you enter the Run command window:
ComputerAC$
Wish you success!
Was this article helpful?
Your feedback helps us improve.
Related Articles
 Instructions to enable Admin Share on Windows 10/8/75 minutes read
 What is Admin? Admin Facebook, what is the website?3 minutes read
 Losing Admin permissions on Windows 10 / 8.1, this is a fix5 minutes read
 How to activate the hidden Admin account on Windows 7/8/103 minutes read
 How to assign Administrator permissions on a Windows 7 computer?3 minutes read
 Instructions on how to activate the Admin account or reset the Admin account password5 minutes read
Reader Comments 0
Sign in with email or Google to join the discussion.