Set static IP settings for Windows XP, 7, 8, and 8.1 computers
When using the network in a multi-machine system, setting a static IP address is more efficient than a dynamic IP DHCP. Instructions on how to set a static IP address.
Table of Contents
When using a network in a multi-machine system, such as a home, motel or company, setting up a static IP address is more effective than using a dynamic IP DHCP because a dynamic IP when using a large number of people very similar IP overlap. That leads to the network showing exclamation mark Limited - I said in the article Internet exclamation and how to fix it
This article will guide you how to set a static IP address for Windows XP, Vista, Windows 7, Windows 8 and Windows 8.1 computers.

If you have a home network of computers and other networked devices, it is more effective to manage, as well as limit the error of duplicating IP addresses. When using Dynamic IP Configuration ( Dynamic Host Configuration Protocol ), each computer will request and be assigned an address each time it boots up. When you have to troubleshoot networking problems, it will be more difficult to find the faulty machine.
Also: Using static IP prevents IP address conflicts between devices and allows you to manage them more easily.
The assignment of static IPs on Windows computers is essentially the same, but depending on the versions of Windows XP, Windows 7, 8, and 8.1, the procedure is slightly different. Here's how to set a static IP for each operating system!
Windows 7 or Windows 8.x
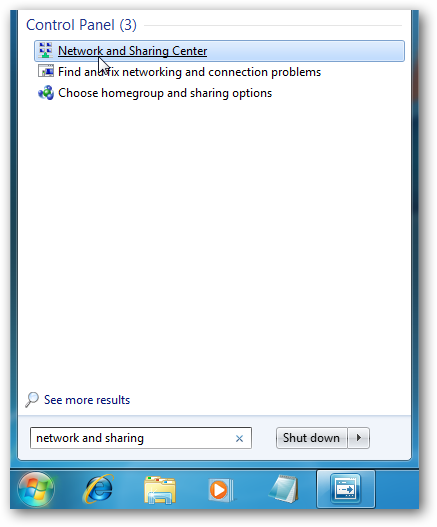
Step 1:
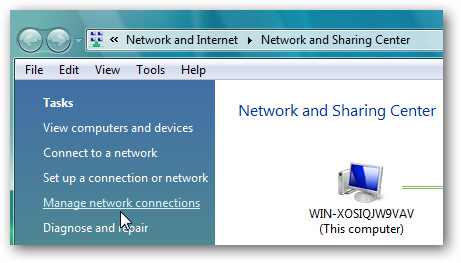
Change the computer's IP address in Windows 7, type ' network and sharing ' into the search box in the Start Menu and select Network and Sharing Center as shown below. If you are using Windows 8.x, it will appear as the first image of the article.
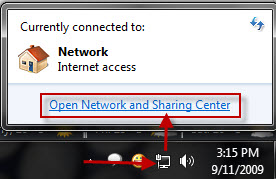
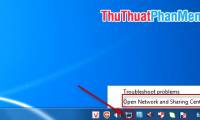
Or right-click the network icon in the right corner of the screen and select Open Network and Sharing Center
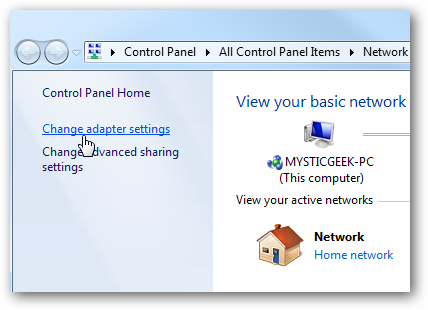
Step 2:
Then, when the Network and Sharing Center window opens, click Change adapter settings . This part will be similar on Windows 7 or 8.x.
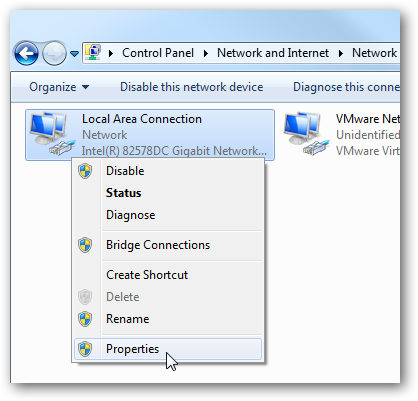
Step 3:
Right-click Local Area Connection or Wireless network if it is Wifi network and select Properties .
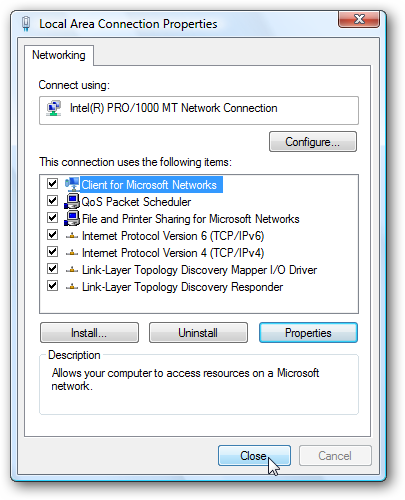
Step 4:
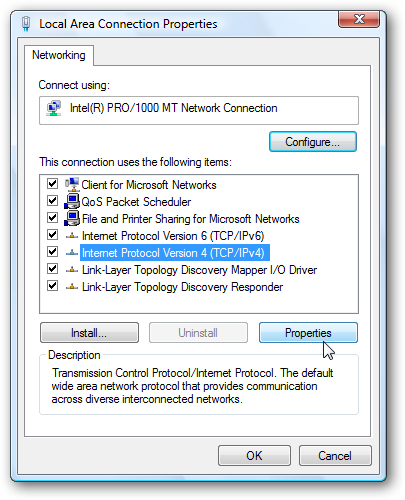
In the Local Area Connection Properties window you will see the Internet Protocol Version 4 (TCP / IPv4) section and then click the Properties button.

Step 5:
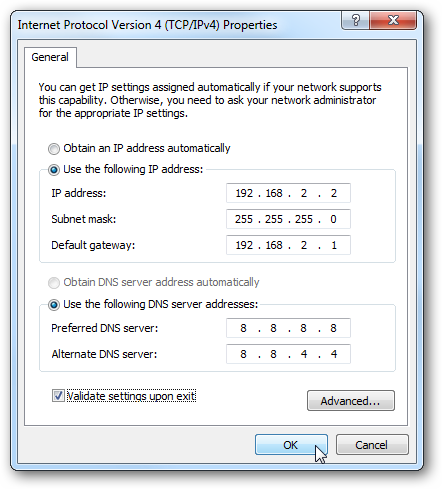
Now select Use the following IP address and enter the correct IP address, Subnet mask , Default gateway that corresponds to your network settings. Then enter your DNS - This is very clear in the section Change DNS to facebook . Normally you enter Google DNS offline: 8-8-8-8 and the bottom line is 8-8-4-4
Check the Validate settings upon exit so Windows can find any problems with the addresses you have entered. When you are finished press OK .
Step 6: Now exit the Local Area Connections window.

Windows 7 will run to check the network and check the connection as well - make sure your settings are correct. You can run the network troubleshooting wizard if the Windows check shows an error.

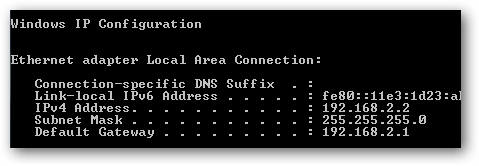
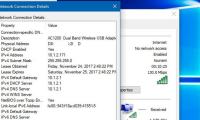
Now you can open the CMD command window (By pressing the Windows + R button, then type cmd and Enter ) and type ipconfig to see the network adapter settings have been changed successfully.
Windows Vista
Changing your IP from DHCP with a static address in Vista is similar to Windows 7, but the correct location is a bit different.Open the Start Menu, right-click Network, and select Properties.

The Network and Sharing Center opens . click on Manage network connections.
Right-click on the network adapter you want to assign a static IP address and select Properties .

Select Internet Protocol Version 4 (TCP / IPv4) and then click the Properties button.
Now change the IP, Subnet mask, Default Gateway, and DNS Server address. When you are finished press OK.

You will need to close the Area Connection Properties window for the settings to take effect.
Open Command Prompt and type ipconfig to check the changes were successful.

Windows XP
In this example, we are using XP SP3 Media Center Edition and changing the IP address of the Wifi adapter.
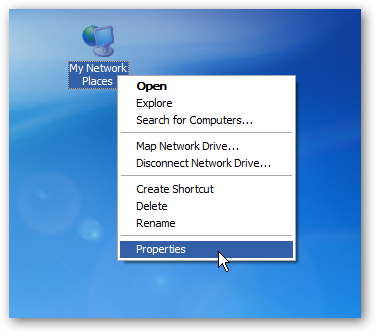
Set static IP in XP right-click My Network Places and select Properties .
Right-click on the adapter you want to set the IP for and select Properties .

Similarly select Internet Protocol (TCP / IP) and click the Properties button.

Now change the IP, Subnet mask, Default Gateway, and DNS Server address. When you are finished press OK.

You will need to close the Connection Properties screen before the changes take effect.

Once again you can verify the settings by opening a command prompt and typing ipconfig. In case you are not sure how to do this, press Start then select Run.

In the Run dialog box type cmd and click OK .
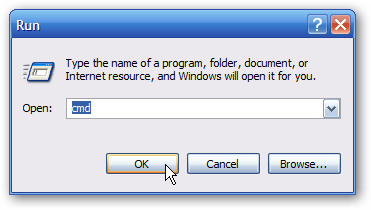
Then type in the ipconfig command window and press Enter . This will display the IP address for the network card you have changed.

If you have a small office or home network, giving each computer a specific IP address makes it a lot easier to manage and troubleshoot network connection issues.
Finally, when you use dynamic IP, it is very easy for you guys to cut the Net. If you set a static IP, this will be a pretty good prevent. If there is an error, changing to another Ip is also simpler.
Was this article helpful?
Your feedback helps us improve.
Related Articles
 How to set up static IPs for computers1 minutes read
 How to set a static IP on Windows 11 simply3 minutes read
 Instructions on how to change your IP address in Windows 10.3 minutes read
 Set up the Linksys router with a static IP address3 minutes read
 What is a static IP address?11 minutes read
 How to assign static IP addresses in Windows 7, 8, 10, XP or Vista6 minutes read
Reader Comments 0
Sign in with email or Google to join the discussion.