How to fix IP 169 address error
When you cannot connect to the Internet and your computer seems to have an IP address starting with 169, the computer has an IP address error 169. This type of error occurs when a Windows computer requests an IP address but does not Get a valid address. To fix this IP 169 address error, the computer must be able to obtain a valid IP address from the local network.
Learn about IP 169 address error and how to fix it
- What is IP 169 address error?
- How to fix IP 169 address error
- Restart network hardware to fix IP 169 address error
- Use Windows network troubleshooter to fix IP 169 address errors
- How to request a new IP address via Command Prompt
- Check the DHCP settings in the router
- How to disable and re-enable network devices
What is IP 169 address error?

In order for a computer to access the Internet via the network, it needs to have a valid IP address. The easiest way to ensure this process happens seamlessly is through Dynamic Host Configuration Protocol (DHCP). This is the setting that allows the router to automatically assign an IP address to each device on the network.
When Windows computers cannot communicate with DHCP servers, Automatic Private IP Addressing (APIPA) will start and assign the computer an IP address starting with 169.254. These IP addresses are only useful on local networks, not the Internet.

The computer does not communicate with the DHCP server and if the computer has an IP 169 address, it will not be able to connect to the Internet. That's why troubleshooting this involves making sure that the computer and the DHCP server can communicate with each other. When that communication process occurs, the underlying problem will fix itself.
How to fix IP 169 address error
To fix a computer error with an invalid IP address starting with 169, you need to make the network device in the computer communicate with the network hardware.
Depending on the exact reason why you encountered this error, you can fix the problem by resetting the network hardware, telling the network device in the computer to request a new IP address or even change some installed in the router.
Here are the most common ways to fix errors and are explained in detail:
1. Restart network hardware: Turn off and unplug the modem and router, then plug it back in. In some cases, this operation will allow the computer to retrieve the normal IP address.
2. Use Windows network troubleshooter: This is a process that automatically handles most network problems, including problems that prevent your computer from obtaining a valid IP address.
3. Request a new IP address using Command Prompt: This method is a bit more complicated, because you will need to open the Command Prompt and enter a series of commands. In most cases, this will allow the computer to obtain a valid IP address.
4. Check the router settings: If the computer still does not receive a valid IP address, check the router settings and make sure DHCP is actually enabled.
5. Disable and re-enable network devices: In the event of a problem with the network device driver, disabling the device or uninstalling the driver will make everything work again.
Restart network hardware to fix IP 169 address error
The easiest way to fix this kind of problem is to just restart the network hardware, so this is the best starting point. Restart your network hardware, including the modem and router, by turning off and unplugging, then plugging in the power and turning them on.
When the network hardware restarts and the computer tries to reconnect to the network, it can obtain a valid IP address.
This is the best way to restart network hardware:
1. Turn off the modem and router if they have a power switch.
2. Unplug the modem and router from the power source.
Note : You need to unplug even if they have a power switch. Some modems and routers maintain a standby state at low power levels even when they are turned off, so these devices need to be removed from the source so that the reset process takes place.
3. Wait for a period of time (specified by the modem and router manufacturer). In most cases, just wait less than a minute.
4. Reconnect the modem and router, then turn it back on if they have a power switch.
5. Try connecting to the network using a computer.
6. If the computer still has an IP address within 169. ***. ***. *** , restart the computer and try again. If the error has not been resolved, proceed to the next section.
Use Windows network troubleshooter to fix IP 169 address errors
Windows has an integrated troubleshooter that can fix many network problems. This feature is available in Windows 10, Windows 8 and Windows 7 and is accessed through the same method in all three versions.
1. Right-click the network icon found in the system tray on the taskbar and select Troubleshoot problems.

Tip : The icon will look like a screen with an external network cable (if you are using an ethernet connection) or a WiFi icon (if you are using a wireless connection).
2. Wait for troubleshooting to complete the task.
3. If the troubleshooter can fix the problem, you will get a notification about it. Click Close and you will be connected to the Internet.
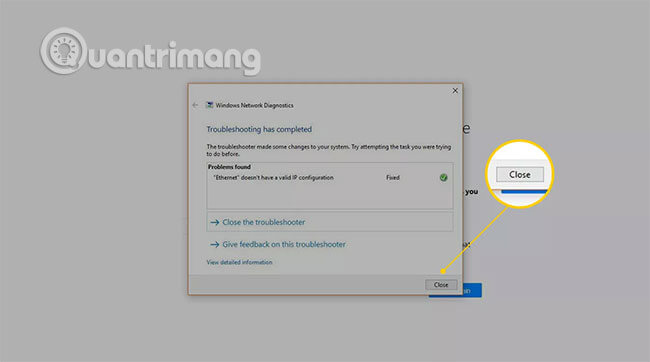
4. If the troubleshooter cannot fix the problem, it will indicate that no problems were found or tell you what the problem is and it cannot be fixed. In that case, move on to the next section.
How to request a new IP address via Command Prompt
1. Press the Windows key and type 'command prompt'.
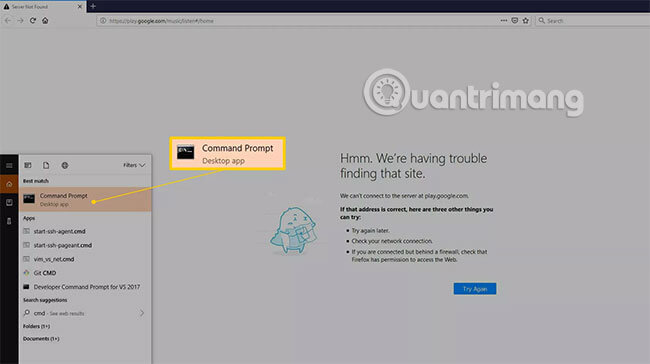
Note ; In Windows 8, navigate to the Windows System located in the Start menu to find a link to the Command Prompt. In Windows 7, you can find a link by navigating to the Start menu> All Programs> Accessories .
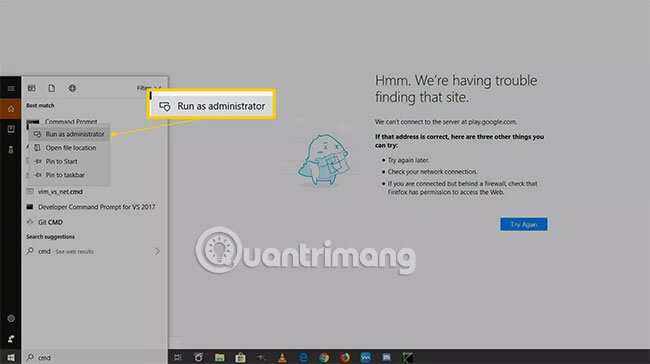
2. Right-click the Command Prompt and select Run as Administrator .
3. When the Command Prompt opens, type netsh winsock reset, then press Enter.

4. Wait for the command to finish, then enter netsh int ip reset.log and press Enter.
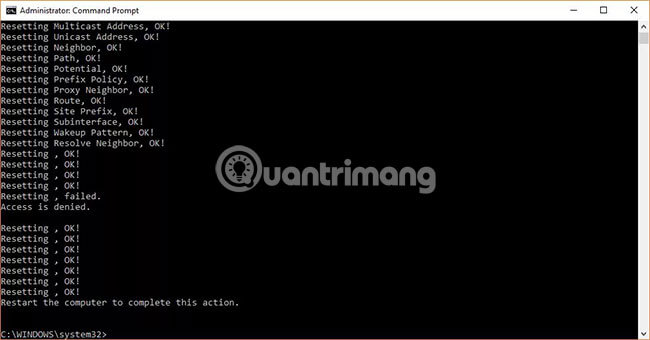
5. Wait for the command to finish, then enter ipconfig / release and press Enter.

6. Wait for the command to finish, then enter ipconfig / refresh and press Enter.
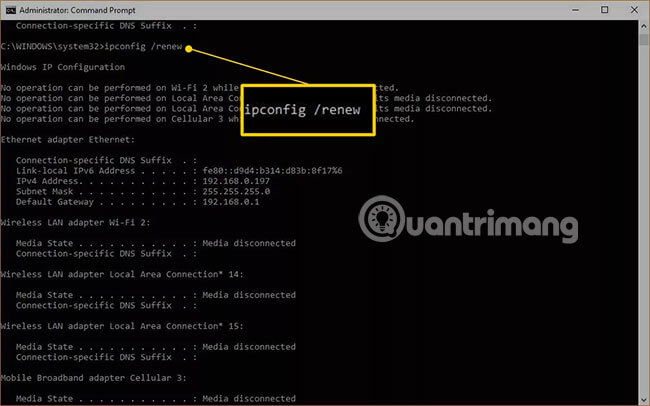
7. Check if the Internet connection is working. You may need to restart the computer. If the problem has not been resolved, proceed to the next section.
Check the DHCP settings in the router
There are two ways for a router to assign an IP address. The router automatically assigns a unique IP address to each device, no interference from the user or the user must manually assign a unique static IP address for each device.
DHCP is the setting that allows the router to automatically assign an IP address. If this setting is disabled and you have not set a static IP address for the computer, then you will not be able to access the Internet.
The exact process for enabling DHCP will vary depending on the router.
The most common methods to access the router involve entering the IP address or URL for the router into the web browser. Some of the most popular IPs include:
- 192.168.0.1
- 192.168.1.1
- 192.168.2.1
- Routerlogin.net
When you have successfully logged in to the router, find the DHCP option and make sure it is enabled. If this feature is disabled, enable it, power on the router and restart the computer, check that you can access the Internet.
How to disable and re-enable network devices
In some cases, you can fix this type of problem by disabling the network device and then re-enabling or uninstalling and reinstalling the driver. These are the same processes and require access to Windows Device Manager.
1. Press the Windows key , enter Device Manager and click on the Device Manager search result .
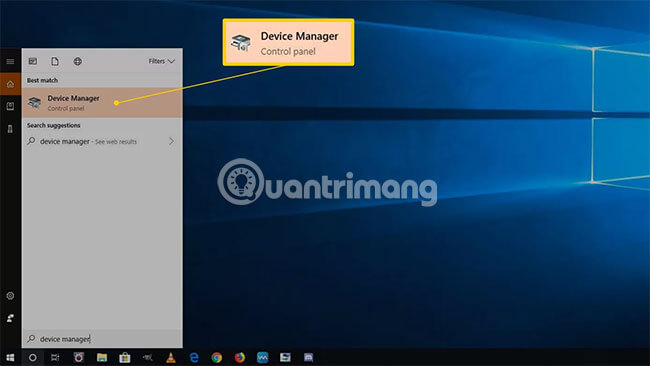
Note : You can also access Device Manager from Control Panel in Windows 7, Windows 8 and Windows 10.
2. Expand Network Adapters.
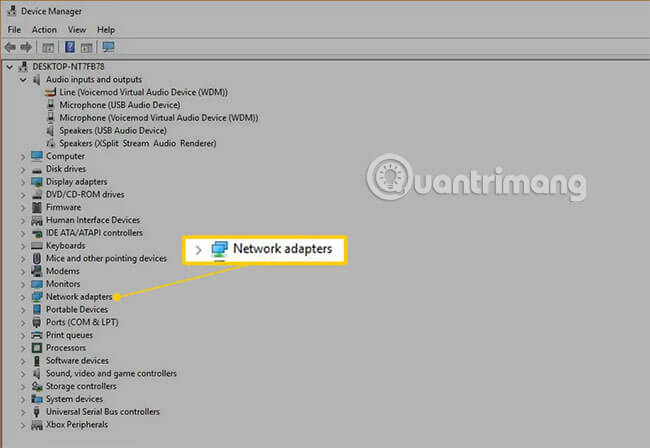
3. Locate the network device and right-click on the device.

Tip : Wired network devices include the word 'ethernet' and WiFi network devices including the word 'wireless'.
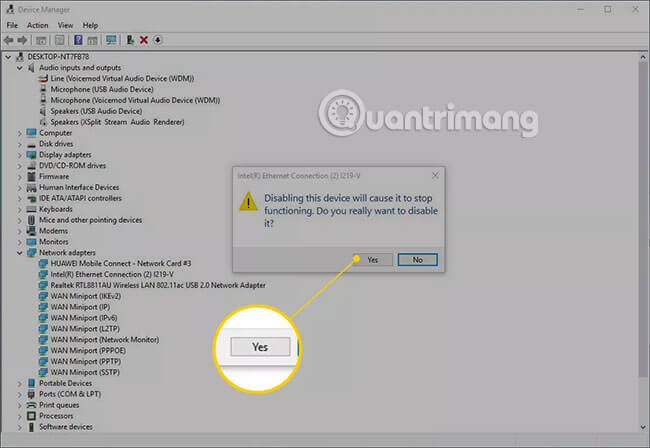
4. Click Disable device.
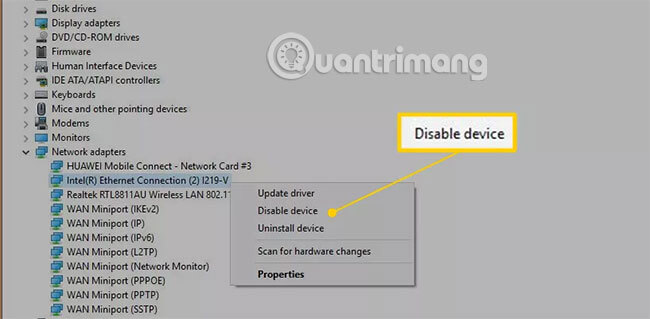
Tip : You can also click Update Driver to check if any new drivers are available for your device.
5. Click Yes.
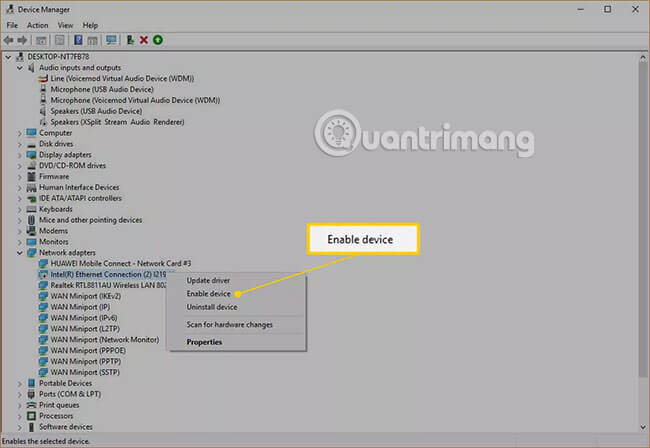
6. Right-click the device again and select Enable Device.
7. Check if the computer can access the Internet. This process may take a few minutes.
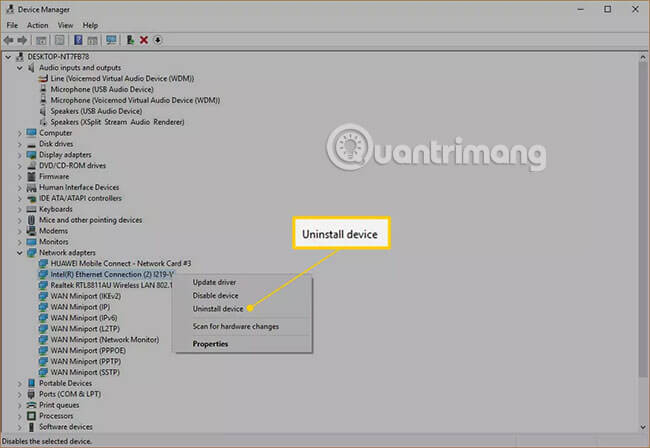
8. If the computer still cannot access the Internet, right-click the network device again and click Uninstall Device.
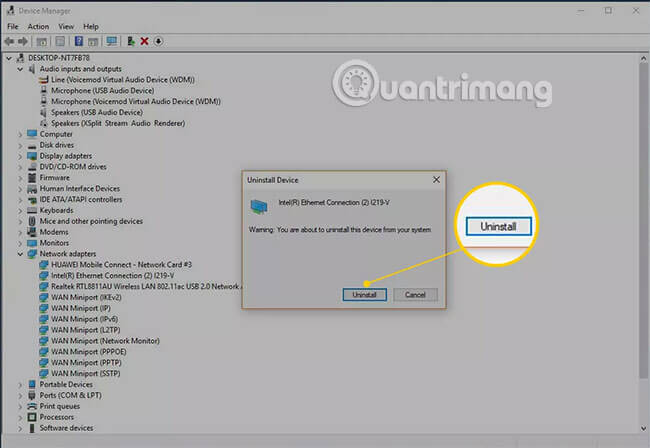
9. Click Uninstall.
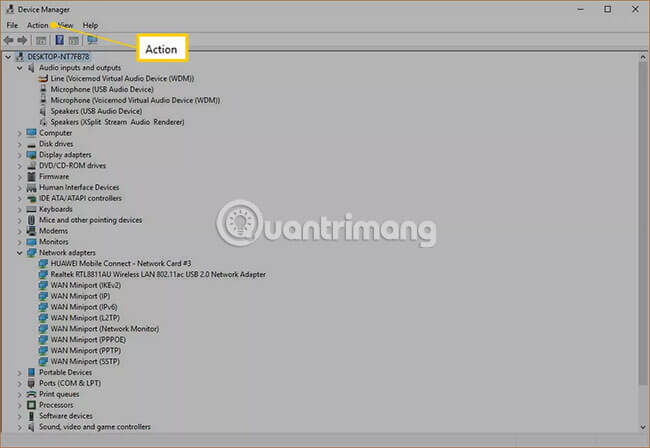
10. Click Action.
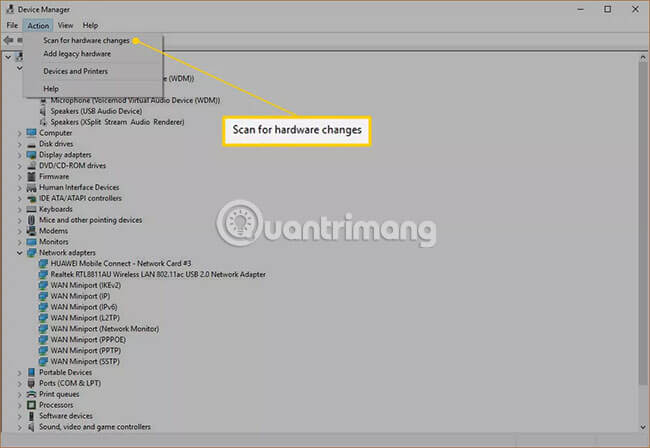
11. Click Scan for hardware changes .
Check if the computer can access the Internet. If not, try restarting the computer. If the error has not been fixed, please run the troubleshooting process again.
Hope you are succesful.