Table of Contents
This guide provides a practical overview of Set Password, Password Protect USB Data Safely, including its main features, benefits, limitations, and important considerations.
There are 2 ways to create a password to protect the USB as follows:
1. Use software to create passwords for USB
Step 1: Download the USB Flash Security software at:
http://usb-flash-security. en. malavida. com/download
Step 2: Install USB Flash Security and use

A dialog box appears, select Agree -> Next .

Click Next to continue.

Select the USB you want to set a password and click Install .

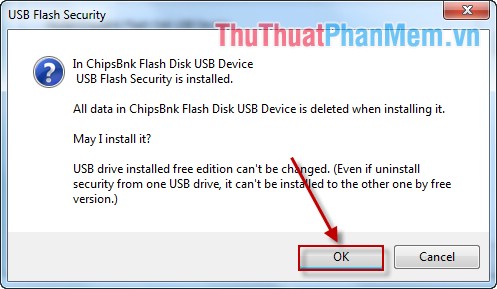
Data notification dialog in USB will be deleted to set the password, click OK .
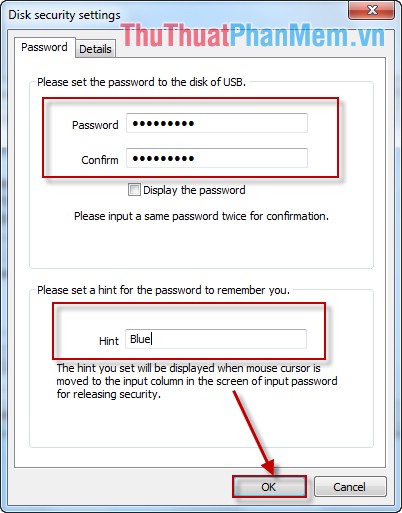
Enter the password in the Please set the passwword to the disk of USB section . You can create hints in case you forgot your password in the Please set a hint for the passwword to remember you section . Next, click OK to finish.
Select Begin the installation to start creating a password.
Note: After creating your USB will be renamed.

Click Close to end the process.

After the password is set, your USB password will be renamed:

Open USBENTER (G), which contains 3 files, open the UsbEnter file.

Enter the generated password and click OK .

In case you want to remove the password, do the following:
Step 1: Plug the USB into the device.
Step 2: Open the USB Flash Security software.
Step 3: Go to Operation -> Uninstall tab.

2. Use the BitLocker encryption feature available on Windows
This feature is only used with Windows 7 Enterprise editions, Ultimate, Win Sever 2008 and Win 8 onwards.
Step 1: Right-click the USB and select Turn on BitLocker .

Step 2: A dialog box appears and select Use a password to unlock the driver -> enter the password in the Type your password field and retype the password in the Retype your password field -> click Next .

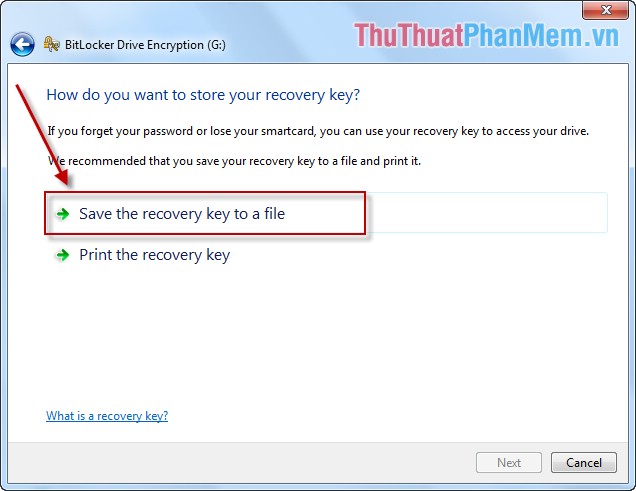
Step 3: A dialog box appears, choose how to store the password, can save the file or print on paper. Here I choose to create a separate password file -> click Save the recovery key to a file .
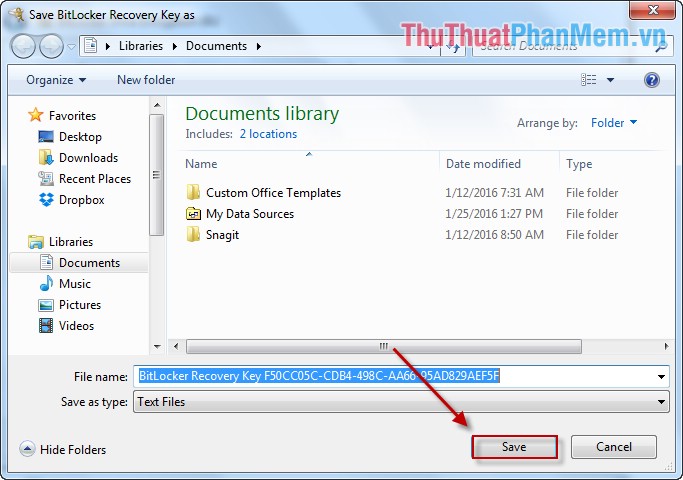
Step 4: Choose where to store the password file and select Save .
Step 5: After saving the password file, click Next to continue.

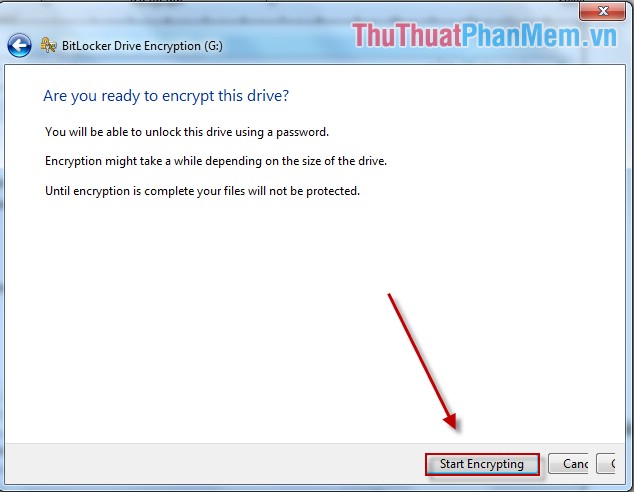
Step 6: Click Start Encrypting to start encryption.
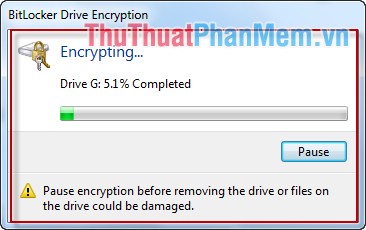
Step 7: The encryption process begins.
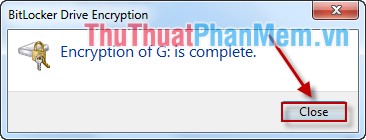
Step 8: A dialog box informs the process of successful password setting, click Close to finish.
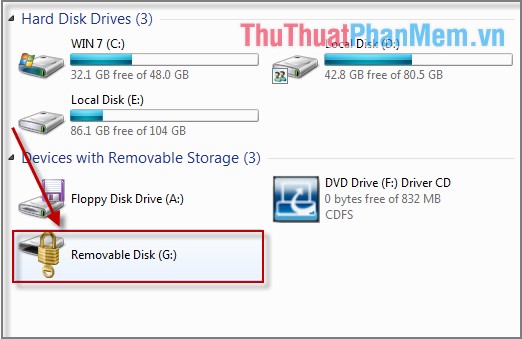
The resulting USB icon has a lock icon:
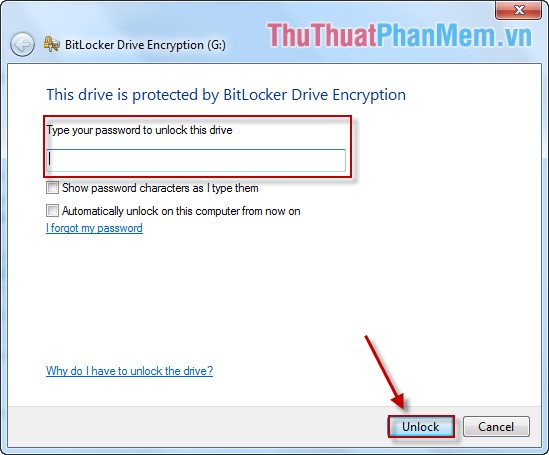
When you choose to open the USB, ask for a password and click Unlock to unlock.
In case you want to delete the password, do the following:
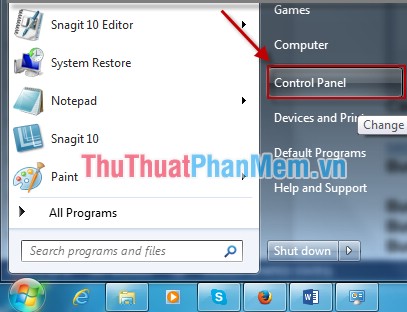
Step 1: Go to Start -> Control Panel .
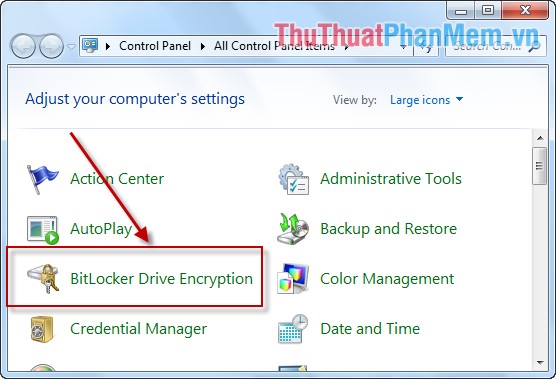
Step 2: Click BitLocker Drive Encryption .
Step 3: Turn off BitLocker mode by clicking Turn off BitLocker .

Step 4: A dialog box appears and choose Decrypt Drive .

After the process has finished, click Close to complete.
Good luck!
FAQ
What should I know about Set Password, Password Protect USB Data Safely?
Focus on the key features, requirements, limitations, and practical use cases explained in this guide.
How do I get the best results with Set Password, Password Protect USB Data Safely?
Follow the recommended steps, use current software or information, confirm compatibility, and review settings before major changes.
Are there any risks or limitations?
Potential limitations depend on compatibility, data quality, cost, privacy, support, and how the product or method is used.
Related Articles
 Set BIOS and UEFI Password to Protect Data on Your Windows 108 minutes read
 Hide Windows Data: Hide and Protect Data in Windows4 minutes read
 How to Change Icloud Password?4 minutes read
 Set a Password for the RAR Archive3 minutes read
 How to Set Excel Password to Secure Data File8 minutes read
 How to Set Password for Folder, Protect Data Effectively5 minutes read
Reader Comments 0
Sign in with email or Google to join the discussion.