How to Burn Dual Layer DVDs Using Nero StartSmart
Method 1 of 2:
Burning a Dual-Layer Data DVD
-
 Insert the dual-layer DVD into your drive. In order to burn a dual-layer project, you must be using a dual-layer DVD, and your drive must support burning dual-layers. If you try to burn a dual-layer project to a single-layer disc, you will encounter errors.
 -
 Open Nero StartSmart/Nero Express. This program will come installed with certain DVD burners, or can be purchased directly from Nero. Start a New Project and then select Data. In the Data submenu, select Data DVD.
 -
 Switch to dual-layer. By default, your project will be a standard single-layer DVD, even if you have a dual-layer DVD inserted. Click the dropdown menu next to the capacity meter. Select DVD9 to switch it to dual-layer. Click the Add button to add the files that you want to burn from your computer, or drag and drop them into the window.
 -
 Check your available space. As you add files, the meter on the bottom will fill up. Dual-layer DVDs can hold up to 8.5 GB of data. If you have less than 4.7 GB of data, it might be cheaper to burn it to a standard DVD. Press Next when you are finished adding files.
 -
 Name your disc. In the next screen, give your disc a name so that you'll recognize it when it's inserted. Make sure that you have the correct DVD burner selected in the 'Current recorder' section.
 -
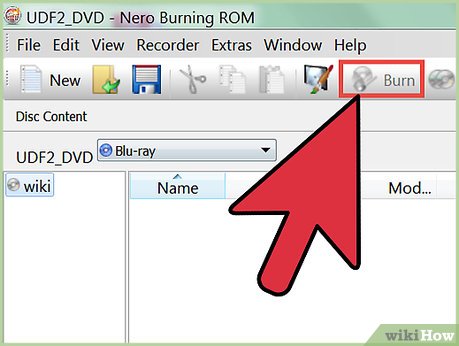
 Click Burn to begin burning the disc. Nero will show you the status to let you know when the process has completed successfully.
Method 2 of 2:
Burning a Dual-Layer Video DVD
-
 Download a different burning program. Nero is notoriously inefficient at burning dual-layer video DVDs, because it does not handle the layer break well. This is the spot in the disc where the reader moves from the first layer to the second layer. You will need a program more capable of handling this correctly, such as ImgBurn.
- In order to burn a dual-layer video DVD, you will need your video file on your computer formatted into the VIDEO_TS folder format. This occurs when you rip a DVD, or copy an unprotected DVD from the disc to your hard drive.
-
 Open ImgBurn. Click the Mode menu, and then select Build. Click the small 'Browse for a Folder' button to open the file browser. Navigate to your VIDEO_TS folder and click OK.
 -
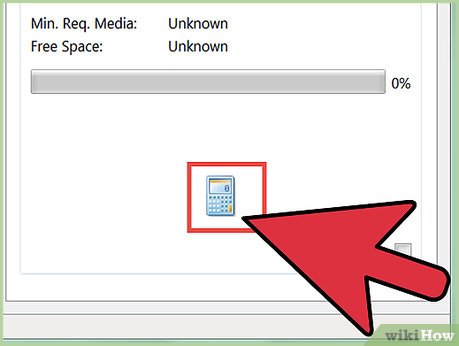
 Click the calculator button. This will ensure that the video will fit onto the disc when you burn it. This will open the layer break selector. ImgBurn will rate all of the available options. Choose the option with the highest rating to ensure the smoothest possible transition between layers.
 -
 Click the Build button. The burn process will begin. Dual-layer DVDs can take a long time to burn, so you may have to wait awhile. Once the process is complete, watch the video in a DVD player to test it out.[1]
Share by
David Pac
Update 04 March 2020


