New features are available in PowerPoint 2019
1. Integrate and improve Slide Morph effect
Morph Effects is one of the new slide transitions available in PowerPoint 2019. With Morph you can create a smooth and smooth motion effect with ease.
This effect can be used to animate a wide range of objects such as text, images, shapes, smartart .
The steps to set up Morph effect are as follows:
Note: To use this effect effectively, you should have two slides and at least one object of the same object.
+ Step 1: Select silde => right click on silde choose Duplicate Slide
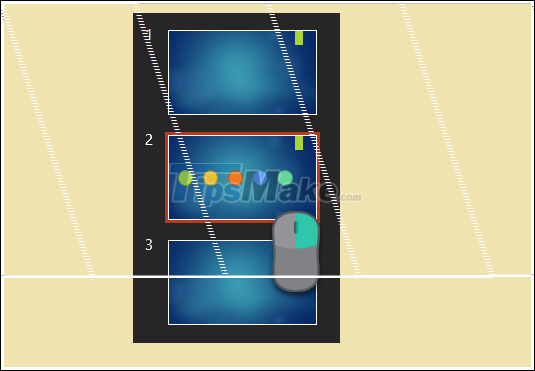
+ Step 2: At the newly created Silde, make necessary customizations such as customizing the position, color, size . of the objects in the silde.

+ Step 3: You go to Transitions => select Morph and you're done.

And here is the result before and after turning silde.

Note that the easiest way to get two sildes with at least one common object is to duplicate it by right clicking and silde and choosing Duplicate Slide.
2. Remove Background improvements
The Remove Background feature in this version is improved by Microsoft with the fact that you can easily customize the area you want to keep or remove accurately with free strokes rather than a rectangle as in the versions. before.
+ Step 1: Select the image to remove the background .
+ Step 2: On the Format tab, choose Remove Background
+ Step 3: The Background Removal tab appears, the program will automatically analyze and then remove the background for you.
If you are not satisfied, use the Mark Areas to Keep tool to add the parts you need to keep, or the Mark Areas to Remove tool to remove the unnecessary parts.
The purple part will be removed and the natural color will be retained by the program.

After customizing, choose Keep Changes to remove the background for you. The image after being deleted should be of good quality and completely acceptable.
In case the original image contains too complex details that the Remove Background tool cannot handle or the image after processing is too low quality, you can use professional image processing programs like Photoshop's. Adobe firm to handle the background deletion for photos.
3. Support exporting to video with 4K format
Microsoft PowerPoint 2019 has supported you to export to video in 4K format.
However, you should pay attention to only export to video in 4K format when necessary and should not abuse this feature because the export to 4K video format is quite long and the video file after exporting is also very heavy.
The steps to export to 4K video format are quite simple, details are shown below:
+ Step 1: Go to File => choose Export => choose Create a Video => choose Ultra HD (4K) => choose Create Video
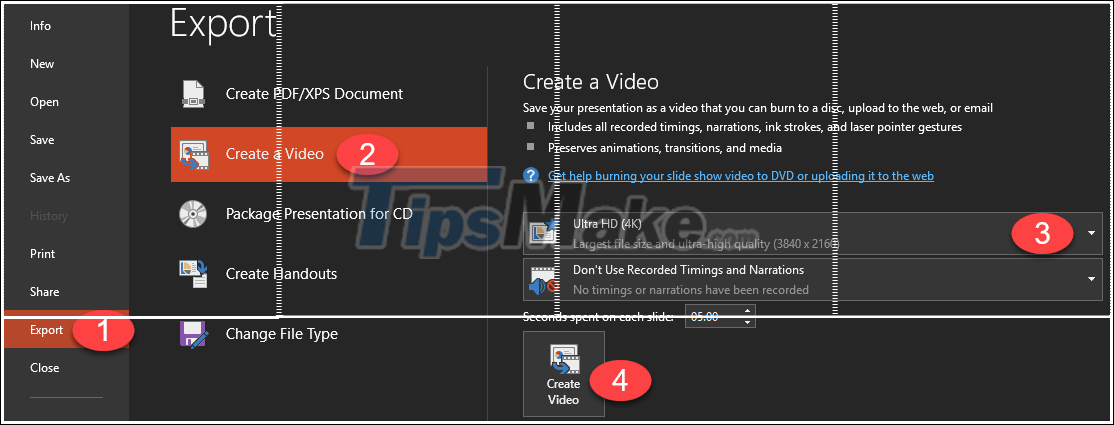
+ Step 2: The Save As dialog box appears, name and choose the output format as * .mp4 or * .wmv, then select Save and wait for the program to export.
4. Draw
The Draw tab allows you to easily create freehand lines and customize the format as you like. However, by default, this tab does not appear on the Ribbon, so you need to customize it in the Options section of the chapter to appear for us to use. How to customize as follows:
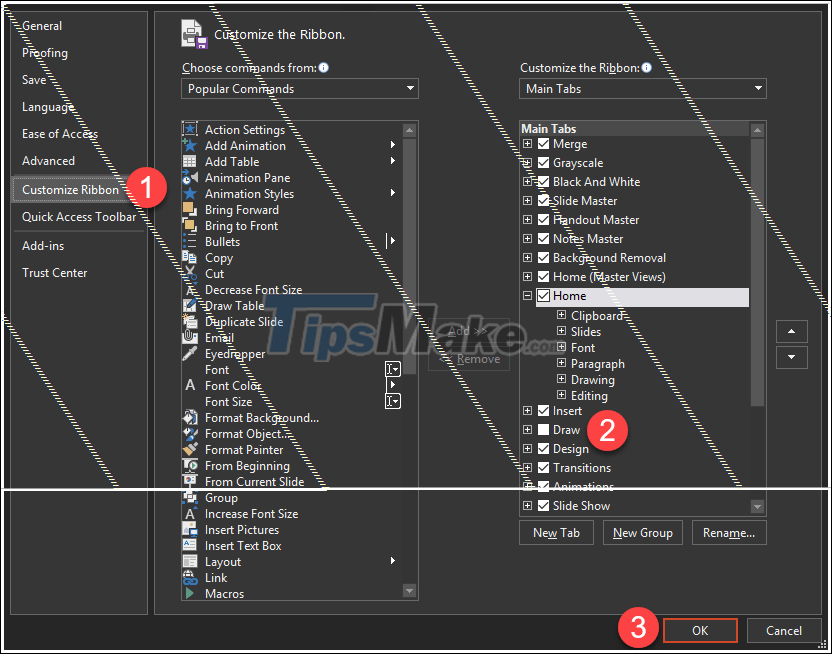
+ Step 1: Go to File => select Options
+ Step 2: PowerPoint Options dialog box appears, choose Customize Ribbon => select Draw => select OK.
When selecting the Ruler tool, a ruler will appear in the center of the page as shown below. You can then use it to draw lines or lines for objects contained in the silde.
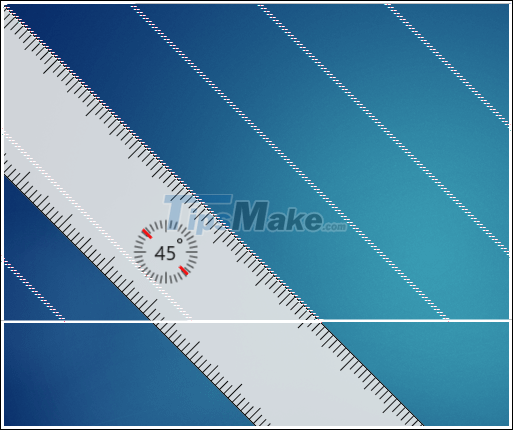
To rotate this ruler, first press Shift + F6 => press Alt + → to rotate each angle 15 degrees or press Ctrl + Alt + → to rotate one angle.
Note: In some cases, when pressing Ctrl + Alt + → will make your screen rotate, press Ctrl + Alt + ↑ to return to normal.
5. Zoom
The Zoom feature is one of the more flexible features to help you present, and it also lets you switch freely between slides to whatever one you want without interrupting the presentation. your.
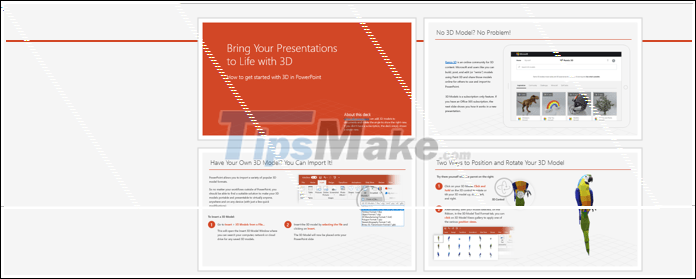
Zoom is a good choice for a presentation that doesn't have too many slides. In PowerPoint 2019, there are three options when Zoom is:
- Summary Zoom
- Section Zoom
- Slide Zoom
To use this feature, go to Insert => select Zoom => choose one of the three Zoom options above
Conclude
I have introduced and completed instructions for you about some of the new or improved features included in the Microsoft PowerPoint 2019 presentation software. In addition to the features that I introduced, the program also has a number of features. Other new features, you can learn more by yourself. Good luck