Table of Contents
Lesson 23: Insert Clip Art: Word 2007 covers the essential facts behind the topic, including what changed, why it mattered, and how it affected users.
In this lesson, you'll learn how to search and locate clip art, and insert it into your document.
Define Clip Art
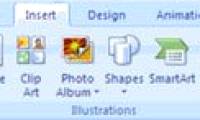
- Select the Insert tab.
- Click the Clip Art command in the Illustrations group.
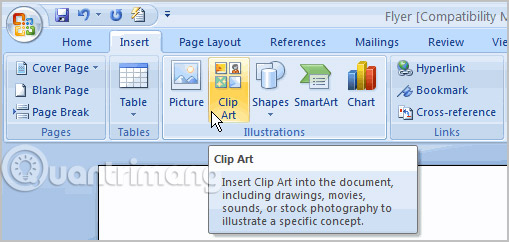
- The clip art options appear in the task pane on the right.
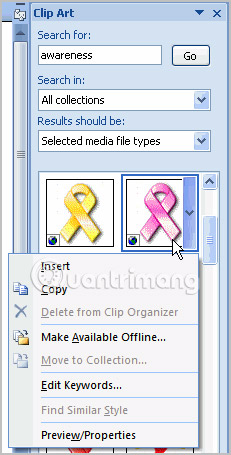
- Enter a keyword in the Search for field: related to the image you want to insert.
- Click the drop-down arrow next to the Search for: field.
- Select Everywhere to make sure Word searches on your computer and its online resources, to find images that meet your criteria.
- Click the drop-down arrow in the Results should be field:.
- Uncheck any type of image you don't want to see.

- Click Go.
Insert Clip Art
- Review the results from the search for clip art.
- Place your insertion point into the document where you want to insert the clip art.
- Left-click a clip art in the task pane. It will appear in the document.
OR
- Left-click the arrow next to the image in the task pane.
- Select Insert, Copy or any other option in the list.
Practice!
Use leaflets or any other Word document you choose to complete this challenge.
- Open an existing Word document.
- Insert clip art images from Office Online.
>> Next post: Lesson 24: Working with Shapes
FAQ
What happened in Lesson 23: Insert Clip Art: Word 2007?
Lesson 23: Insert Clip Art: Word 2007 covers the essential facts behind the topic, including what changed, why it mattered, and how it affected users.
What factors influenced Word 2007?
In this lesson, you'll learn how to search and locate clip art, and insert it into your document.
What was the practical impact on users?
Define Clip Art Select the Insert tab.
Related Articles
 How to Insert Clip Art in Word 2003, 2007 Simply and Quickly4 minutes read
 How to Add Clip Art to PowerPoint Easily3 minutes read
 MS Excel 2007 - Lesson 9: Insert Images and Graphics into a3 minutes read
 How to Add Clip Art to Microsoft Word5 minutes read
 Review JBL Clip 3: Durable Speaker, Big Sound5 minutes read
 MS PowerPoint 2007 - Lesson 7: Insert Images and Graphics in the4 minutes read
Reader Comments 0
Sign in with email or Google to join the discussion.