Lesson 22: Working with the Text Box
You may want to insert a text box into your document to draw attention to a specific piece of text or allow you to easily move around the text in a document..
In Word 2007, you may want to insert a text box into your document to draw attention to a specific piece of text or allow you to easily move around the text in a document.
In this lesson, you'll learn how to insert a text box and format it in different ways, including resizing, moving, and changing the shape, color, and outline of the text box.
Insert a text box
- Select the Insert tab on the Ribbon.
- Click the Text Box command in the Text group .
- Select a text box in the Built-in section or Draw Text Box from the menu.
- If you select the text box in the Built-in section, left-click the text box you want to use, and it will appear in the document.
OR
- If you choose Draw Text Box, a cross cursor will appear. Left-click and hold down the mouse, drag until the text box is the size you want.

- Release the mouse.
Change the text box style
- Select the text box. The new Format tab appears with Text Box Tools.

- Select the Format tab .
- Click the More drop-down arrow in the Text Box Style group to display other style options.
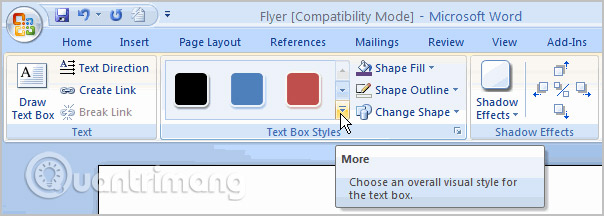
- Move the cursor over the options and the Live Preview feature will give you a preview of how those types will appear in the document.
- Left click on a style to select it.
Change the Shape Fill
- Select the text box. The new Format tab appears with Text Box Tools.
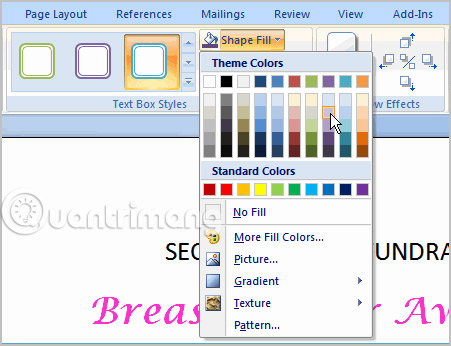
- Click on the Shape Fill command to display a drop-down list.
- Choose a color from the list, select No Fill, or one of the other options.
Change Shape Outline (border)
- Select the text box. The new Format tab appears with Text Box Tools.
- Click the Shape Outline command to display the drop-down list.
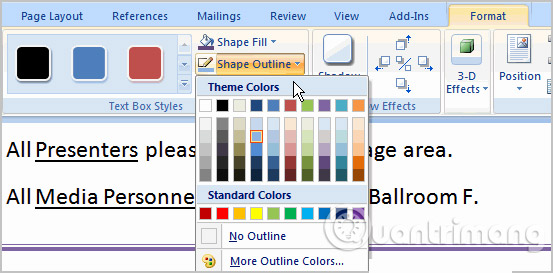
- Select a color from the list, select No Outline, or one of the other options.
Change the shape of the text box
- Select the text box. The new Format tab appears with Text Box Tools.
- Click the Change Shape command to display the drop-down list.
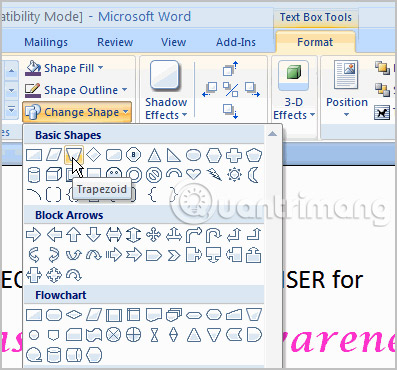
- Select an appropriate shape from the list.
Move the text box
- Left click on the text box. Your cursor will become a cross with an arrow at each end.
- Hold down the left mouse button and drag the text box to the desired position on the page.
- Release the mouse.
Resize the text box
- Select the text box.
- Left click on one of the blue handles to resize the text box.
- Hold down the mouse button and drag the handles until the text box is the size you want.
If you drag the blue size adjustment handle on any corner, the text box will resize to the same scale. The resize handles at the top or bottom of the text box will allow you to resize them vertically, while the adjustable handles on the left and right will change the text box horizontally.
Practice!
Use leaflets or any other Word document you choose to complete this challenge.
- Open the existing document.
- Insert a text box.
- Change the border of the text box to another color.
- Change the background color of the text box.
- Move the text box to the desired location.
- Enter any text you want into the text box.
>> Next post: Lesson 23: Insert Clip Art