Table of Contents
Instructions to Turn Skydrive into Network Drive in Windows 7 covers the essential facts behind the topic, including what changed, why it mattered, and how it affected users.
Skydrive Mapping
First of all, let's find out what drive mapping is. When mapping a network drive we tell all the computers on the network the ability to use this drive remotely. As a result, it can be said that, mapping a network drive on machine A, machine B is connected to machine A if the same network and the same Home Group. With drive mapping, machine B can now use machine A's hard drive as it is physically installed on machine B.
The benefit of this is that you can easily backup files from machine B to machine A whenever you want to reinstall the operating system or make sensitive modifications.
With SkyDrive, you don't map the drive to any other computer. Instead, you directly access 25GB of Microsoft storage assets.
Steps
Please start the drive mapping. Suppose we are using Windows 7:
- Go to your computer's control pannel and click User Accounts and Family Safety.
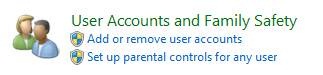
- Click User Account.
- Now, click Link Online IDs on the left.
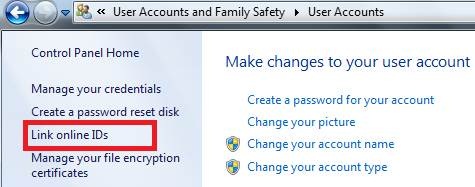
- Click Add an online ID provider. It will lead to a page on the Microsoft website where users can download software that supports Windows Live ID SignIn.
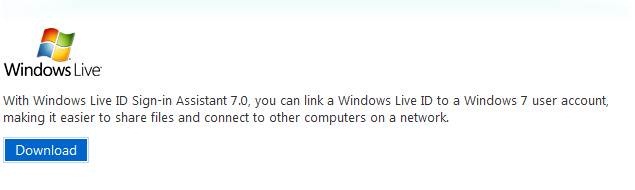
- Click the Download button and install. Users do not have to restart the computer. Please close the installer after finishing. Back to Link Online IDs window, we will see:

- Click on the Link online ID in the picture.
Note: Windows may have an error that prevents the function from working after installing Windows Live Sign-In. If that happens, close the window and repeat the steps to go to the Link Online IDs window.
The user will see a window like this:
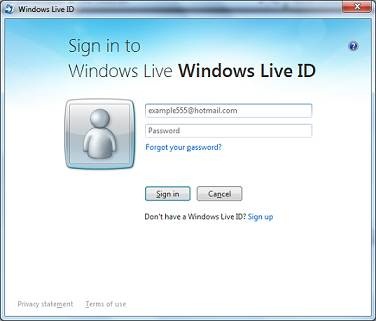
- Once logged in, we will see the program update itself as follows:

- Now, we need the SkyDrive URL. Log in to SkyDrive and go to the Public folder or any other folder without being private. Users can also create a temporary folder that is not private when doing this and return it to the original after it is done.
- Go to the folder and on the right side of the page, under Sharing, click Share folder.
- Click Get a link and create a link to view and edit.
- In the URL, copy the text between 'cid- ' and ' &' and then delete the rest of the URL. For example, if the URL is 'https://skydrive. Live. Co/redir. Aspx? Cid=cd682326f5242fd4&resid=Cd682326F5242FD4! 216 & parid=root ' then we just need to copy ' cd682326f5242fd4 '.
- Now, reformat this text so that it turns into an internal access URL for the SkyDrive folder like this: "docs. Live. Net@SSLcd682326f5242fd4^2Documents".
Note: Don't forget to replace the CID in the URL with your own CID segment. We also replace 'DOCUMENT' with the folder name we want to map. Do not map public folders. Or at least, don't give anything you don't want to share to the public folder.
- Go to Computer on the Start menu and click Map Network Drive.
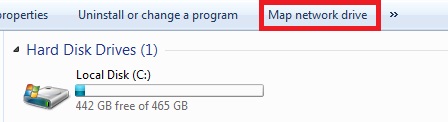
- Under the Drive section, select any drive name you want. Under Folder, paste the URL we created earlier.
Once completed, click Finish.
Now, you can use this drive like any other normal drive, copy the file without any problems. The computer will have an additional 25GB of storage, a perfect solution when you want to backup data.
FAQ
What is the main topic of Instructions to Turn Skydrive into Network Drive in Windows 7?
Instructions to Turn Skydrive into Network Drive in Windows 7 covers the essential facts behind the topic, including what changed, why it mattered, and how it affected users.
Why is Windows 7 important?
Skydrive Mapping First of all, let's find out what drive mapping is.
What should readers remember about Windows 7?
When mapping a network drive we tell all the computers on the network the ability to use this drive remotely.
Related Articles
 Connect Skydrive Storage Folder in Windows 73 minutes read
 Set up and Use Skydrive on Windows Phone 8: Set up Skydrive5 minutes read
 Microsoft Will Rename the Skydrive Service to Microsoft Drive in3 minutes read
 Skydrive and Google Drive - Where Is the Best Cloud Service for6 minutes read
 How to Map Network Drives in Windows 116 minutes read
 How to Turn Off Hard Drive When Not in Use on Windows 113 minutes read
Reader Comments 0
Sign in with email or Google to join the discussion.