Instructions to combine clouds into beautiful and simple photos using PicsArt
With this application, you can add clouds to photos, add sky to photos, and edit the sky to make photos more sparkling in the simplest way.
Table of Contents
In addition to having to pose and choose a photo location to have a satisfactory photo style, photo editing such as choosing color effects, increasing or decreasing brightness, smoothness. are also very important factors before dividing. Share a photo "so deep".
Not only that, you also need to deal with the surrounding environment to get the best photo. Especially when shooting outdoor landscapes, often the most noticeable outdoor element is the sky.
Imagine you take a photo with a nice pose but the sky looks gray and gloomy, that's definitely not the photo you like the most.
Therefore, you will need photo editing apps and photo editing tools to combine clouds and sky into your photos. Below is how to combine clouds into photos using PicsArts on your phone.
How to combine clouds into photos on your phone using PicsArts
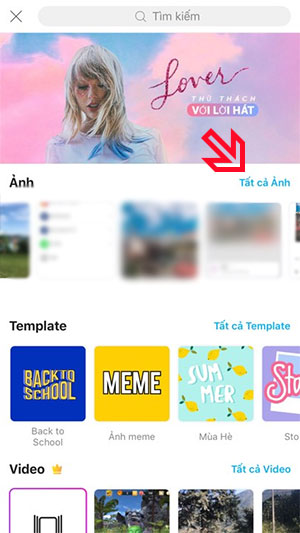
Step 1: Choose an application to combine clouds into photos
First, download the PicsArt application to your phone, then launch it. PicsArt is an application to combine sky into photos that is quite simple, even for those who are not familiar with photo editing.
In the main interface, quickly log in with Facebook or create an account by entering email and clicking Create account. Next step, write down the password to create a PicsArt account. If a trial notification appears, click the X in the upper left corner to turn it off.


Step 2: Select the photos you want to merge
To select the photo you want to combine with clouds, in the main interface, click on the red plus icon to add photos from your album.

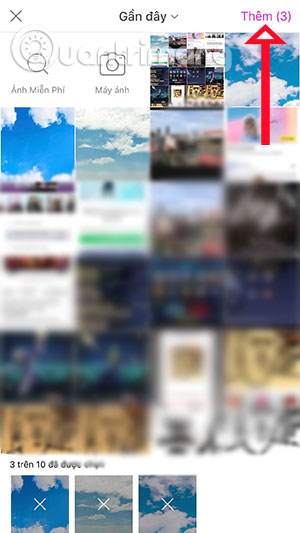
Step 3: Select the sky photo you want to merge
Next, go to the section to select the tool to merge the sky into the photo. Swipe back and forth until you see the Add Photo tool and select it. You can insert 10 additional sky photos to combine into your photo. Select the sky photo you want to merge and click Add in the upper right corner
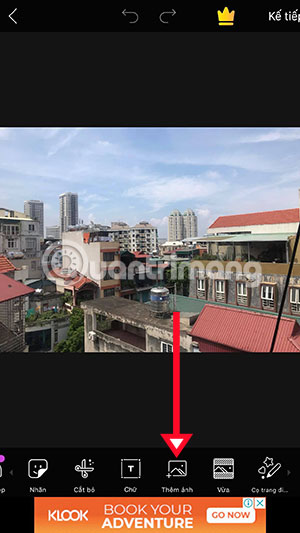
Step 4: Edit photos
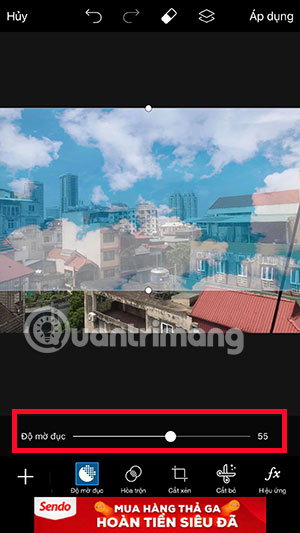
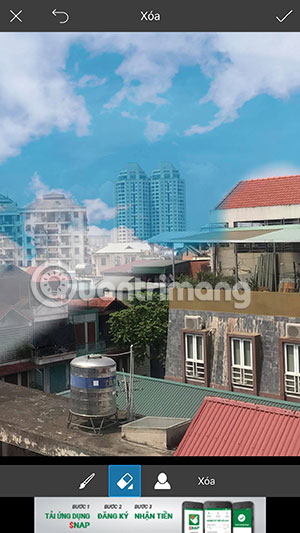
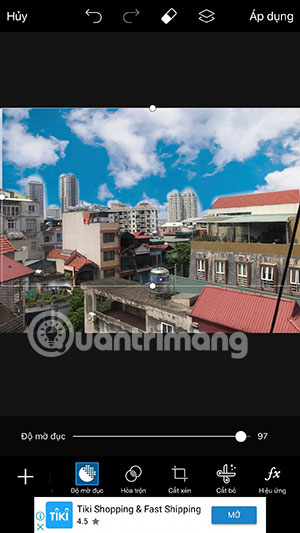
Once you have selected the sky photo you want to combine, you can stretch your photo to fit the photo frame. To adjust the opacity, drag the opacity bar below for easy editing. Use the eraser icon (half black, half white icon) above to erase the excess clouds and sky in the photo.
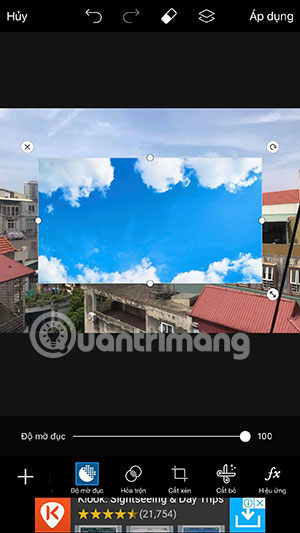
Step 5: Zoom in on the photo for editing
You can zoom in on the photo you are editing with two fingers, hold two fingers on the point you want to zoom in and drag out. This will make photo editing easier and make the photo look more realistic.
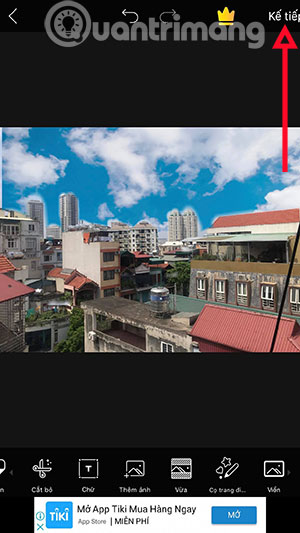
When zooming in on the photo, other parts will be obscured. If you want to drag to another side, just hold two fingers and drag them to the part you want to edit. After editing, click on the check mark in the upper right corner to save your edits.
If you want to go back to edit again, just click on the sky photo again , you will be returned to the photo editing interface with the eraser and other tools as shown below.
Step 6: Save and share the edited photo
If you are satisfied, click the check mark in the upper right corner, then click Next. In the next interface, click Save .
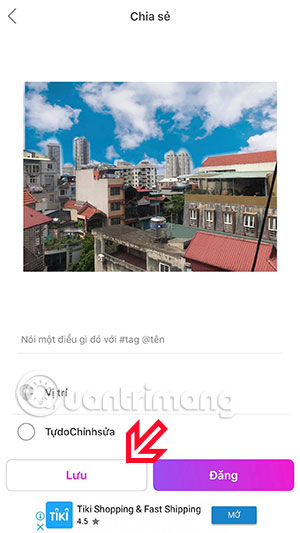
Next there will be three options, please choose depending on your needs.
- Send: Share photos with friends via social networks
- Private upload: Upload to PicsArt app storage
- Save: Save the edited photo to your device

So through the instructions above for grafting sky into photos and clouds into photos, you will have beautiful photos when going out, traveling. How to graft clouds into photos is really very simple, the photo has Whether it's beautiful or not depends a lot on how skillful you are in removing the clouds while editing your photo.
Was this article helpful?
Your feedback helps us improve.
Related Articles
 Guide to blending clouds into beautiful and simple photos5 minutes read
 How to combine photos of 'Duck Luyen, Duck Dua, and Cuc Roi' toxic and strange4 minutes read
 How to edit photos with PicsArt on your phone in detail12 minutes read
 How to replace art background image with PicsArt4 minutes read
 Instructions for creating images from descriptions on PicsArt2 minutes read
 The mystery and the irresistible beauty of nacre clouds3 minutes read
Reader Comments 0
Sign in with email or Google to join the discussion.