Table of Contents
Google Vids can animate a still image or generate a new clip guided by reference images and a prompt. These are useful for short visual examples in lessons and presentations. A generated clip is only one part of a finished video: you still need to check its content, arrange scenes and review the final playback.
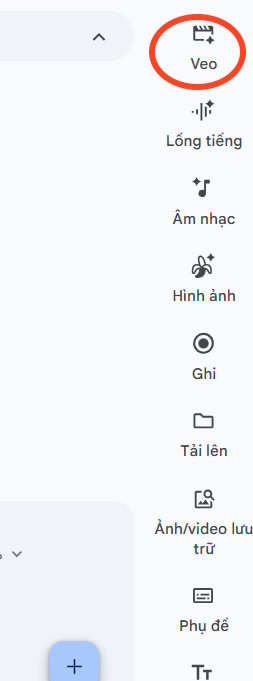
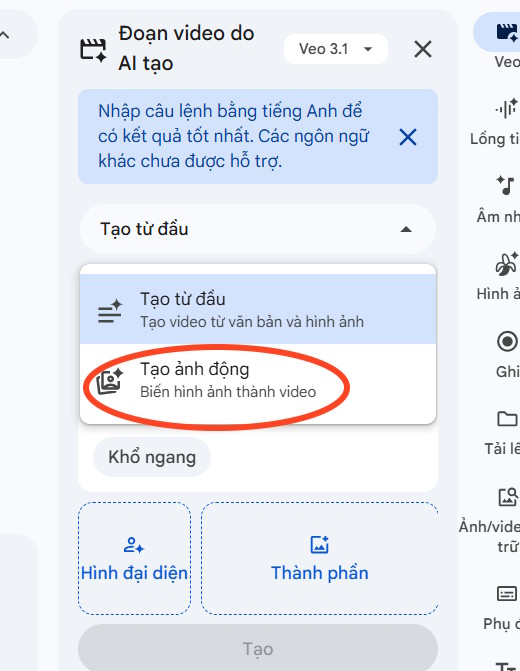
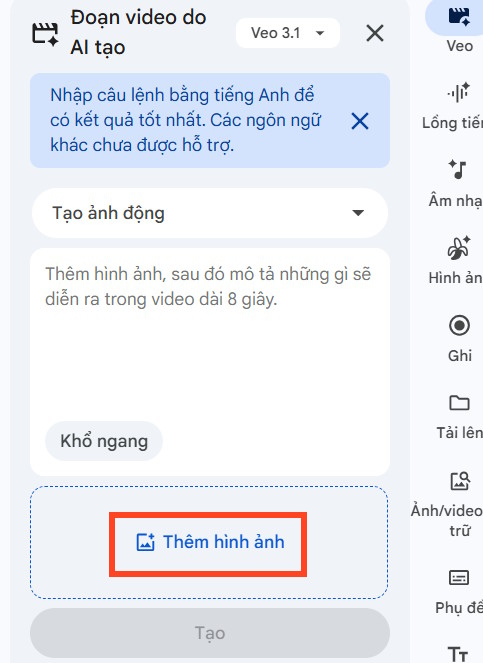
The screenshots below show an earlier interface labeled Veo. Google's current AI video clip instructions use Create AI videos or AI video, with separate Create and Animate options.
Before you start
- Sign in to the Google account you intend to use. AI feature access and generation limits depend on the account and, for work or school, administrator settings.
- Check Google's Vids feature availability if an option is missing. Do not assume access to the editor includes every AI feature.
- Use images you have permission to use. Avoid uploading private student photos or other personal images without appropriate permission.
- Decide what one short scene should communicate before generating it.
Method 1: animate a still image
1. Open the AI video panel
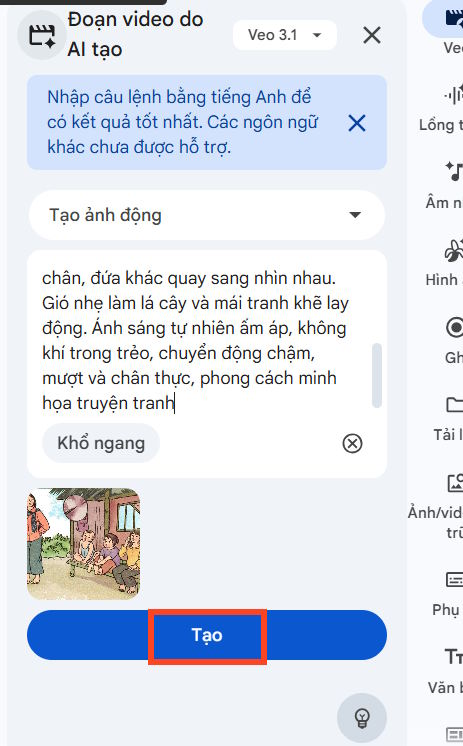
Open a Vids project on a computer. Choose the AI video option in the start menu or side panel. In the older interface pictured here, the entry point is labeled Veo.
2. Choose Animate and add an image
Select Animate, then add a clear JPG or PNG image. Choose the orientation that fits your project. A source image close to the intended frame shape makes it easier to avoid unwanted bars or awkward composition.
For an illustrated village scene like the one below, describe the movement you want rather than repeating every detail already visible.
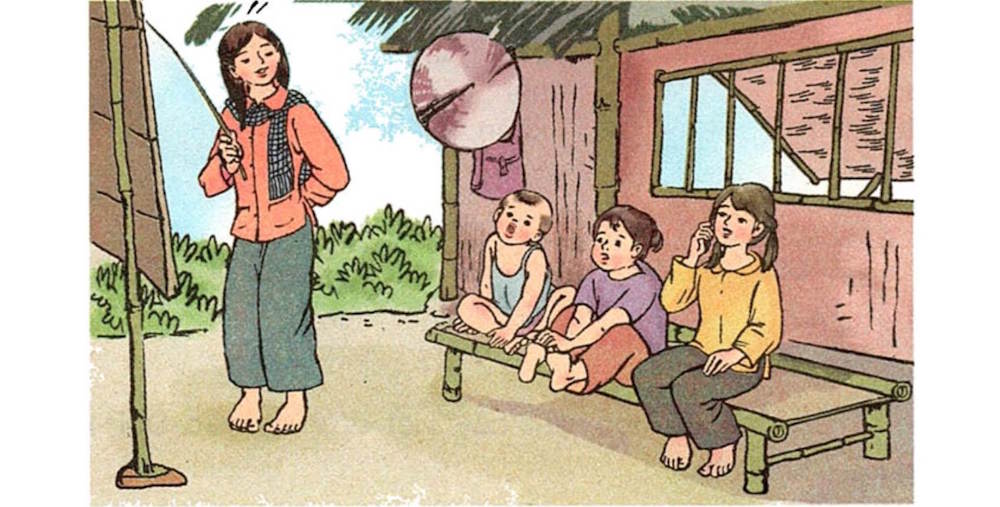
Animate this illustrated Vietnamese village scene with gentle movement. The woman moves her pointing hand slowly. The seated children blink and make small head movements. Leaves sway in a light breeze. Keep the original composition and drawing style, with a steady camera and natural, unhurried motion.Begin with a small number of motions. Asking every character and object to move differently can make errors harder to diagnose.
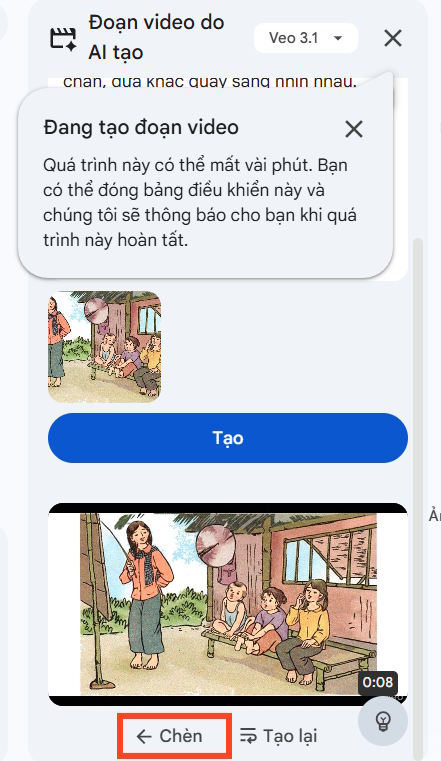
3. Generate, inspect and insert
Select Generate and play the result. Check faces, hands and object continuity. If the movement is wrong, simplify the prompt or change one instruction at a time. When the clip is useful, choose Insert to add it to the project.
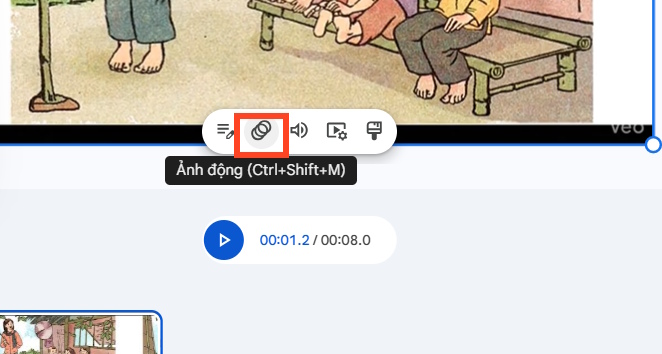
4. Adjust the clip in the editor
Select the inserted clip to adjust its placement and timing. The older screenshots show animation controls for how an object enters or plays within the scene. These editor effects are separate from the movement generated inside the clip.
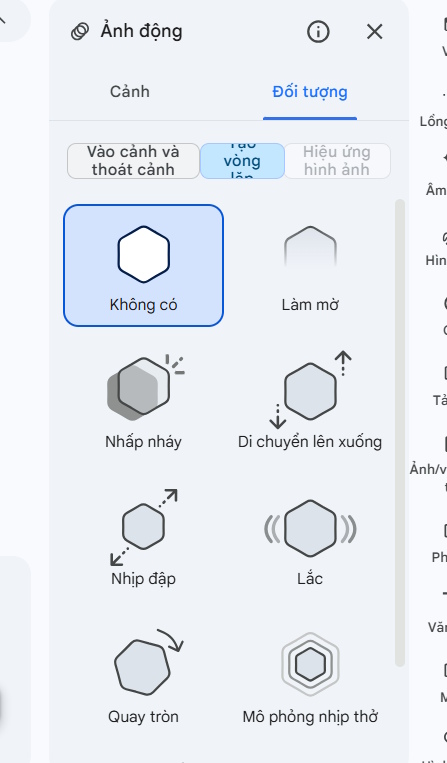
Avoid combining a large entrance effect with strong camera movement unless that serves the lesson. Play the surrounding scenes to check that the transition is comfortable to follow.
Method 2: generate a clip using reference images
1. Choose Create and add references
Choose Create in the AI video panel and add reference images through the available Ingredients control. Follow the limit shown in your interface. References guide a generated scene; uploading several images does not automatically make a slideshow or one separate scene per image.
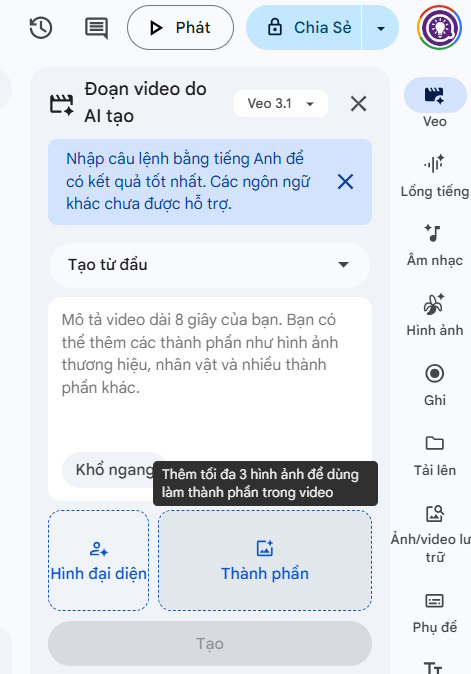
2. Describe one clear scene
Explain which subject or style each reference should contribute. Include the main action and any camera movement, but avoid a long sequence of unrelated events. For example:
Create a cheerful 3D animated classroom scene using the supplied character and classroom references. A friendly blue robot at the center slowly lifts a gift box. The children smile and raise their hands while the teacher nods. Use warm daylight and a gentle camera push-in. Keep the character designs consistent throughout the clip.This example focuses on a single action. Add exact instructional text later in the editor, where you can control spelling and readability, instead of depending on generated writing on a blackboard.
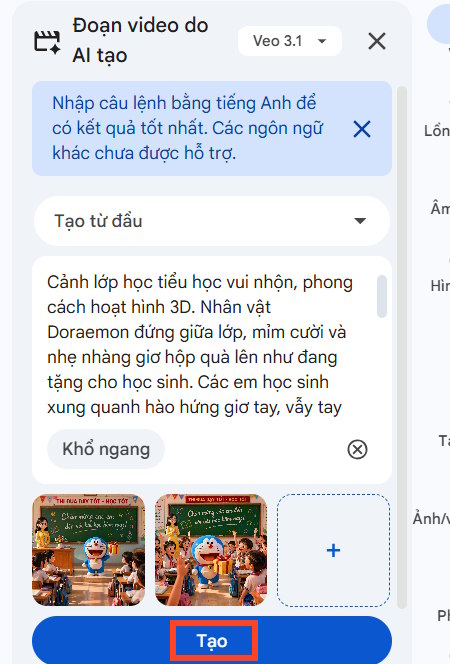
3. Review the result before adding it
Generate the clip, compare it with the references, and insert the version you want to keep. Check that subjects do not change appearance unexpectedly and that the action matches the prompt.
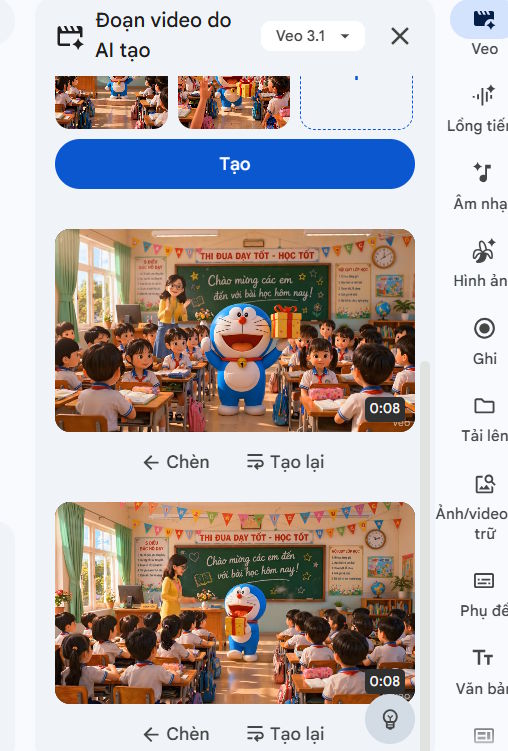
Finish the video and check it as a viewer
Insert useful clips before leaving the generation session, then arrange them with your titles, narration and other material. For the broader editing workflow, see creating a video presentation with Google Vids.
- Check whether each clip actually supports the intended explanation. AI imagery should not be presented as footage of a real event.
- Review any speech, sound and written labels for accuracy.
- Keep background audio low enough that narration remains clear.
- Watch the entire project, including transitions and the ending, before sharing.
If Vids does not offer the feature you need, compare the workflows in other AI video creation tools, checking each provider's current availability and terms before committing to one.
Related Articles
 How to Create an AI Avatar Video in Google Vids8 minutes read
 How to Add AI Background Music to Videos on Google Vids3 minutes read
 Guide to Using AI for Voiceovers in Google Videos5 minutes read
 New Feature Allows Editing Videos Directly on Google Drive Right4 minutes read
 Create Presentations with Google Vids8 minutes read
 How to Create AI Timelapse Videos9 minutes read
Reader Comments 0
Sign in with email or Google to join the discussion.