How to connect an MCP Server Filesystem to Claude Desktop
This guide provides detailed instructions on how to connect the MCP Server Filesystem to Claude Desktop, enabling AI to read and write files directly on your PC..
The Model Context Protocol ( MCP ) is ushering in a new era for large model languages (LLMs), enabling them to break free from the browser "box" and interact directly with real-world data.
Among these, the Filesystem MCP Server is one of the most useful tools, allowing Claude Desktop to read, write, create, and list files directly in specified folders on your computer. This connection not only saves copy-paste time but also makes Claude a valuable partner in data management and programming support. Let's explore how to set it up below.
Steps to connect MCP Server Filesystem to Claude Desktop
To begin, make sure you have Node.js installed on your computer, as we will be using the `node.js` command npx. If you don't have it yet, please download and install Node.js from https://nodejs.org .
Step 1: Open the configuration settings on Claude Desktop.
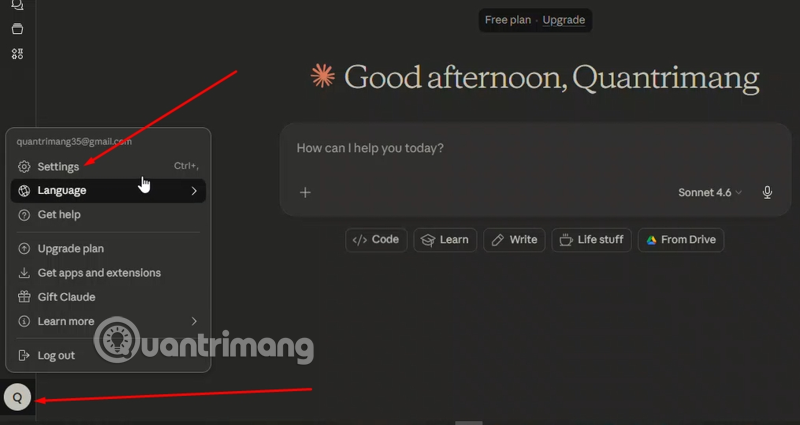
First, launch the Claude Desktop application. Click on your account name in the bottom left corner, then select Settings .
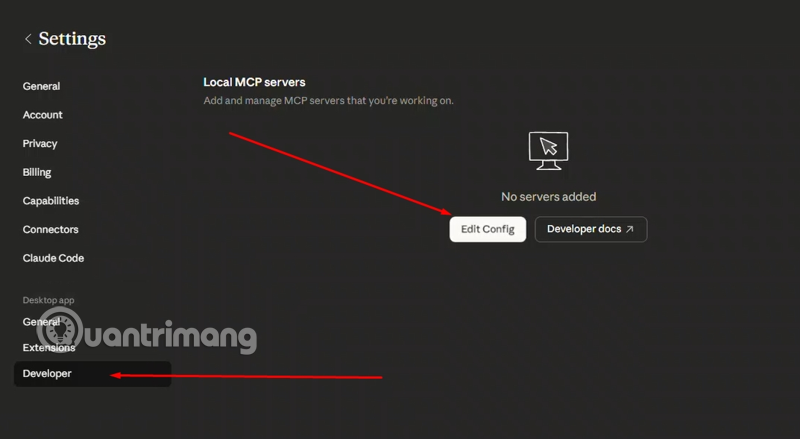
In the window that appears, select the Developer option in the left column, then click the Edit Config button .
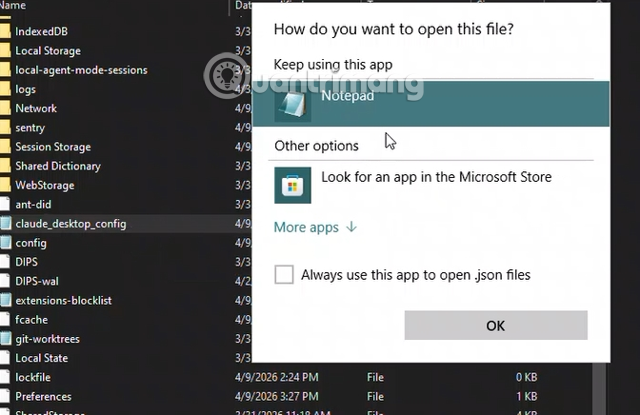
Step 2: Find the configuration fileclaude_desktop_config.json
After clicking Edit Config, the computer will open the folder containing the configuration file. You will see a file named claude_desktop_config.json. Right-click on this file, select Open with , and choose Notepad (or any code editor like VS Code) to start editing its contents.
Step 3: Add the Filesystem connection code
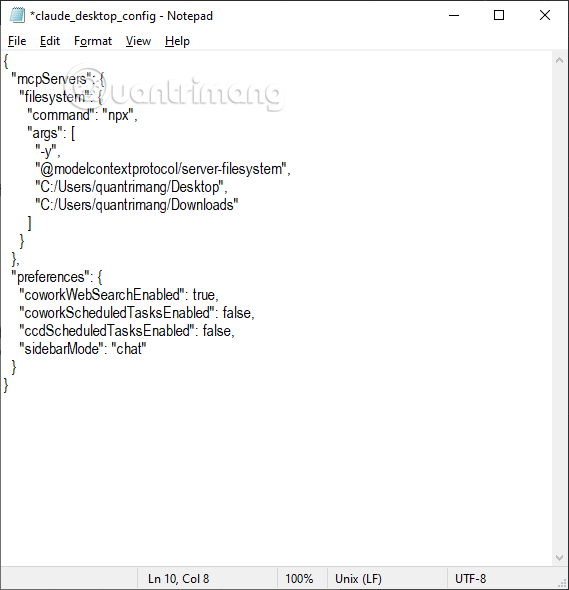
Depending on your operating system, copy the corresponding code below and paste it into the JSON file opened with Notepad above.
{ "mcpServers": { "filesystem": { "command": "npx", "args": [ "-y", "@modelcontextprotocol/server-filesystem", "/Users/username/Desktop", "/path/to/other/allowed/dir" ] } } }Important note: You must change the path /Users/username/Desktopto C:/Users/username/Desktopthe actual path to the folder you allow Claude to access.
This is when you have successfully saved.
Step 4: Save and Restart Claude
After pasting the code, press Ctrl + S (Windows) or Command + S (Mac) to save the file. Then, completely close Claude Desktop and reopen it; you can also close it completely using Task Manager .
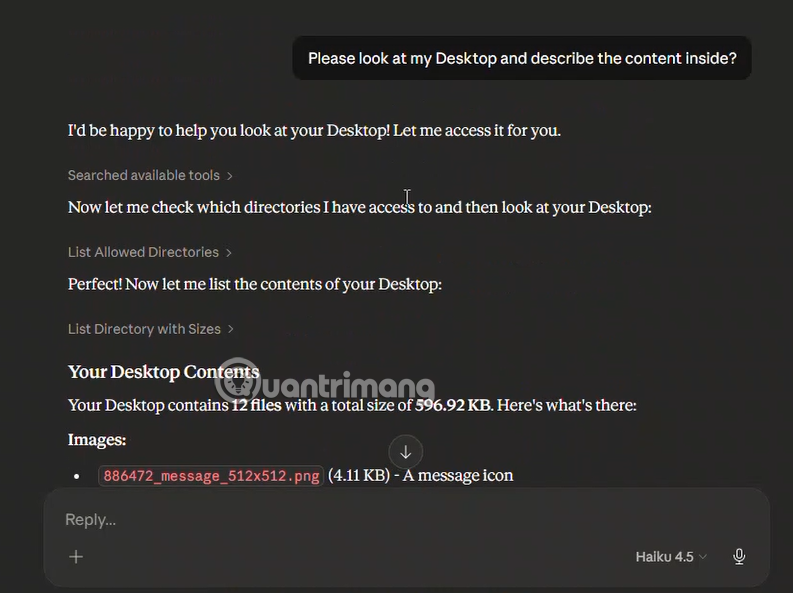
If the connection is successful, try an example command like "Please look at my Desktop and describe the content inside?". Using this command, you will see Claude list what is currently on your Desktop.
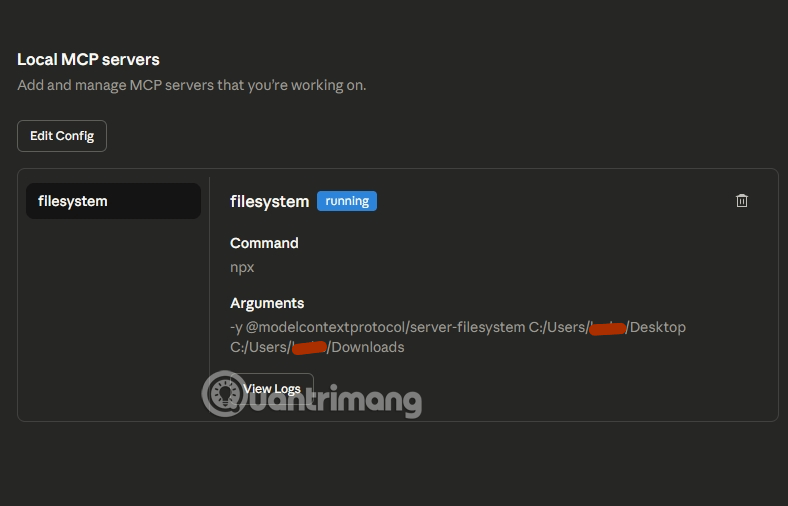
And when you go back to the Developer menu, you will see the currently running filesystem displayed as shown in the image below.
Why should you use a Filesystem MCP Server?
Granting AI access to the local file system offers tremendous flexibility. Instead of uploading each file to the chat window, you can simply request: "Analyze all log files in the Desktop folder" or "Create a new Python file named script.py in my project folder" .
This is especially useful for programmers who need to manage source code or data analysts who need to process a large number of files simultaneously while maintaining security within designated directories (Allowed directories).
Security precautions when granting Filesystem permissions to AI.
Although the Model Context Protocol is designed for security, you still need to keep a few principles in mind when configuring it:
- Limit the scope: It's best to only add the actual directory paths to the array
args. Don't grant access to entire drivesC:/or sensitive system folders. - Control write permissions: AI has the ability to delete or modify file contents. Therefore, always double-check requests before confirming to avoid unnecessary data loss.
- Execution monitoring: Always monitor the commands that the MCP Server executes through the console or logs if you are an advanced user.