Instructions on how to install MySQL on Windows 11 computers
Detailed instructions step by step to install MySQL on Windows 11. How to set up MySQL Server on the most complete Windows 11 computer
Table of Contents
As you all know, MySQL is one of the most affordable solutions for handling databases. And if you are doing a project that requires you to store and manipulate data, then MySQL is a database system that is very suitable for your needs.
So in this article, I will show you how to install MySQL on Windows 11 operating system so that you can do it yourself easily.
#first. Install MySQL Server on Windows 11
+ Step 1: First, to install and use MySQL on your computer, you need to install Microsoft Visual C ++ 2019 Redistributable first. You access the link here to download:
=> Then choose you 32bit or 64bit to suit the Windows platform you are using. You can see how to check if your Windows is 32bit or 64bit if you don't know yet!

+ Step 2: After downloading, double click on the downloaded file to proceed with the installation => an installation window will appear as shown below => select I agree to terms and conditions => and Click the Install button to perform the installation.
Maybe the User Account Control box appears, click Yes to agree.

You wait a moment for the installation process to finish, and after the installation is complete, click Close to close the program window. So you have successfully installed the Visual C ++ Redistributable package.

+ Step 3: Now we will install MySQL on the computer. You access your address below to access the official MySQL download page:
https://www.mysql.com/downloads/
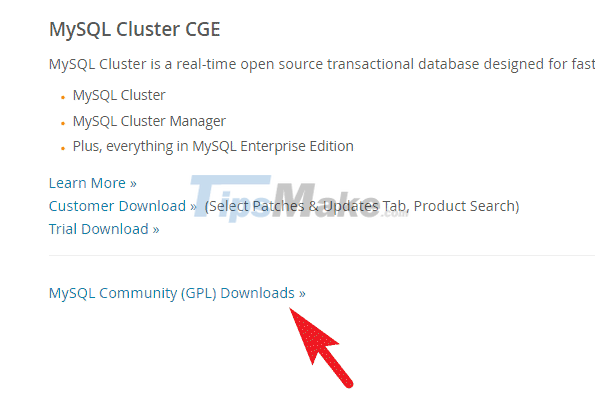
=> Then you scroll down => and click the MySQL Community(GPL) Downloads button to continue.
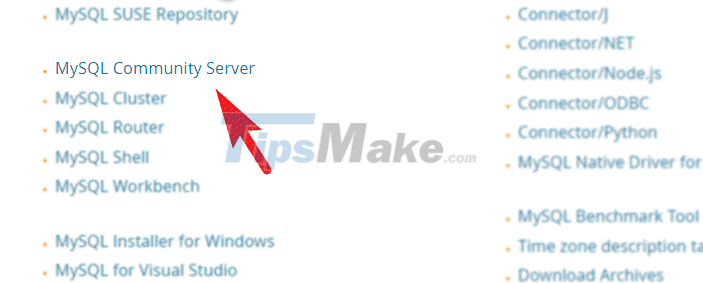
Continue, go to Community Downloads => click on the option MySQL Community Server to continue.
A new interface appears, choose Go to Download Page

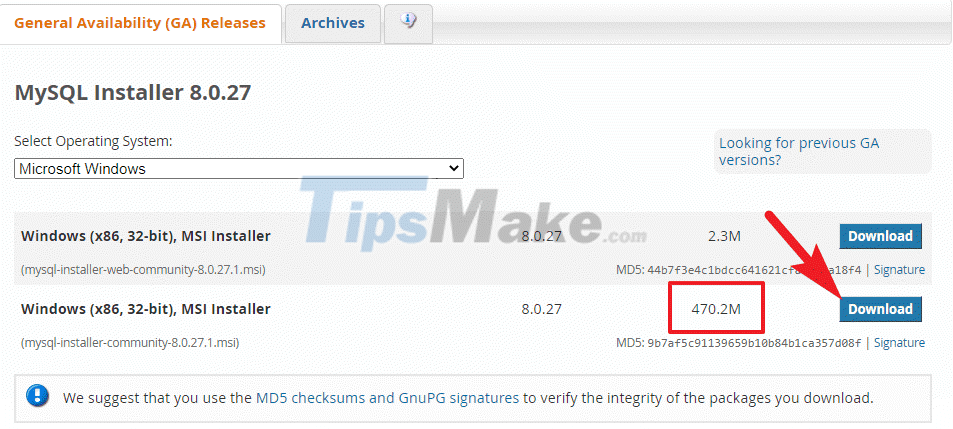
And click the Download button in the larger version.
You choose No thanks, just start my download to continue.

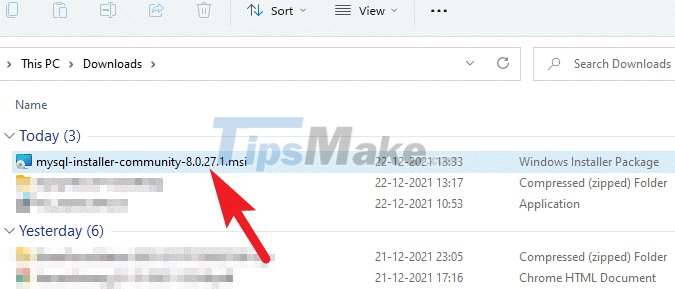
+ Step 4: Okay, now you have successfully downloaded the MySQL installer, double click on this file to proceed with the installation.
Wait a moment for the program to work with the computer system. Maybe the User Account Contro window will appear, choose Yes.

+ Step 5: Okay, now we will be taken to the installation setting of MySQL, with the following options:
- Developer Default: Select this option to install MySQL server and necessary tools for MySQL application development. Specifically, the settings include MySQL Shell, MySQL Router, MySQL Workbench, MySQL for Visual Studio, MySQL Connectors and MySQL Server.
- Server Only: Only install MySQL Server. Select this option when you want to deploy a MySQL server but not develop MySQL applications.
- Client Only: This option will install all the tools included in the Developer Default setup with the only exception of MySQL Server. Select this option if you want to develop an application for an existing server.
- Full: This option includes all MySQL products along with samples, examples, and documentation of the tools.
- Custom: With this option, you can manually set up all the tools, depending on your usage needs.
=> Please choose the type of setting that suits your needs, here I will choose Developer Default. If you want to set it up in a Custom style, you can refer to this article!

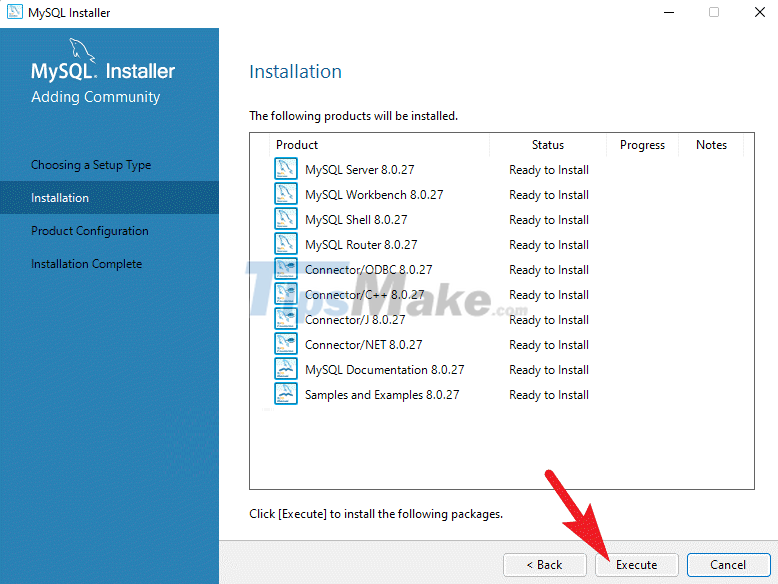
In the next interface, select Execute to start installing the selected tools.
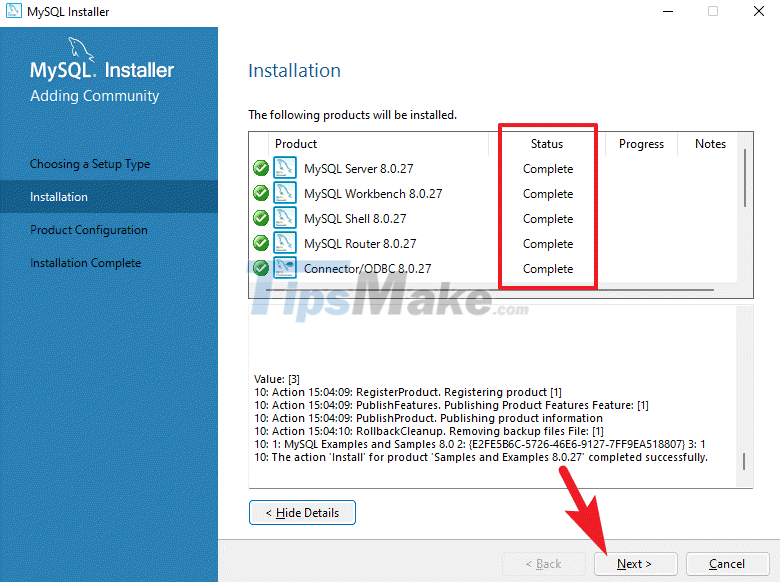
After the installation tools are successful, there will be a notification status as shown below, click Next.
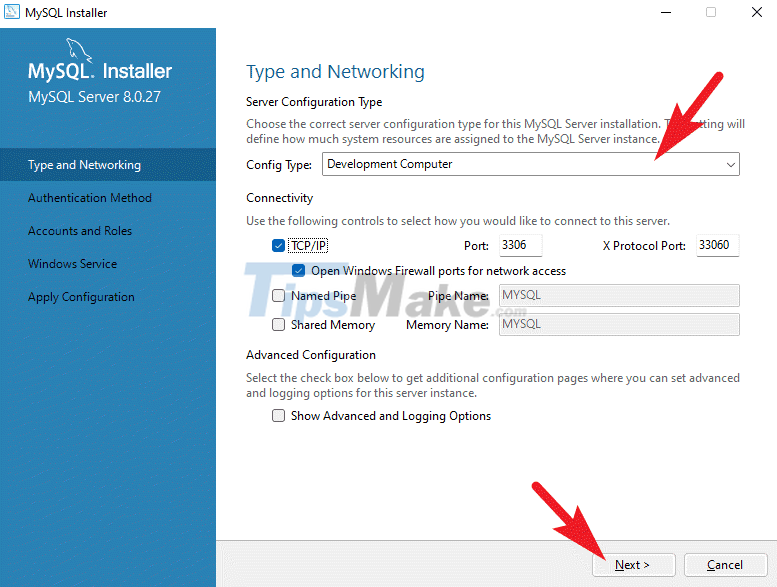
+ Step 6: In this step, we will choose the type of server on the computer. There are 3 styles for you to choose from:
- Development Computer: If you are running several servers and applications on your machine then this is the most suitable option for you, as MySQL uses the least memory of these 3 options.
- Server Computer: Choose this type of server when you are running some other server applications along with MySQL. Memory usage is moderate.
- Dedicated Computer: If you do not run any other server on the machine, select this option. At this point MySQL will maximize the available memory.
=> Please choose the type of server that suits your needs, if not sure, it's best to leave it as default => then click Next.
+ Step 7: If you are creating a new server, then check Use Strong Password Encryption for Authentication.
NOTE: If you already have applications that cannot use the SQL 8 connector and driver or recompiling the existing application is not possible, then select Use Legacy Authentication Method.

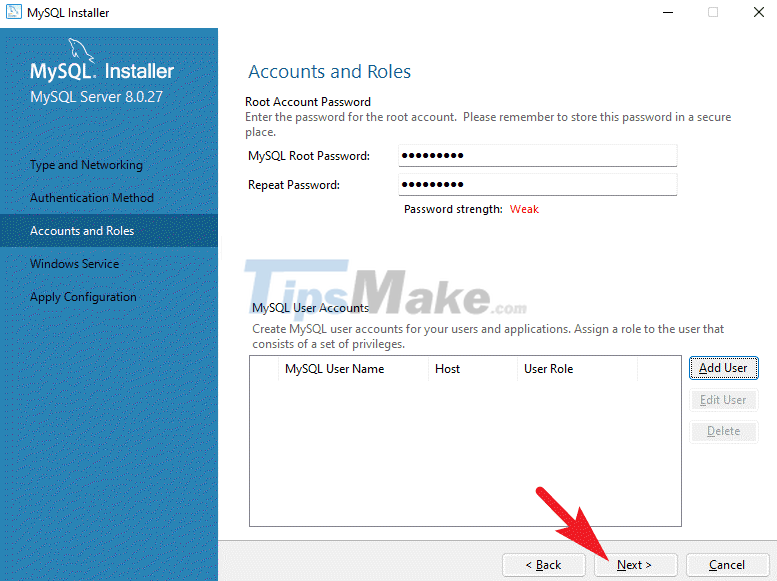
This is the step to create a password, enter the password. Alternatively, you can also click the Add User button to create a user account in this step.

If you want to create User Accounts, enter the user's name. You can set up similar to the image below.
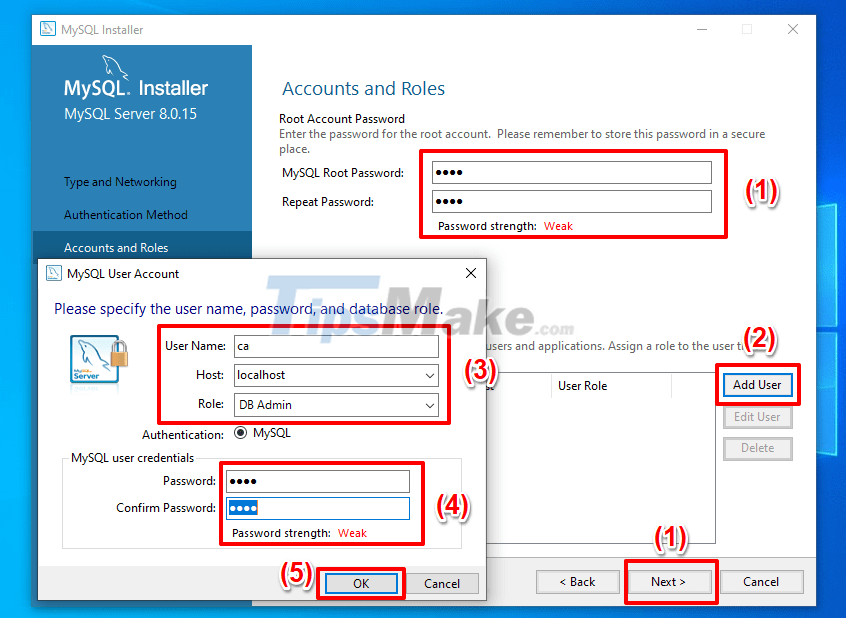
In case you don't want to create a User yet, click Next to move on to the next step.
+ Step 8: At default setting, SQL Server will run as Windows Service suitable for most cases.
In case you don't want to run it as a Windows Service, uncheck Configure MySQL Server as a Windows Service and configure it yourself in the following steps. If you are not familiar with the settings, then I think you should leave the default.

In addition, you can:
- Windows Service Name: Rename the server instance.
- Start the MySQL Server at System Startup: Check this option if you want to start MySQL with the system.
=> Then you click Next to continue.

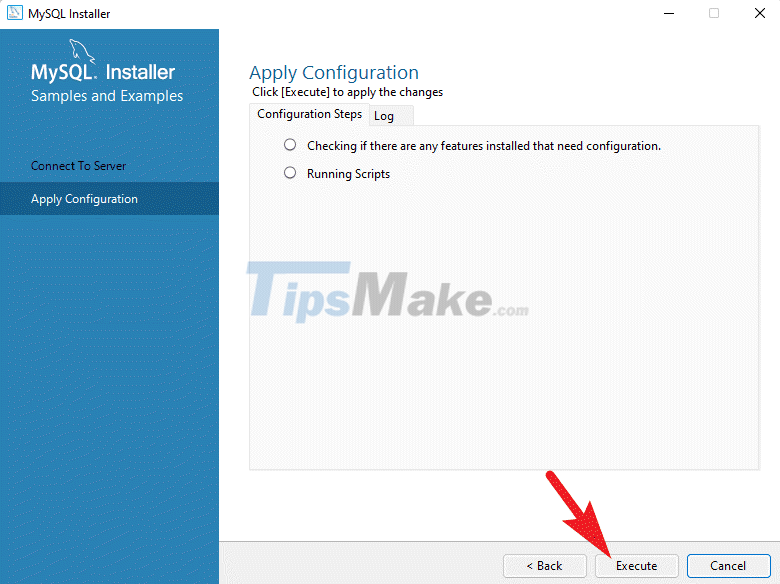
You select Execute in the next window to apply the configuration settings.

+ Step 9: In this step is to configure MySQL Router. If you do not need to use it, just uncheck the line Bootstrap MySQL Router for use with InnoDB cluster => and click Finish.

On the next screen, select Next

At the Connect to Server screen, enter the password you set in the previous step in the Password box => then click Check to check.

If ok, the status will be displayed as shown below.

You click the Execute button on the Apply Configuration screen
Then you choose Finish

At the Product Configuration screen => you choose Next

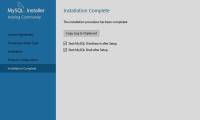
Thus, the process of installing MySQL on Windows 11 is complete. Click Finish to close the installation window.

#2. Conclude
So I have finished showing you how to install MySQL on Windows 11. All in all, it's not complicated at all, right?
Was this article helpful?
Your feedback helps us improve.
Related Articles
 Instructions for installing MySQL on Windows and remote access8 minutes read
 How to install MySQL Workbench Community Edition on Windows 105 minutes read
 How to install MySQL on Ubuntu 20.0414 minutes read
 How to install and configure MySQL server on Pi6 minutes read
 How to Install the MySQL Database Server on Your Windows PC9 minutes read
 Backup and restore MySQL with mysql-zrm on Debian Sarge23 minutes read
Reader Comments 0
Sign in with email or Google to join the discussion.