How to create USB BOOT to install Windows 11 from standard ISO file using Rufus
How to create Windows 11 installation USB with Rufus from ISO file? How to install Win 11 ISO using USB Boot, the latest operating system version from Microsoft? If you don't know where to start or how to do it, please refer to the instructions on how to create a USB BOOT to install Windows 11 with Rufus from Taimienphi's latest standard ISO file.
Similar to other versions, to install Windows 11 using USB we first need to create a USB Boot, this USB will contain the Win11 operating system that needs to be installed into the system instead of using a disc as usual, for For experienced technicians, creating a USB to install Windows 11 using Rufus is said to be the fastest and safest solution.
What do you need to prepare to install Windows 11 using USB?
- Preview whether the Windows 11 installation configuration is appropriate.
- USB with 15GB free capacity , does not contain important data
- Latest Windows 11 ISO version: Download Windows 11 64 Bit
- Download Rufus 4.3 to support creating USB to install Windows 11 here.
Instructions for creating the fastest USB to install Windows 11
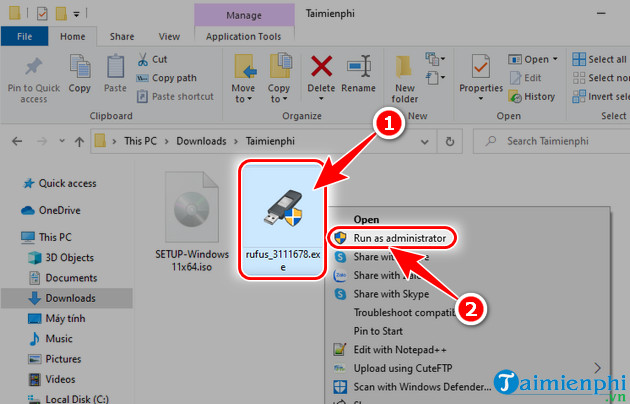
Step 1: Right-click Rufus and select Run as Administrator .
Step 2: At the Rufus interface , select USB to create Windows 11 installer at Device .
- Note: Remember to plug the USB into the computer for the software to recognize the installation drive

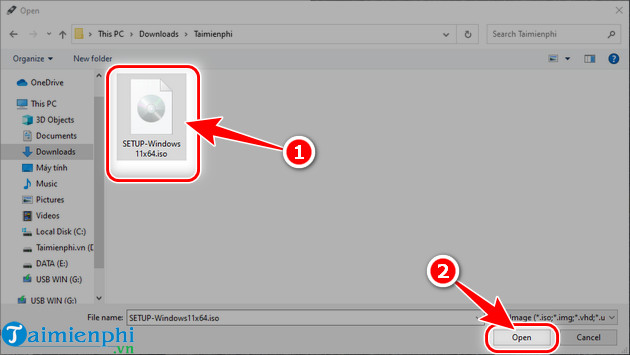
Step 3: Click Select to find the location containing the Windows 11 installer => select the Windows 11 ISO file and click Open .

How to create Windows 11 installation USB with Rufus
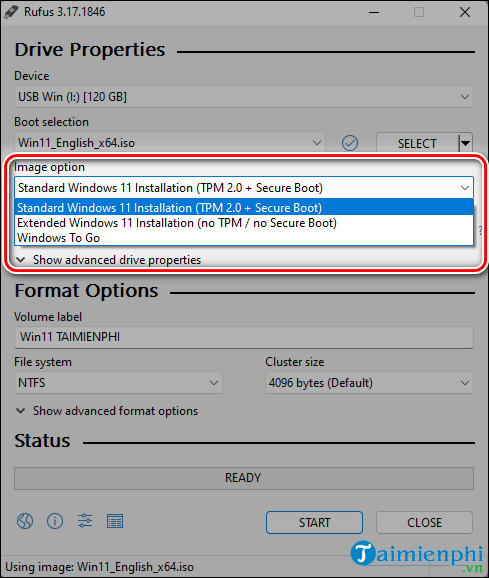
Step 4: This step is quite important, depending on the method you choose.
- Select Stardard Windows 11 Installation (TPM 2.0, Secure Boot) : Create a USB to install Windows 11 with TPM 2.0 using Rufus
- Select Extended Windows 11 Installation (no TPM/ no Secure Boot) : Create a USB to install Windows 11 bypassing TPM 2.0 using Rufus
Step 5: Next, choose as shown below
- Partition scheme: Select MBR
- Target system: Select BIOS (or UEFI-CMS) => allows you to install Windows on both formats of computer and laptop hard drives

Step 6: Name your Windows 11 installation USB at Volume Lable .
- Suggestion: You should name it in the most meaningful way (eg USB Cai Win 11 Taimienphi).

Step 7: At the File System tab, select NTFS => click Start .

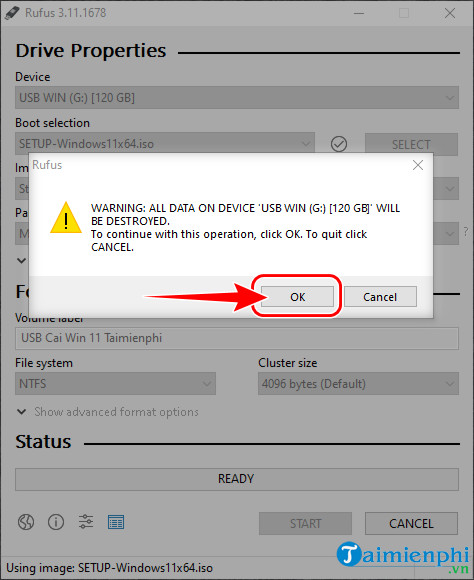
Step 8: Click OK to start the process of creating a USB to install Windows 11.
- Note: After clicking OK, all data available in the USB will be completely erased, you should copy the data to avoid loss and irretrievability.
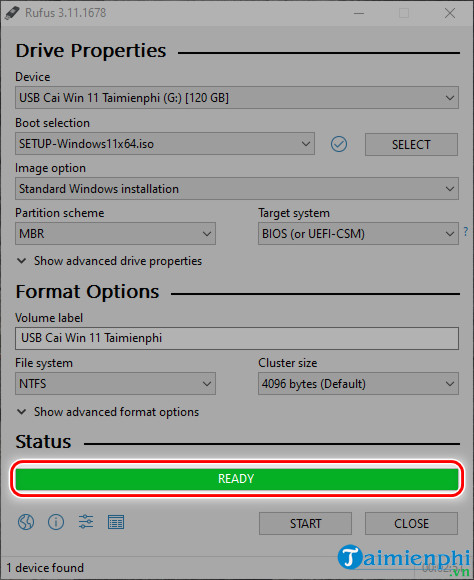
The process of creating a USB to install Windows 11 is complete, you will receive a green READ message like the illustration below.
After successfully creating a USB Boot to install Windows 11 ISO, you can immediately refer to how to install Win 11 in the tutorial below to experience the new features that Microsoft has integrated in Windows 11.
Above are all instructions on how to create the simplest and fastest USB to install Windows 11 today. If you have any questions during the process of creating a USB drive to install Windows 11, don't forget to leave them below in the comments section. Taimienphi will answer all your questions as soon as possible. In case you don't have a USB, don't worry, please refer to how to install Win 11 without USB here.
- How to create USB Boot, USB install Windows by Rufus
- How to create Windows 10 installation USB using Rufus, Boot UEFI and LEGACY
- How to create USB Boot to install Windows 10 with Rufus
- How to create USB Boot, create a Windows installation USB with Rufus is simple and effective
- Instructions for creating UEFI standard USB boot using Rufus software
- Download Rufus 3.13: Utility to create bootable USB open source, free
- How to create a standard USB BOOT to install Windows 10 on both UEFI and LEGACY
- Fix ISO image extraction failure when creating USB Boot with Rufus
- When do you need to create a USB Boot to install Windows using Rufus?
- It is possible to create a USB to install Windows 11 on an unsupported machine with Rufus
- Steps to change Taskbar position on Windows 11
- Download Ghost Windows 11 Pro Full Soft v1.0 Best New Standard 2021
- How to report Windows 11 errors, suggest Windows 11 features for Insider Preview users
- List of MSI motherboards that support Windows 11
- Steps to open Local Security Policy on Windows 10, Windows 11
- How to use Explorer Patcher, a tool to bring Windows 10 Taskbar to Windows 11
- How to bypass TPM 2.0 requirement when installing Windows 11?
- Download Ghost Windows 11 Pro No Soft v1.0 2021
- How to disable Sleep mode on Windows 11
- How to open multiple images side by side for comparison on Windows 11
-
 Table of common BSOD error codes on Windows 11 and Windows 10
-
5 ways to fix Wi-Fi disconnection issues on Windows 11 laptops.
-
Windows 11 Error Code Table and Most Common Issues When Updating Windows
-
Useful AI features in Windows 11
-
Laptop displaying a blue screen: Causes and effective solutions.
-
How to quickly split the screen on a Windows 10, 11, and macOS laptop.
 Table of common BSOD error codes on Windows 11 and Windows 10
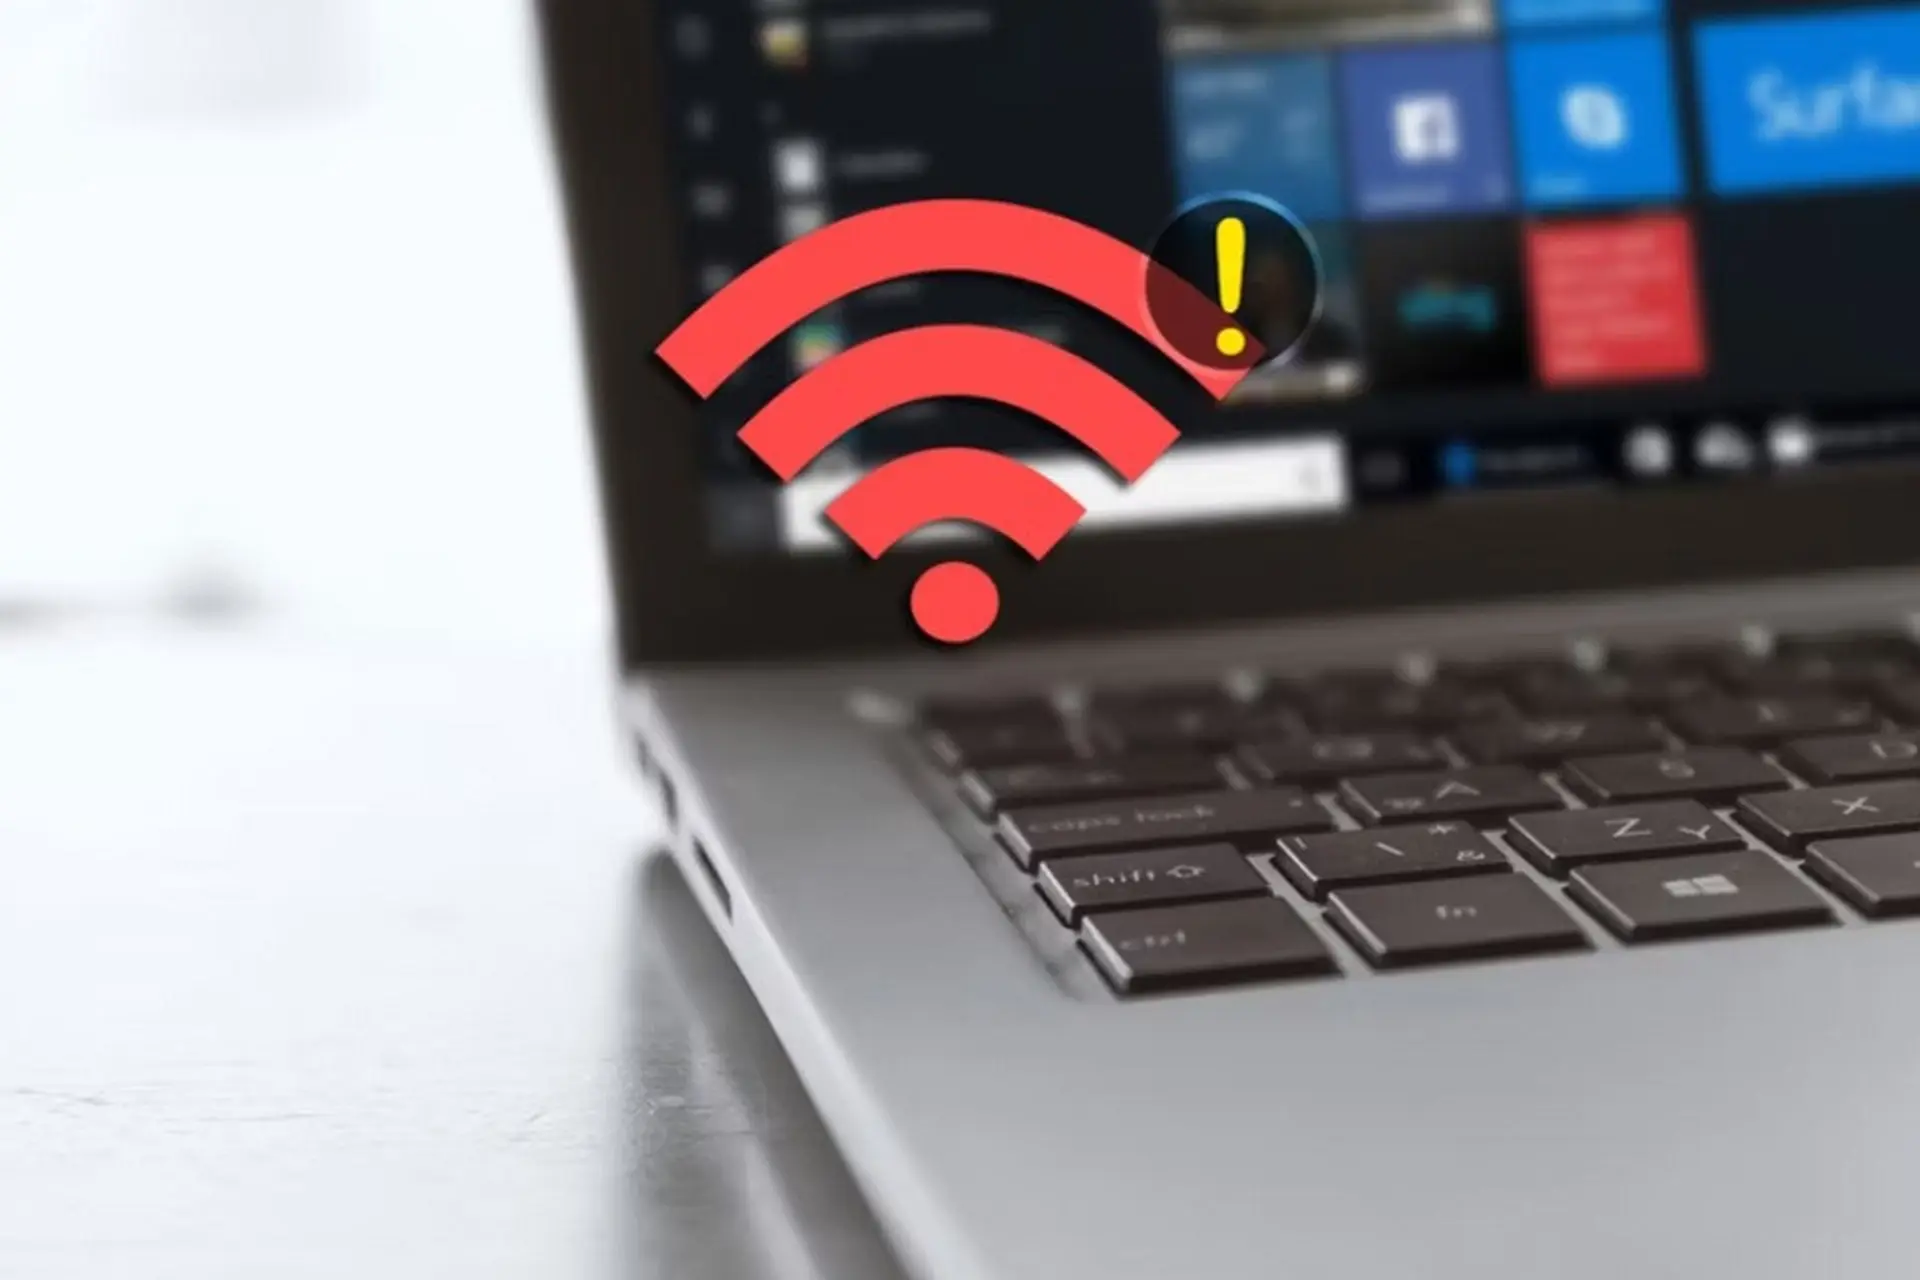 5 ways to fix Wi-Fi disconnection issues on Windows 11 laptops.
 Windows 11 Error Code Table and Most Common Issues When Updating Windows
 Useful AI features in Windows 11
 Laptop displaying a blue screen: Causes and effective solutions.
 How to quickly split the screen on a Windows 10, 11, and macOS laptop.