Insert images, logos, text in Excel 2010, 2013, 2016
In the process of creating an Excel file, you want to create your own personal identity or copyright, you can create text or logo sink. The following article details how to insert Text, logo sunk in Excel..
In the process of creating an Excel file, you want to create your own personal identity or copyright, you can create text or logo sink. The following article details how to insert Text, logo sunk in Excel 2013, with Excel 2007, 2010, 2016 you can do the same.
1. Insert immersive Text in Excel 2013
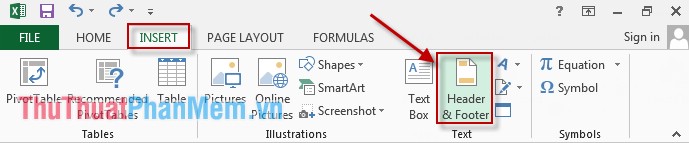
Step 1: Go to the Insert tab -> Header & Footer .
Step 2: Enter the text you want to create text in -> black out and select Font and font color, so choose a light gray color. Notice where you want the text to be located on the file can use the Enter key and align them to the position you want.

Result:

2. Insert logo sunk in excel 2013
Step 1: Go to the Insert tab -> Header & Footer .

Step 2: Click to select the DESIGN tab -> Picture .

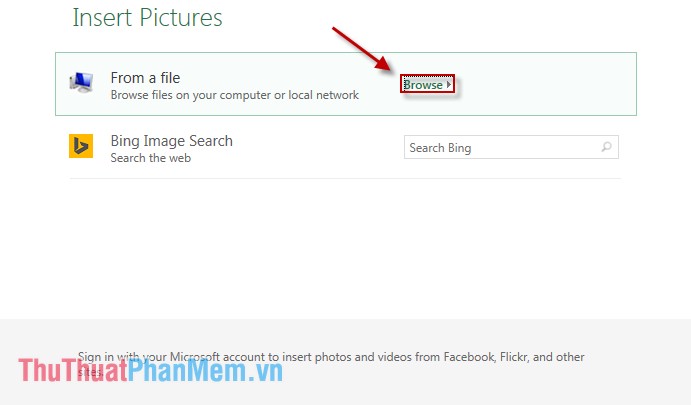
Step 3: A dialog box appears, you can choose photos or logos directly on your computer or search on google. Here take the image directly on the machine, click Browse :
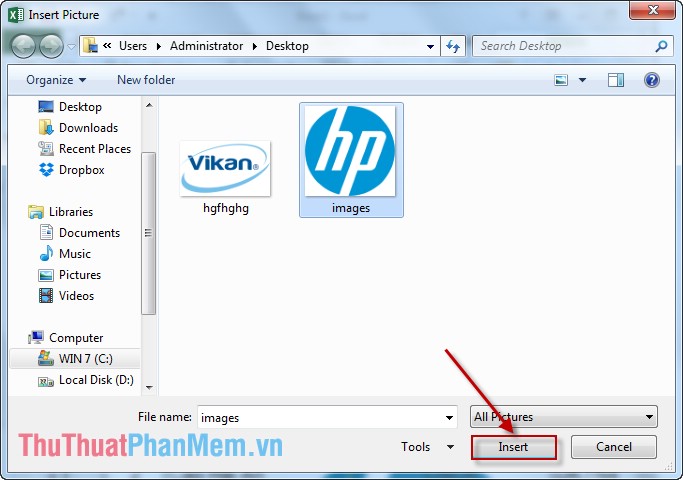
Step 4: The dialog box appears image selection -> Insert .
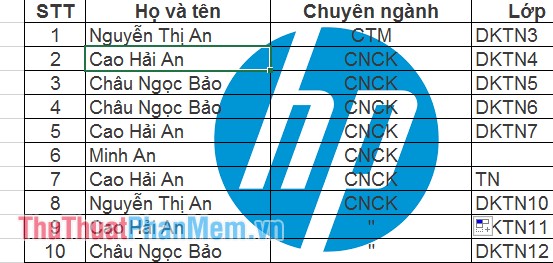
Align the position of the resulting image:
Step 5: You can blur or hide the image under the text by the following.
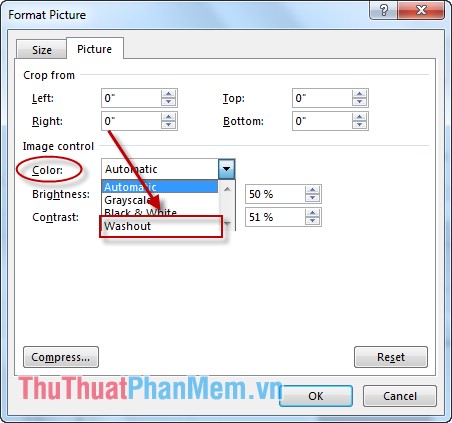
Click the DESIGN tab -> Format Picture .

Step 6: A dialog box appears, select the Picture tab in the Color section, select Washout -> OK .
Result:
So depending on the job and ask you to choose accordingly. Good luck!