How USB ports turn your router into the ultimate backup hub
You can plug more than just Ethernet cables into the back of your router. Most modern routers have USB ports on the back, making them the perfect backup hub for your home..
You can plug more than just Ethernet cables into the back of your router. Most modern routers have USB ports on the back, making them the perfect backup hub for your home.
You can plug a USB storage device into the router.
Depending on the make and model of your router, your router's USB port may support external USB flash drives or even hard drives , as long as they use file systems like FAT32, NTFS, or exFAT. While there are many devices you can plug into your router's USB port, the primary purpose is usually USB storage.

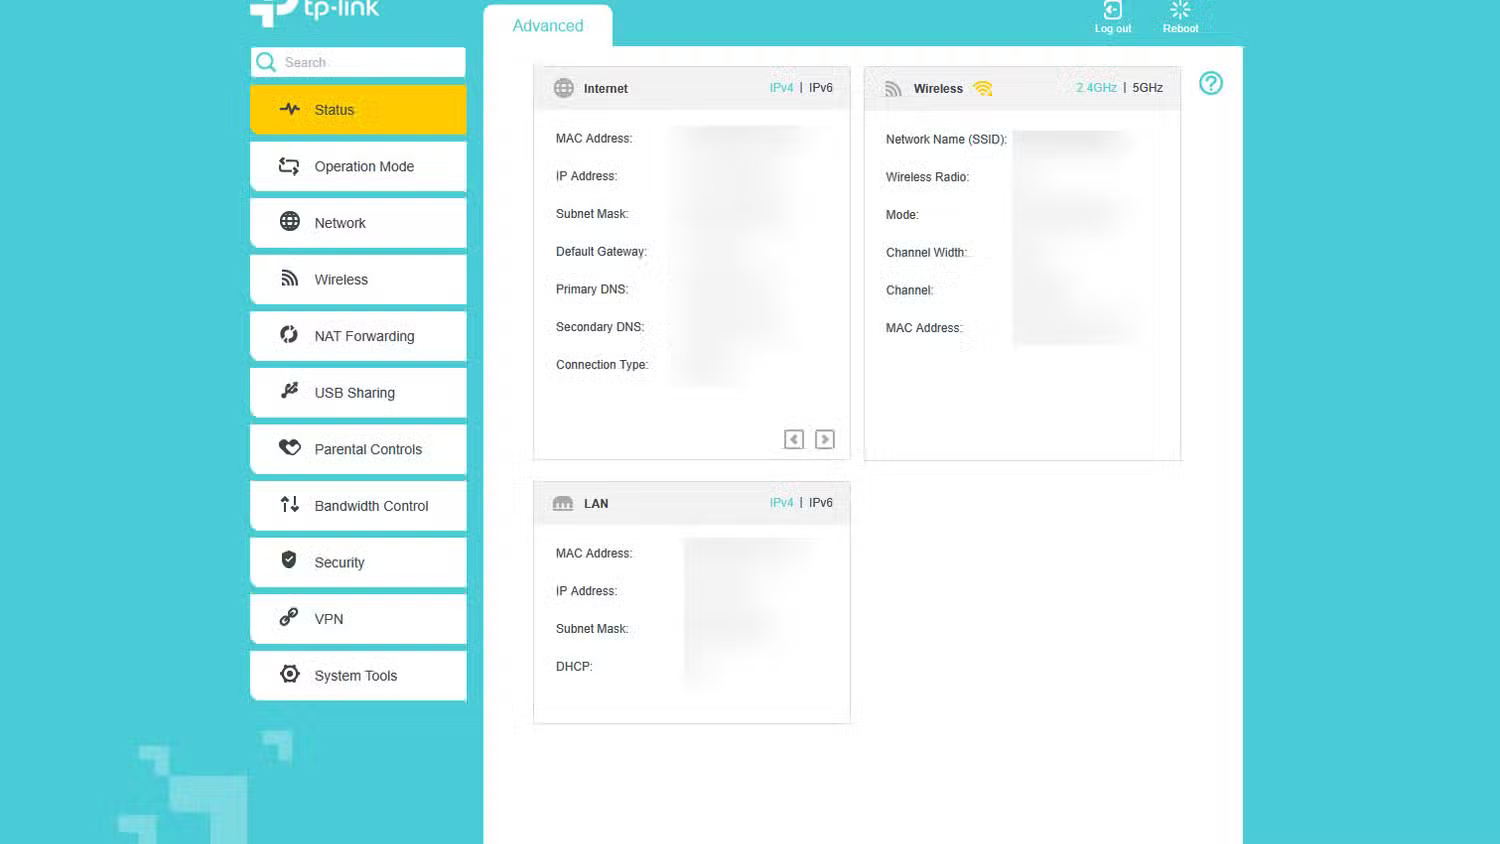
Setup is simple. Just plug the USB into your router's USB port, go to your router's admin page, and enable the feature (it may be under USB Application or similar). You can usually access your router's firmware by typing the router's local IP address , such as 192.168.1.1, into your browser's address bar.
You'll usually find your login information and default IP address on a label on the back of your router, but you should change this if you haven't already. Your router's beginner's guide will explain more if you need help logging in.

Once set up, your drive will appear as a network drive on Windows or macOS. For Android, iPhone, and other devices, you can use a third-party FTP-compatible file explorer (like FTPManager on iPhone or Solid Explorer on Android) to access the files. You can even set up your router to allow access to the drive over the internet , which may be in the same settings menu if available.
How to Turn Your Router into a Backup Solution
To set up a USB storage device on your router, first format the storage drive to a supported file system. We recommend using NTFS, as it works with most drives of any size and most routers, but you can check your router's manual for more information.
I'm using an 8GB NTFS formatted USB flash drive with a TP-Link Archer C5 router. The exact steps may vary depending on your router make and model, but the general process is the same:
- Plug the USB into the router's USB port and open the administration interface in a browser (e.g. 192.168.0.1 ).
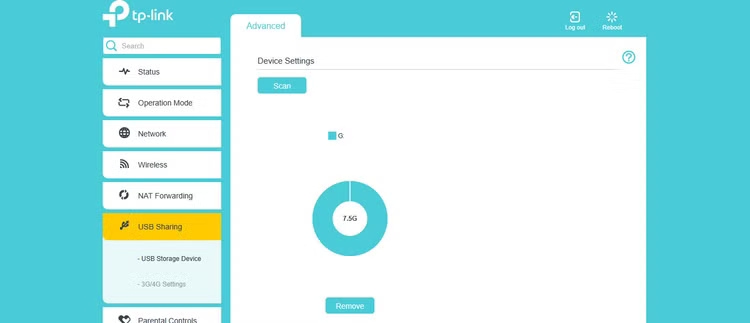
- Once opened, click on the USB Sharing tab .
- In Device Settings , click the Scan button to make sure your router detects the USB drive.
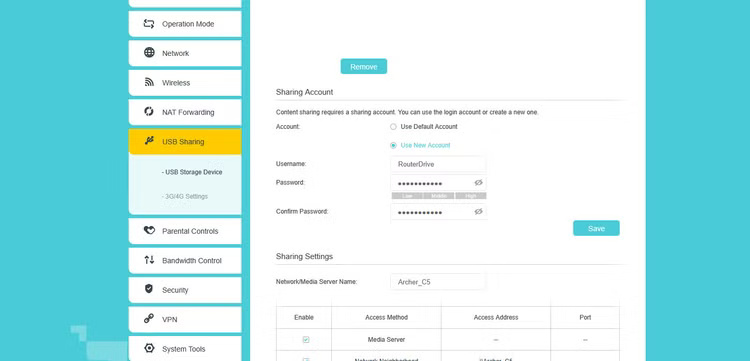
- Under Sharing Account , select the Use New Account option . Enter a username and password for the new account and click Save . You can use the default account (the same as your router's login information) if you're using the storage yourself. However, if you're sharing this storage or want to share it over the Internet, you should use a dedicated account.
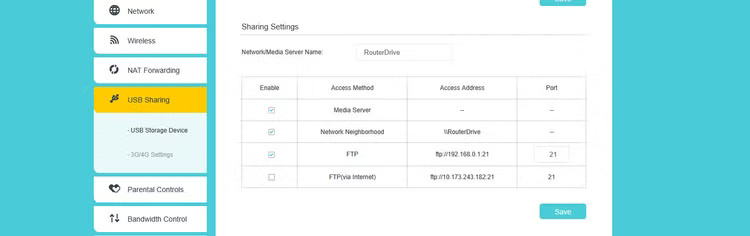
- In Sharing Settings , make sure Media Server , Network Neighborhood , and FTP Server are enabled. If you want the drive to be accessible over the Internet, enable FTP (via internet) . You can also change the media server name by editing the Network/Media Server Name field .
The USB drive is now accessible via your router's Wi-Fi or Ethernet connection. There are a number of ways to access the drive, but FTP is the most reliable. If you're using Windows, follow these steps:
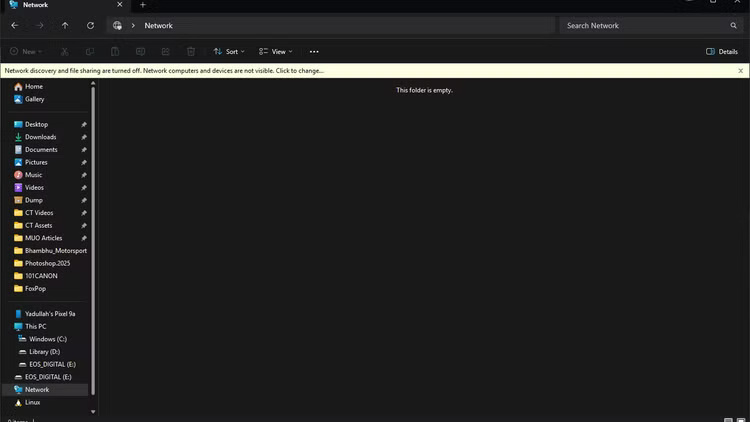
- Open File Explorer and click on the Network option in the left panel.
- You will be prompted to turn on Network discovery and file sharing . Click the prompt to do this.
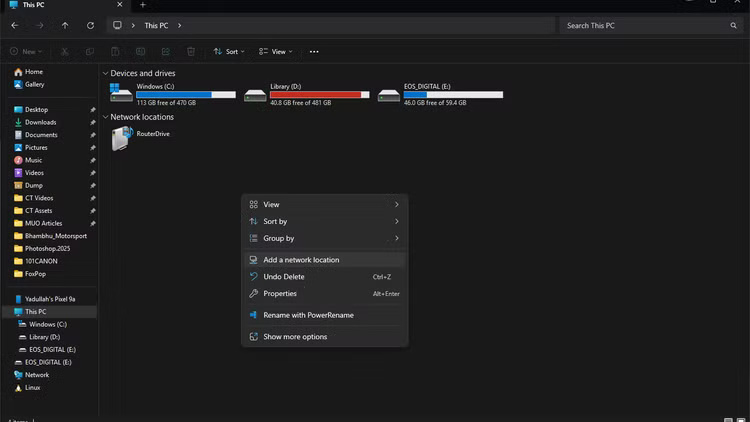
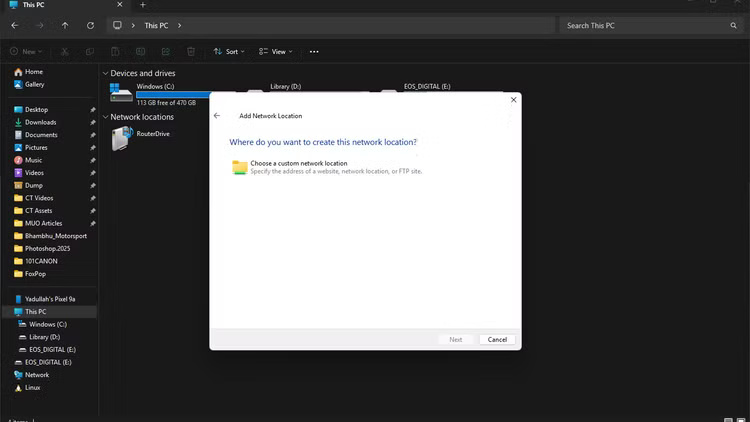
- Back in This PC , right-click any empty space and select Add a network location .
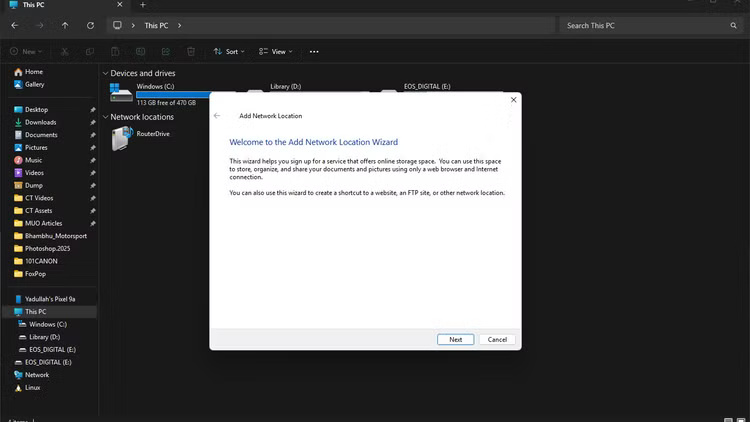
- Click Next on the Add Network Location wizard .
- Select Choose a custom network location . Click Next to continue.
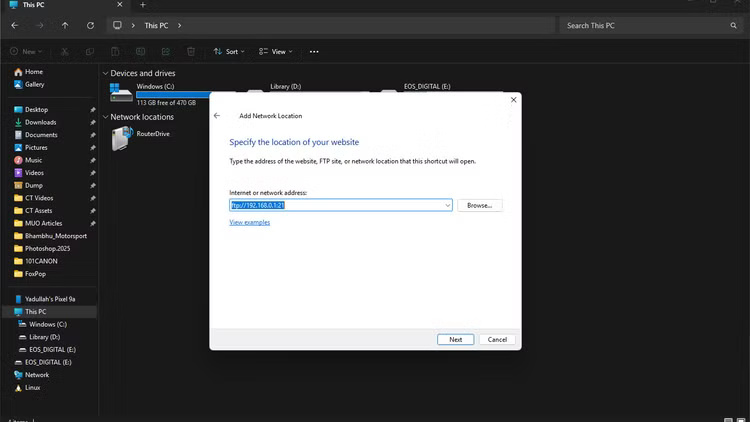
- Enter the drive address, which you'll find in the sharing settings on your router's admin interface. By default, this is your router's local IP address, followed by the FTP port. If you haven't changed it, for example, the drive address would be ftp://192.168.0.1:21 .
- On the next screen, uncheck the Log on anonymously option and enter the username you created for the shared account on the router.
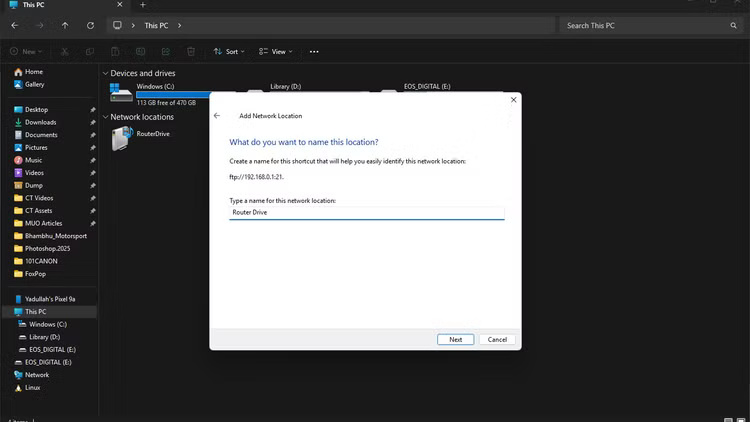
- Enter a name for the drive and click Next . Click Finish on the next screen.

You should now be able to access the drive without any problems. If prompted, enter your password and you're good to go.
Using a USB port on your router to create a storage drive that's accessible from all your devices in your home is a quick and convenient way to clone your NAS, whether for file sharing or backup. It may not be the fastest way to share files across your network, but it's easy to set up, doesn't require you to spend extra money on hardware, and can be a great way to quickly back up your files.