Table of Contents
This guide explains how to set up Port Forwarding on Netgear Router, with clear steps, practical tips, and important checks before you begin.
How to set up Port Forwarding on Netgear router
Step 1 : Log into the Netgear router via the default gateway address.
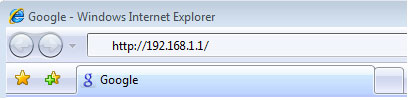 Log into the Netgear router
Open a web browser and enter the router's IP address ( 192.168.0.1 by default) into the address bar. Enter the username ( admin by default) and then the password (leave blank by default).
Step 2 : Navigate to Port Forwarding / Port Triggering on the left navigation bar and select Port Forwarding. Select HTTP from the Service Name drop-down list .
 Select HTTP from the Service Name drop-down list
Step 3 : Select Add Custom Service .
Step 4: Enter information in the Service Name, Starting Point, End Point and IP Address sections. Then click on Apply.
- In Service Name, enter a name.
- In Service Type, select TCP / UDP.
- In Starting Port, enter the port number (Example: 8090 ).
- In Ending Port, enter the port number (Example: 8090 ).
- In Server IP Address , enter the IP address (for example, 192.168.1.5 ).
- Click on Apply.
 Enter information in the Service Name, Starting Point, End Point and IP Address sections
You may need to restart the router for the changes to take effect.
You can check whether the port was successfully forwarded at:
https://www.yougetsignal.com/tools/open-ports/ Check whether the port was successfully forwarded or not
You can now connect to your device via a web browser. Just enter the server name followed by the port number in the address bar. For example:
http://hostname.ddns.net:8000Note : If you are using a mobile application, you only need to use your hostname to connect. The application will specify the port when attempting to make the connection.
How to disable Port Forwarding in NetGear router
To stop Port Forwarding, you can delete the specified rules. This allows the Netgear router to use the default settings for the ports or you can choose to disable them and easily re-enable them in the future.
Step 1: Launch the web browser and type 192.168.0.1 in the address bar. Enter Netgear username and password to login.
Step 2 : Click Port Forwarding in the Advanced section .
Step 3 : Uncheck the Enable box next to each Port Forwarding rule you want to disable. If your Netgear model does not provide the Enable checkbox , the disable option will be in the Edit Service menu . Or, select the rule and click Delete.
Step 4 : Click the circle next to the Port Forwarding rule you want to disable and click on Edit Service. Clear the checkmark next to Enable and click Apply. Or, select Block Always from the Action drop-down menu .
Step 5: Click Apply Changes to disable Port Forwarding.
FAQ
What should I know about Set up Port Forwarding on Netgear Router?
Focus on the key features, requirements, limitations, and practical use cases explained in this guide.
How do I get the best results with Set up Port Forwarding on Netgear Router?
Follow the recommended steps, use current software or information, confirm compatibility, and review settings before major changes.
Are there any risks or limitations?
Potential limitations depend on compatibility, data quality, cost, privacy, support, and how the product or method is used.
Related Articles
 6 Simple Steps to Install Port Forwarding on the Router17 minutes read
 How to Set Up Port Forwarding on Draytek Router5 minutes read
 How to Set Up Port Forwarding on a Router10 minutes read
 What Is Port Forwarding?14 minutes read
 Top 5 Best Netgear Routers Today7 minutes read
 How to Set up Port Forwarding in Windows5 minutes read
Reader Comments 0
Sign in with email or Google to join the discussion.