Instructions to turn on automatic backup on Zalo
When you turn on automatic backup on Zalo, all messages are automatically saved without you having to perform manual backups.
The backup and restore feature on Zalo makes it easy to save all personal data, especially the messages of your Zalo account. When you change devices or log in to your Zalo account on your computer or in another device, the message content is immediately synchronized. When you turn on automatic backup on Zalo, all messages are automatically saved without you having to perform manual backups. The following article will guide you to turn on automatic backup on Zalo.
How to turn on automatic backup on Zalo
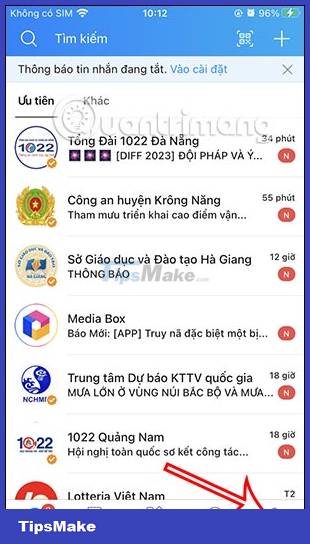
Step 1:
At the application interface on Zalo, users click on the Personal item in the bottom corner below the screen. Next switch to the new interface, click on the gear icon in the top right corner.

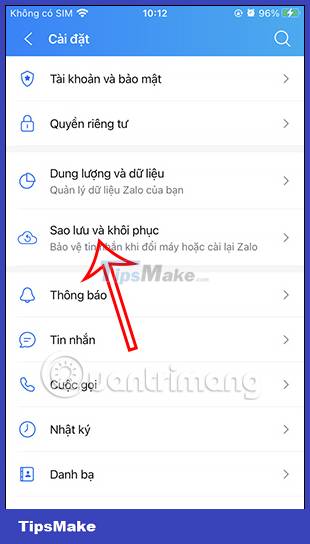
Step 2:
Switch to the interface of settings for the Zalo account, we click on the Backup and restore feature to set up automatic backup mode.
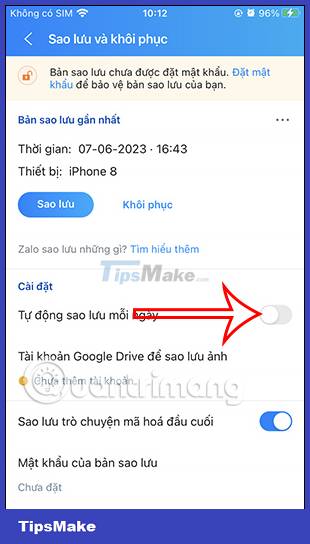
Step 3:
Now you will see the settings for the backup and restore feature on Zalo. Here, please enable Automatic daily backup to perform. Next, below shows more network conditions settings when performing automatic daily backups on Zalo.
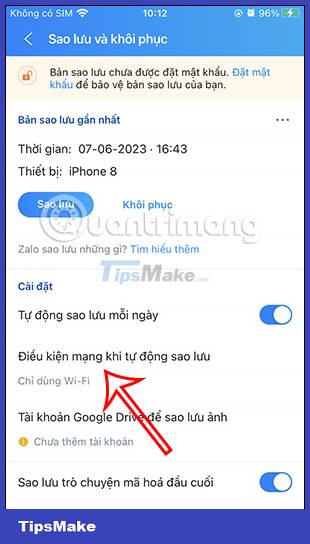
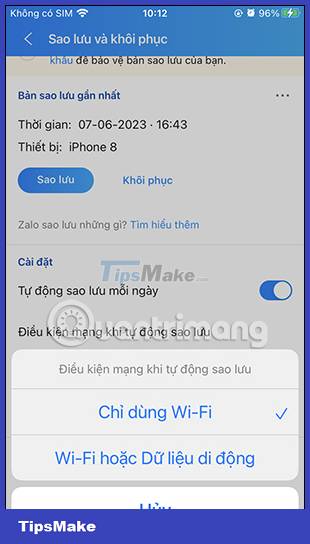
Step 4:
Now we will choose the type of network to use for the Zalo application when performing automatic backups. You should choose to use WiFi to limit the use of data data when your Zalo messages are many, especially with media files.
- How to backup and restore Zalo messages on Android phones
- Instructions to turn off notifications on Zalo effectively
- Instructions to review old messages on Zalo
- How to turn on automatic registry backup in Windows 10
- 2 steps to backup Zalo messages on your computer
- How to backup and restore messages on iPhone Zalo
- Instructions on how to delete the update of contacts on Zalo
- How to turn off log notifications and moments on Zalo
- How to permanently delete your Facebook account on your phone and computer.
- How to block YouTube channels on all devices
- How to enable the avatar shield to protect your Facebook profile.
- How to download TikTok videos to your computer or phone.
- How to unarchive Messenger messages on your phone and computer.


-
 How to enable the Discover Friends feature on Zalo (latest version)
-
How to download Zalo PC and log in to Zalo on your computer.
-
How to delete a Zalo account on your phone, cancel the deletion of a Zalo account.
-
Instructions on how to update your status on Zalo
-
Instructions for inserting song lyrics into photos on Zalo
-
Instructions for quickly scanning QR codes in photos on Zalo
 How to enable the Discover Friends feature on Zalo (latest version)
 How to download Zalo PC and log in to Zalo on your computer.
 How to delete a Zalo account on your phone, cancel the deletion of a Zalo account.
 Instructions on how to update your status on Zalo
 Instructions for inserting song lyrics into photos on Zalo
 Instructions for quickly scanning QR codes in photos on Zalo
-
Application
-
Web Email
-
Website - Blog
-
Web browser
-
Support Download - Upload
-
Software conversion
-
Social Network
-
Simulator software
-
Online payment
-
Office information
-
Music Software
-
Map and Positioning
-
Installation - Uninstall
-
Graphic design
-
Free - Discount
-
Email reader
-
Edit video
-
Edit photo
-
Compress and Decompress
-
Chat, Text, Call
-
Archive - Share
-
-
System
-
Mac OS X
-
Hardware
-
Game
-
Tech info
-
Technology
-
Science
-
Life
-
Electric
-
Program
-
Mobile