In this article, I will show you how to use the Live Photos feature in FaceTime in the simplest way, especially for those who first experience and do not know how to use this famous video call application.
With Apple's [ FaceTime ] app , you can capture Live Photos during your FaceTime video calls to record special moments on the screen while you're chatting with friends and family.
The Live Photos feature captures what happens 1.5 seconds before and after you take a photo, and makes captured photos come alive when you view them in Apple's photo folder.
In addition, when using this feature, you will have the right to enable / disable this Live Photos feature in your FaceTime calls. The app will also notify the person you call at the other end of the line that you are preparing to take Live Photos to avoid sneaking, and this feature will remove sound during Live shooting. Photos so users won't have to worry about recording that call.
1. How to use Live Photos in a FaceTime call
If you want others to be able to take Live Photos when you make a FaceTime call with them, then you need to turn on FaceTime Live Photos first .

On your [ iOS ] device, open Settings , tap on FaceTime and navigate to FaceLive Photos , and turn it on by tapping the slider to toggle green ON.
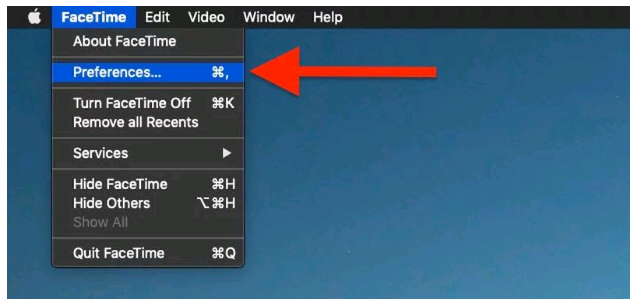
On the [ Macbook ], open the FaceTime app, click on the FaceTime menu bar in the top left corner of the screen and click Preferences , then check the box Allow Live Photos to be captured during Video calls.
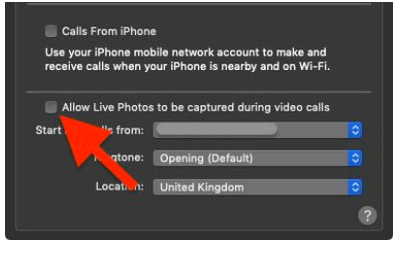
2. How to capture Live Photos in FaceTime on iPhone and iPad
On iPhone and iPad devices to use the Live Photos feature on FaceTime, follow these steps:
Step 1: Open the FaceTime app on your iOS device.
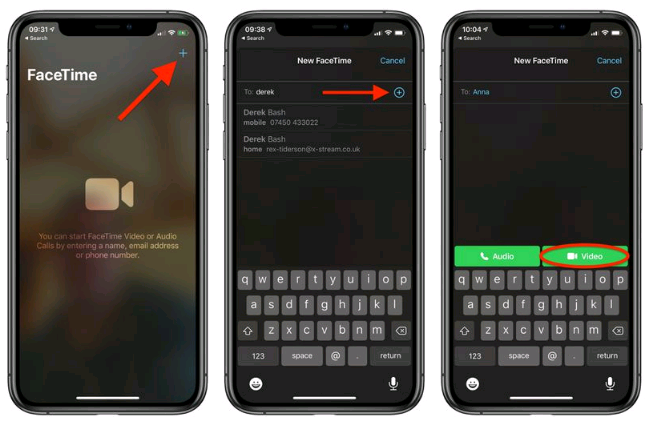
Step 2: To make a FaceTime call, tap a contact in the recent call list or select a person from Contacts to call by clicking the plus (+) icon .
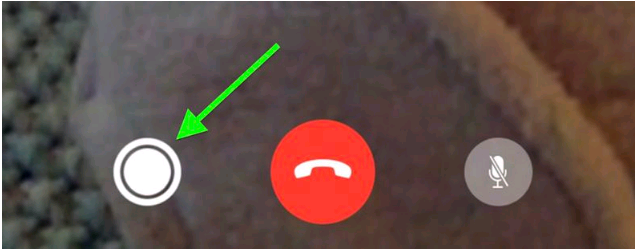
Step 3: When the call is connected and you can see the caller appear on the screen, touch the screen and find the camera icon on the left with a red button. If you do not see this icon, the person you are calling has not enabled the LiveLive Photos feature.
Step 4: Click the camera icon when you are ready to take Live Photos. Photos taken will be automatically saved in the camera library on the machine.
3. How to capture Live Photos in FaceTime on Macbook
For a Macbook, to use the Live Photos feature in FaceTime, follow these steps:
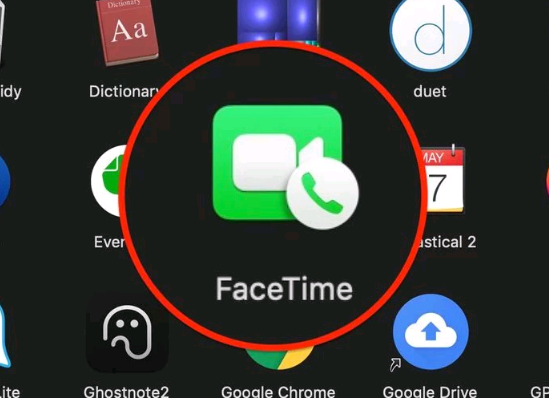
Step 1: Open the FaceTime app on your Mac from the Dock folder or the Applications folder .
Step 2: To make a FaceTime call, tap a contact in the recent call list, or enter the contact's name in the search bar, then make a call by clicking the Plus icon .
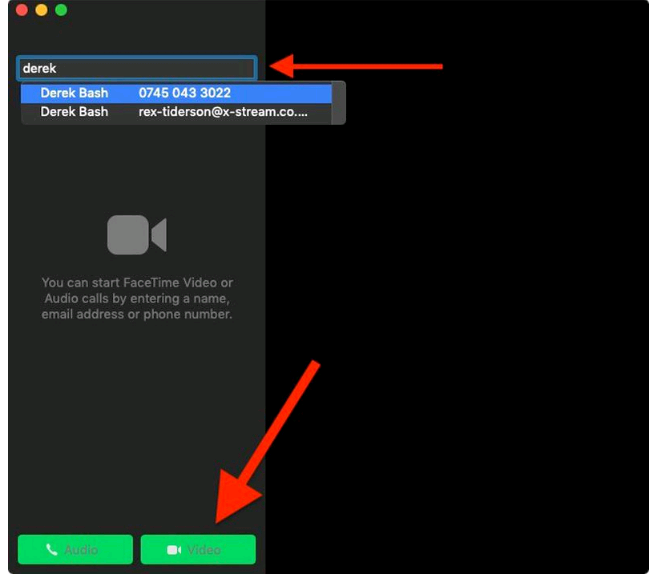
Step 3: When the call is connected and you can see the caller on the screen, look for the camera icon to the left of the red button. If you do not see this icon, it may be because the person you are calling them has not enabled the LiveLive Photos feature.

Step 4: Click the camera icon when you are ready to take Live Photos. Photos are automatically saved in the photo library of the Macbook.
When taking Live Photos in FaceTime video call, you don't care about your own reflection image in the corner of the screen. Because they are automatically deleted from Live Photos stored in the photo library.
So I have shown you how to use the Live Photos feature in FaceTime in the simplest way. Hopefully this article will be helpful to you. I wish you successful implementation!