How to bring iPhone's Live Photos feature to any Android device
Live Photos is exclusively on iPhone devices, but if Android users want to experience the same feature on their device, TipsMake.com will show you how to bring iPhone's Live Photos feature to every Android device.
Live Photos is also an animation, this is a very interesting mode on the iOS operating system to help you save short moments in seconds, especially with the accompanying sound. To use this attractive feature on Android, users need a third application called Camera MX.
- Guide to unlock smart screen like iPhone for Android device
- Tips to put virtual navigation bar on iPhone X on Android devices
- Guide to turn videos into beautiful wallpapers on Android phones
The reason you should use Live Photos
Live Photos' plus point is a lot more compact than video clips, more complete than traditional photography.
If you just want to take photos and want to save a memorable moment, Live Photos is the perfect choice. After shooting, you will still have a photo you like and when you hold it, they turn into a very interesting short video.
Instructions to bring iPhone Live Photos feature to Android devices
Step 1: First of all, you need to download and install the application to your device by clicking on the link below.
- Download the Camera MX app for Android.
Step 2: After the installation is successful, you open the application and learn through some features at the main interface including: Home (storing images and effects on the machine), Gallery (where archives are stored) Products), More Effects (effects store) and Camera (Live Photos photography).
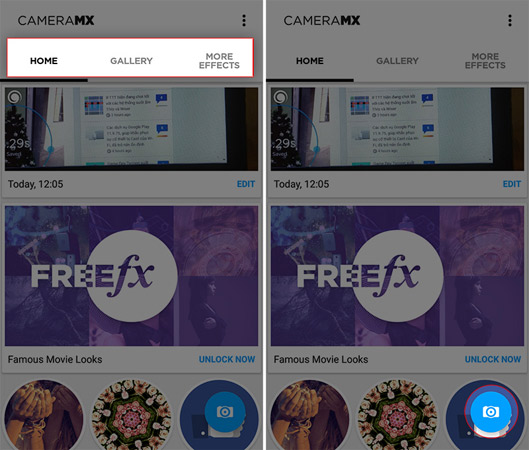 The main interface of the application.
Step 3: To take a picture, select the camera icon right corner of the screen. Here, you need to pay attention to two main features are taking photos and turning on, turning off Live Photos.
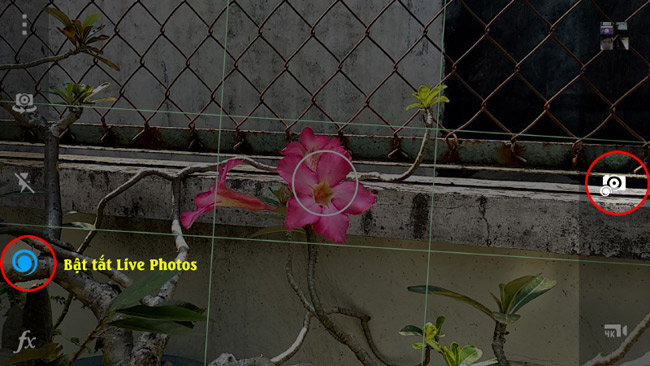 Turn on, turn off Live Photos, select the swirl icon.
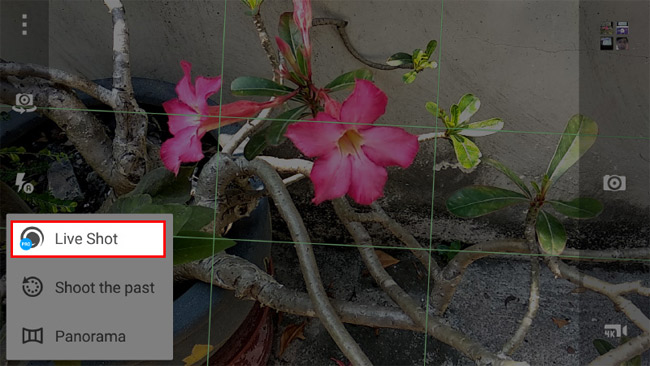 Activate Live Photos to choose Live Shot.
Note: When using the Live Shot feature, if the application requires activation, please grant permission to log into your Google or Facebook account to complete.
Step 4: Take a picture, press the Back key to return to the Gallery to review the photos and edit as you like.
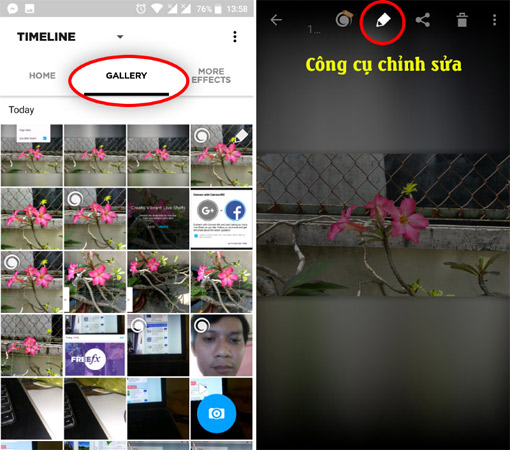 Live Photos photos will have a "swirl" icon as shown in the picture.
Note: To adjust the run time of Live Photos, you access the swirl icon> Edit Live Shot> Select the amount of time to be set> Select Save to save.
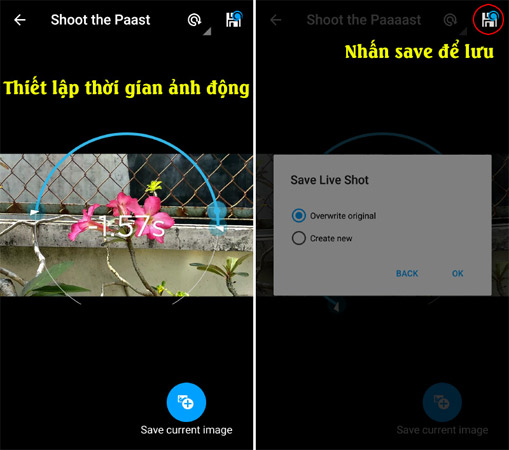 This photo is set to 1.57s to make it lighter and easier to share on social networks.
Step 5: Choose export mode to video file or export to GIF animation file. To share on social networks, select the Share icon> Choose the format to share.
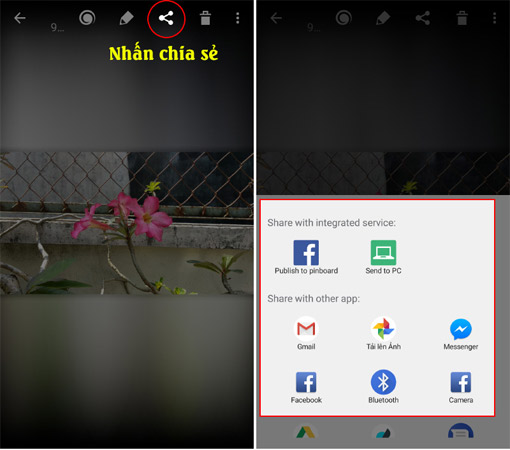 You can share via Messenger, Facebook, Zalo, .
Thus, Android users can take and freely share Live Photos as much as iPhone devices.
Wish you have beautiful Live Photos.
See more:
- How to use AiMee to create a sticker from the face
- Instructions on how to convert Live Photos to still images on iPhone
- Talent cooking skillfully with mobile app "Eat well"
You should read it
- ★ Instructions for taking live and animated photos on iPhone
- ★ Instructions on how to convert Live Photos to still images on iPhone
- ★ Instructions for using GIF Toaster to create GIF images from Live Photo on iPhone
- ★ Instructions for sharing Live Photos on Facebook and Instagram
- ★ How to edit Live Photos on iOS 11