Table of Contents
This practical guide explains how to use hidden video editor on Windows 11. Follow the steps in order, review the requirements first, and use the troubleshooting notes when a setting or option does not work as expected.
How to use the video editor in the Photos Legacy app
Windows 11 comes with an improved Photos app by default, which includes handy features like text recognition, iCloud sync, and even a Generative Erase tool. However, the new app doesn't include the video editor that was part of the old Photos experience.
Instead, Microsoft is now developing Clipchamp for video editing, which is great if you like pre-made templates and want to sync them online. But if you like the simplicity of the old editor, the good news is that you can still use it.
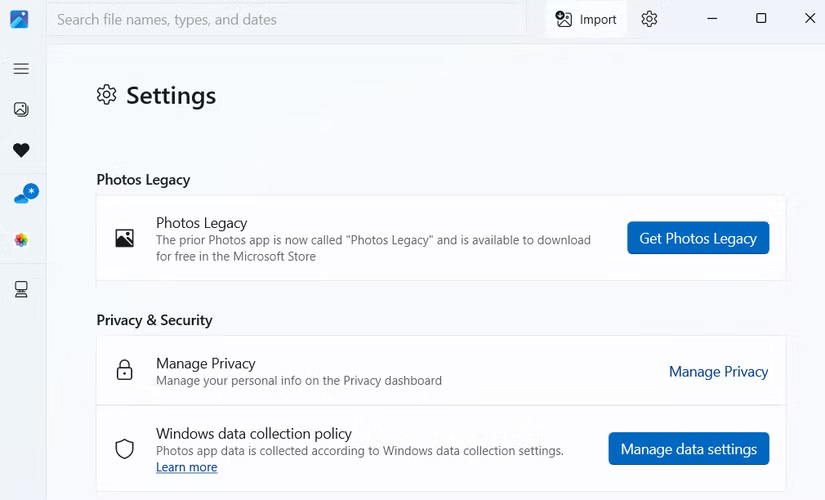
First, open the new Photos app on your Windows 11 PC. Click the gear icon in the upper-right corner to open the Settings menu. Scroll down until you see the Get Photos Legacy option. Click it and you'll be taken straight to the Microsoft Store, where you can download the older version of the Photos app.
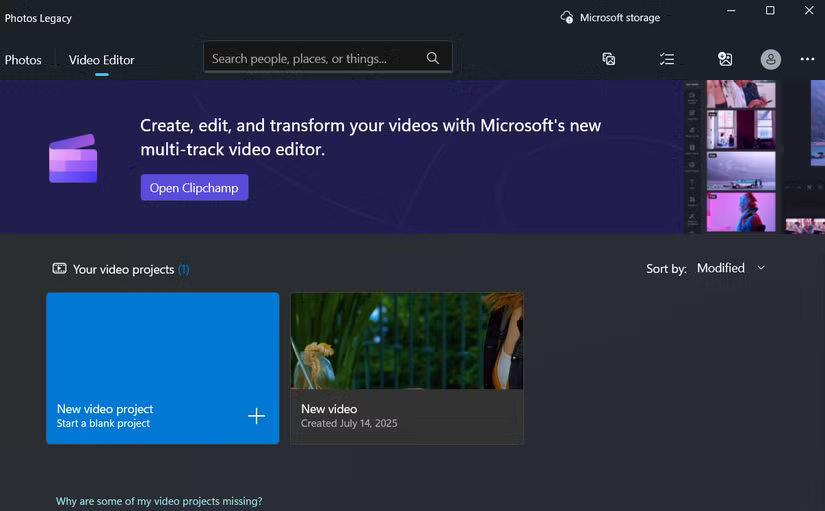
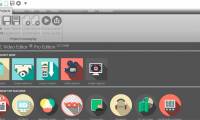
Open the Photos Legacy app and switch to the Video Editor tab. Then, click New video project , name the project, and press OK . Once in the legacy editor, click Add to import the video clips and photos you want to work with.
Some basic operations in the hidden video editor on Windows 11
6. Cut, Split and Rotate Video
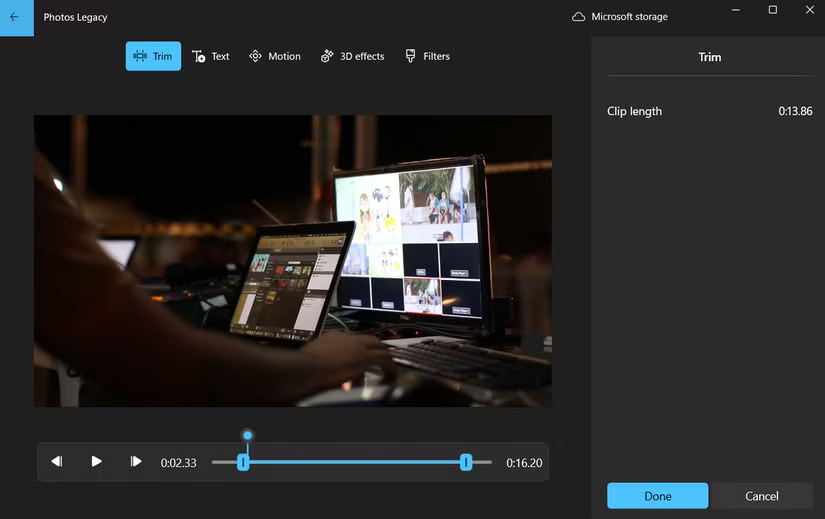
The first thing you'll probably want to do when editing a video is trim away any unwanted parts. After adding a clip to your timeline, select a video and use the options above to trim, split, and rotate the clip.
To trim a clip, use the two sliders at either end of the video timeline. Drag them inward to keep only the part of the video you really want. Similarly, to split a clip, move the blue play button to the exact point where you want to trim it, then click Done .
If your clip is skewed or upside down, you can use the shortcut Ctrl + R to rotate it 90 degrees. You can hit it multiple times to get the correct orientation. And if you're working with clips of different resolutions, you can get rid of those unsightly black bars. Click the Crop icon to shrink the video to fit, or zoom in and trim the edges.
5. Add text to video
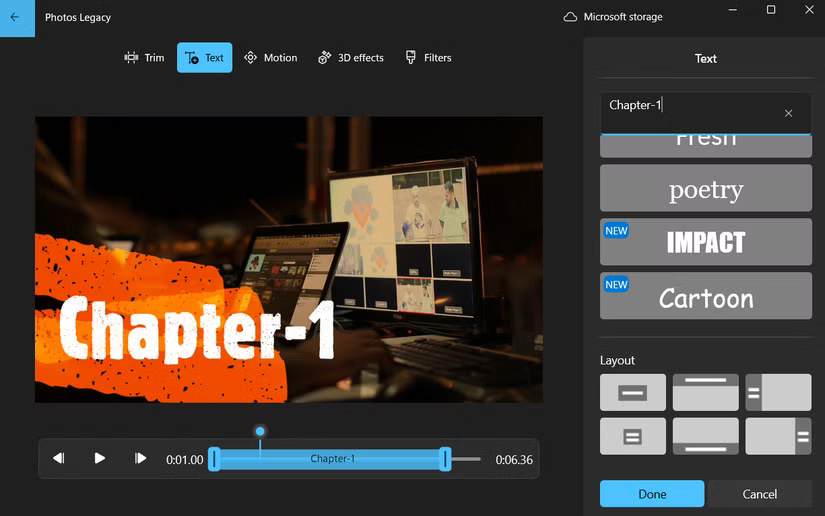
If your video needs additional text, such as subtitles or labels for clarification, adding text is easy. Select the clip where you want the text to appear, then click the Text button on the toolbar.
You can choose from a variety of text styles. There aren't a ton of options, but you'll find the perfect mix of minimalist and stylish options. Choose one that fits the style of your video, then head to the Layout tab to decide where to place your text.
4. Adjust playback speed
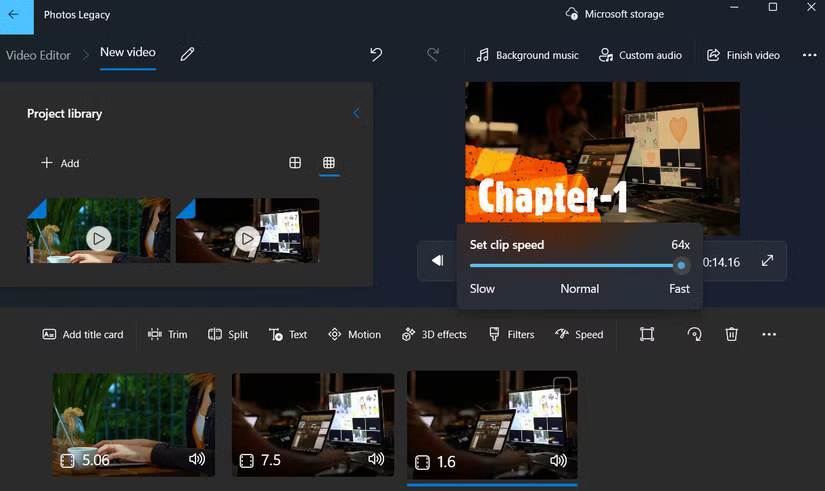
Select the clip you want to adjust in the timeline and click the Speed button on the top toolbar. You can then use the slider that pops up to adjust the speed exactly to your liking. You can speed it up from 1x to 1.25x , 1.5x , and all the way up to a blazing fast 64x . If you want to slow it down, use the slider to slow it down to 0.8x , 0.67x , 0.5x , or as slow as 0.02x .
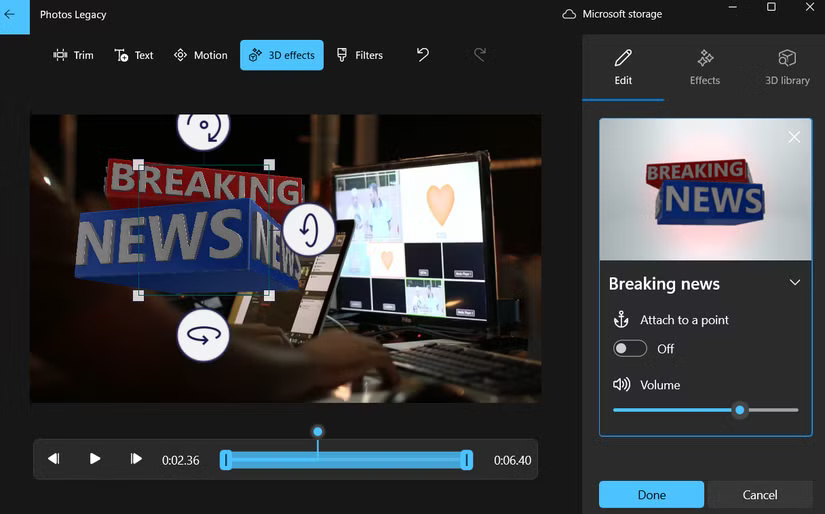
3. Insert motion, filters and 3D effects
Let's start with Motion. This is especially useful if your video has any still images or you want to give your video clip a dynamic feel. Once you've selected your clip, click Motion and you'll see some pre-set motion effects like zoom, pan left, tilt up, etc.
Clicking on the Filters option will give you a set of Instagram or TikTok- style presets to quickly change the overall tone and mood of your shot. However, there are no options to adjust the filter strength, so what you see is what you get.
With 3D Effects , you can add fun elements like lightning, explosions, butterflies, floating bubbles, and more. Once you select an effect, you can drag it around the screen, tilt and rotate it, and use the slider to control how long the effect appears on screen. These effects also come with their own sounds, which add to the realism. You can mute them if they interfere with the original audio.
2. Add background music
To add music from the built-in library, click the Background music button at the top of the editor. You'll see a list of tracks that you can scroll through. Each track has a small play icon next to it, allowing you to preview it before adding it. Once you find a track that fits the mood of your video, set the volume level using the slider and click Done to apply it.
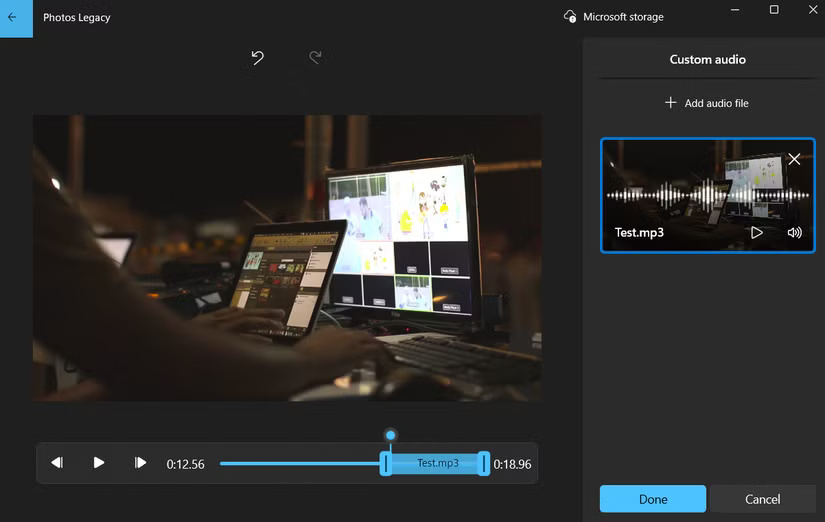
If you have the sound or song you want to use saved on your PC, click Custom audio at the top. Then, click Add to add an audio file, select your song or audio clip, and it will appear on the timeline. You can drag the slider to choose exactly when the sound starts and ends. When you're happy, click Done .
1. Add title tag and export video
This may not be necessary for every video, but if your video needs an intro, outro, or both, click the Add title card option. You can then customize the title card with your own text, change the background, and decide exactly how long it stays on screen.
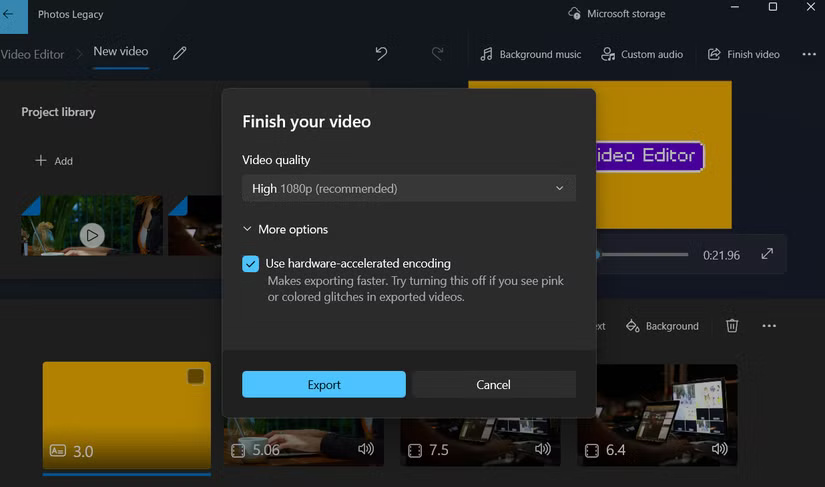
Once everything is good and you've finished all your edits, it's time to save your video. Click the Finish video button in the top right corner, choose your video resolution, and hit Export .
Frequently Asked Questions
How to use the video editor in the Photos Legacy app?
Windows 11 comes with an improved Photos app by default, which includes handy features like text recognition, iCloud sync, and even a Generative Erase tool. However, the new app doesn't include the video editor that was part of the old Photos experience.
What should you know about 6. Cut, Split and Rotate Video?
The first thing you'll probably want to do when editing a video is trim away any unwanted parts. After adding a clip to your timeline, select a video and use the options above to trim, split, and rotate the clip.
What should you know about 5. Add text to video?
If your video needs additional text, such as subtitles or labels for clarification, adding text is easy. Select the clip where you want the text to appear, then click the Text button on the toolbar.
What should you know about 4. Adjust playback speed?
Select the clip you want to adjust in the timeline and click the Speed button on the top toolbar. You can then use the slider that pops up to adjust the speed exactly to your liking. You can speed it up from 1x to 1.25x, 1.5x, and all the way up to a blazing fast 64x. If you want to slow it down, use the slider to slow it down.
Was this article helpful?
Your feedback helps us improve.
Related Articles
 7 Top AI Video Editors on Mobile: Best Options Compared9 minutes read
 How to Use Video Editor on Windows 109 minutes read
 Top 4 Free Video Editors for YouTube7 minutes read
 Download VSDC Video Editor PRO, Video Editing Application Worth5 minutes read
 How to Create and Edit Videos in YouTube Video Editor: Clear Instructions20 minutes read
 Free Software to Replace the Classic Windows Movie Maker Video9 minutes read
Reader Comments 0
Sign in with email or Google to join the discussion.