How to use Photoshop CS6 (Part 6): Create abstract geometric blocks
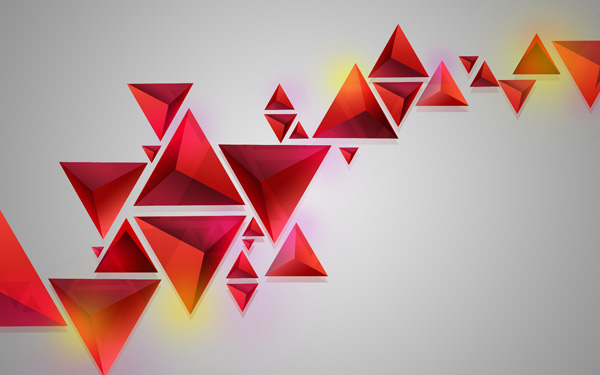
In this tutorial, we will continue to learn how to use Photoshop CS 6 to create an abstract image of top color geometric shapes. This technique is quite simple and the whole tutorial can be done in less than an hour.
In this tutorial, we will continue to learn how to use Photoshop CS6 to create an abstract image of top color geometric shapes. This technique is quite simple and the whole tutorial can be done in less than an hour.
- 10 common problems in Photoshop and basic remedies
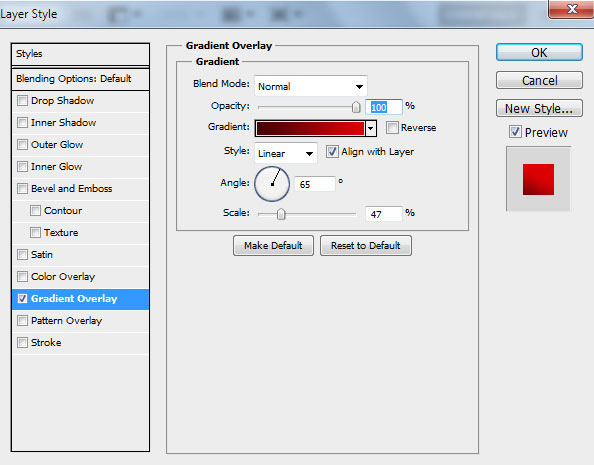
Start by creating a new document ( Ctrl + N ) in Adobe Photoshop CS6 with a size of 1920px by 1200px ( RGB color mode) at a resolution of 72 pixels / inch . Click the Add a layer style icon in the Layers panel and select Gradient Overlay .

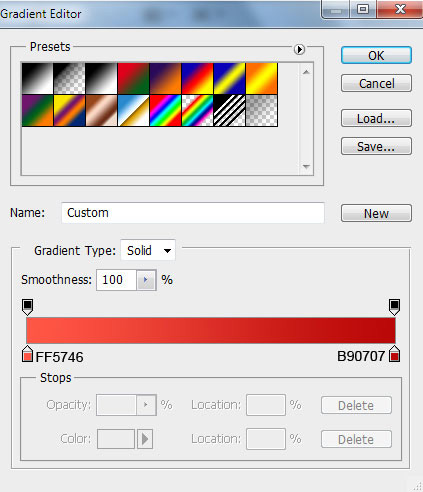
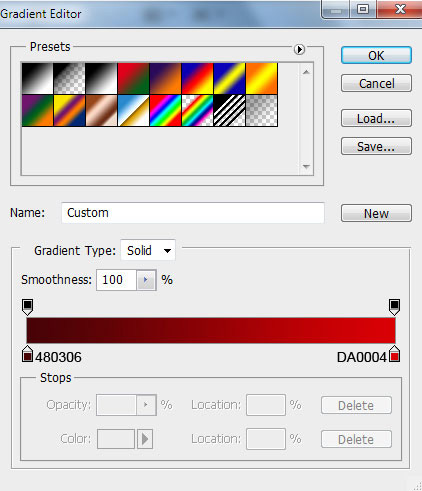
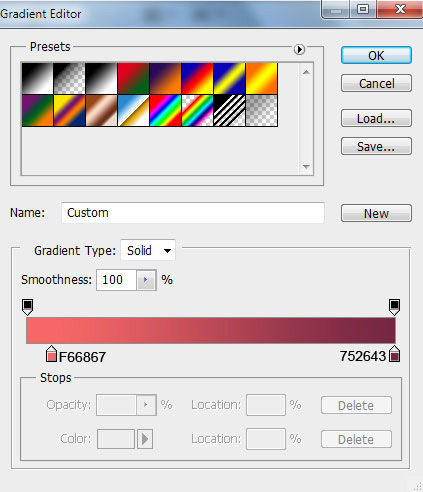
Click the color bar to open the Gradient Editor and set the color stops as shown below. Click OK to close the Gradient Editor dialog box.

We have the next result:

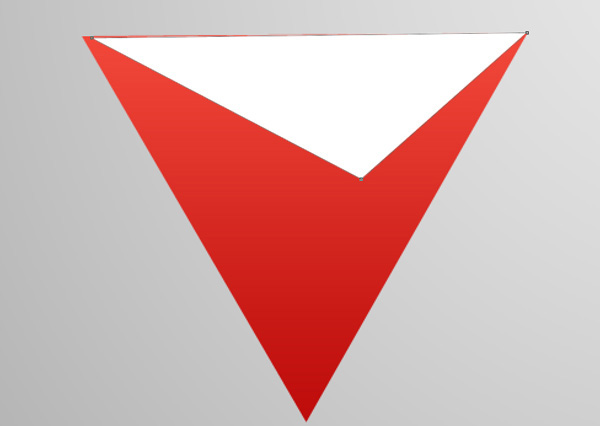
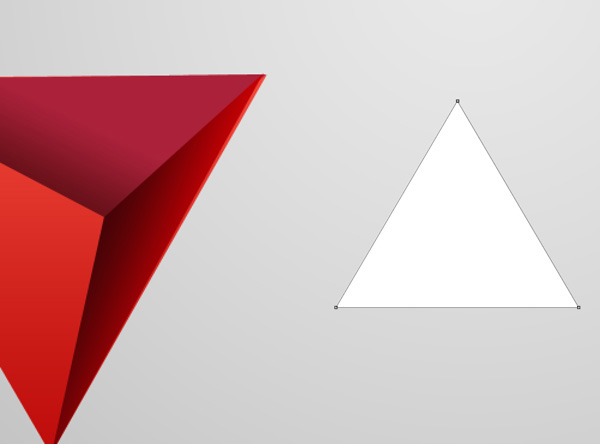
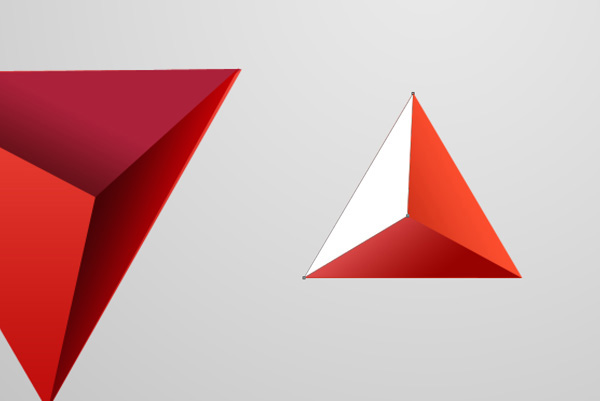
Now create a tetrahedron, but first we will draw a triangle. Select the Pen Tool (P) , set the drawing mode on Shape Layers in the Options bar and draw the next shape as shown.

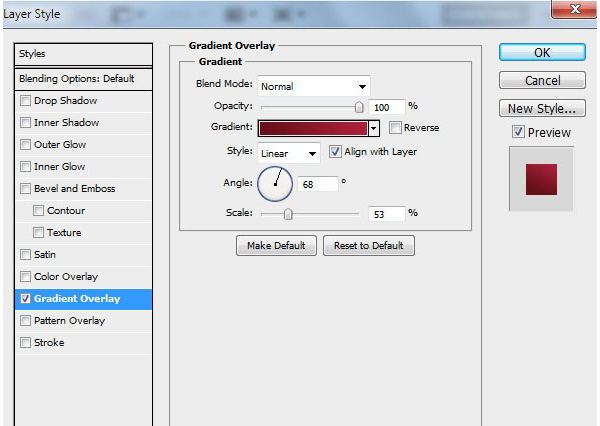
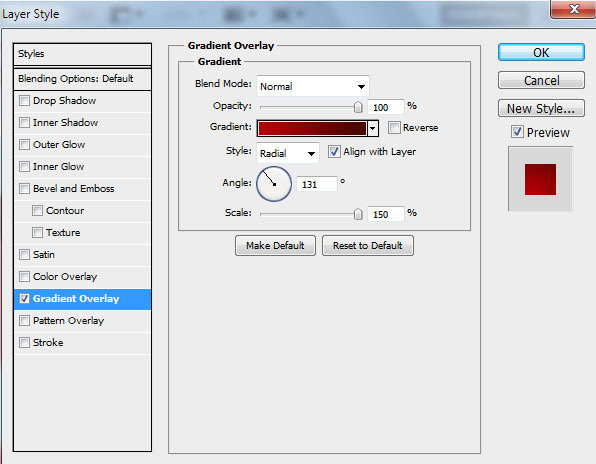
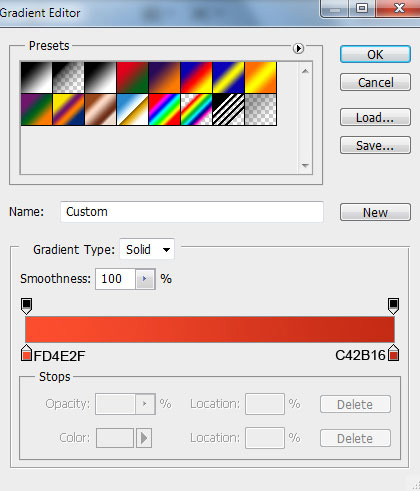
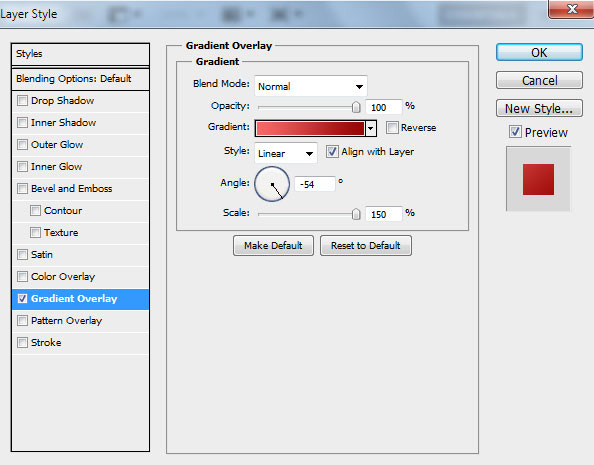
Click the Add a layer style icon in the Layers panel and select Gradient Overlay .

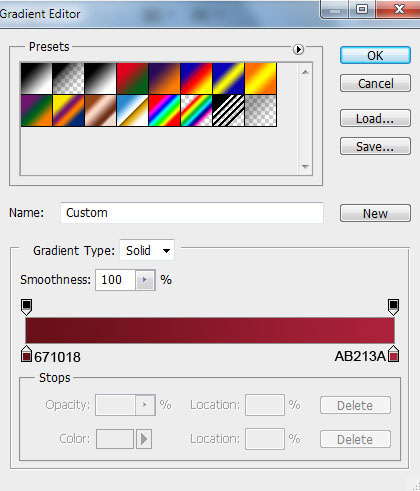
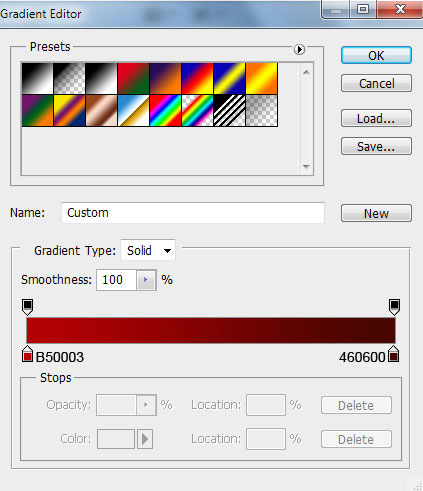
Click the color bar to open the Gradient Editor and set the color stops as shown. Click OK to close the Gradient Editor dialog box.
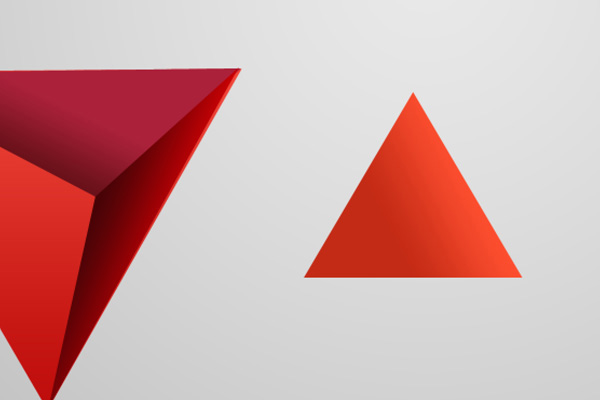
We have the next result:

Next, draw a triangle, use the Pen Tool (P) like the one above.
Click the Add a layer style icon in the Layers panel and select Gradient Overlay .
Click the color bar to open the Gradient Editor and set the color stops as shown below. Click OK to close the Gradient Editor dialog box.
We have the next result:

Apply the same tool to draw the next triangle face:

Click the Add a layer style icon in the Layers panel and select Gradient Overlay .

Click the color bar to open the Gradient Editor and set the color stops as shown below. Click OK to close the Gradient Editor dialog box.

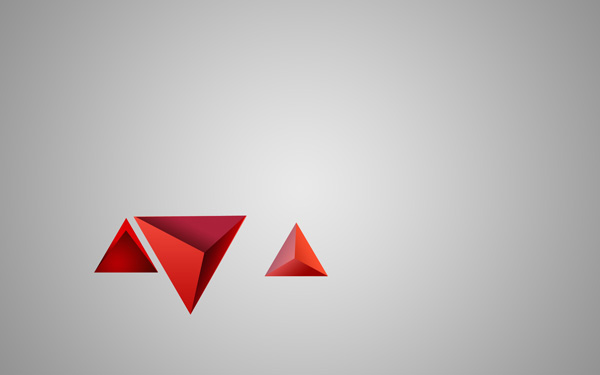
We have the next result:

Next draw other tetrahedral shapes, first create the basic layer using the Pen Tool (P) .

Click the Add a layer style icon in the Layers panel and select Gradient Overlay .
Click the color bar to open the Gradient Editor and set the color stops as shown. Click OK to close the Gradient Editor dialog box.
We have the next result:

Use the same tool to paint the next triangle:

In the Layers panel select Gradient Overlay .
Set color stops as shown. Click OK to close the Gradient Editor dialog box.
We have the next result:

Next draw another tetrahedron using the Pen Tool (P) .
Click the Add a layer style icon in the Layers panel and select Gradient Overlay .

Click the color bar to open the Gradient Editor and set the color stops as shown below. Click OK to close the Gradient Editor dialog box.
We have the next result:
Now draw the triangle face, use the Pen Tool (P) .

Select Add a layer style in the Layers panel and select Gradient Overlay .
Similarly, set the color stops as shown below in the Gradient Editor, then click OK to close.

We have the next image:

Grab the Pen Tool (P) to create a triangle for the tetrahedron.
Click the Add a layer style icon in the Layers panel and select Gradient Overlay .

Set the color stops as shown in the image and click OK to close the Gradient Editor dialog box.
We have the next image:
Combine all tetrahedral layers into one group (press CTRL button to select the required layers and hold the left mouse button while dragging the selected layers into the Create a new group icon in the Layers panel).
Now we have to create multiple copies of that group. Leave some copies in the opposite direction using the Free Transform command (Ctrl + T) . Change the gradient color of triangular faces to change the gloss. The direction of the gradient color is changed in the opposite direction.

Now we have to combine all tetrahedral groups into one (do the same as above). Create a copy of the group just created and rasterize it. Press CTRL + E to Merge Down the layer (mix the top layer to the bottom) of the selected group in the Layers panel. The rasterize class will be placed under the first tetrahedral group.
Create a copy of the rasterized layer and use the Free Transform (Ctrl + T) command to move a copy layer down a bit.
Set the Fill to 20% for this layer.

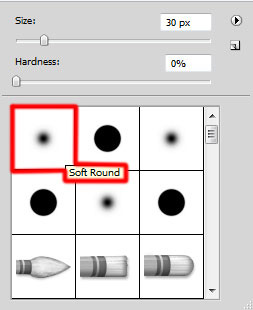
Insert the mask on this layer by selecting Add layer mask at the bottom of the Layers panel and selecting the Soft Round black brush (set the Opacity to 40% in the Options bar).
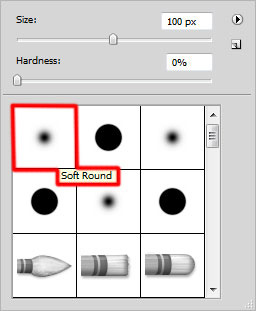
Paint the mask using this brush to hide tetrahedral elements as shown.

Create a new layer and select the Soft Round brush from the Brush Tool (B) . Use this brush to show some color spots on the tetrahedron. The color of the brush is # F008D (Brush has an Opacity of 30% ). The layer will be placed above the first group.

Set Fill to 40% for this layer and change the Blending mode to Linear Dodge .

Make sure that this layer is selected in the Layers panel , hold down the Ctrl button and click on the layer containing the tetrahedron below the first group (no Displacement).
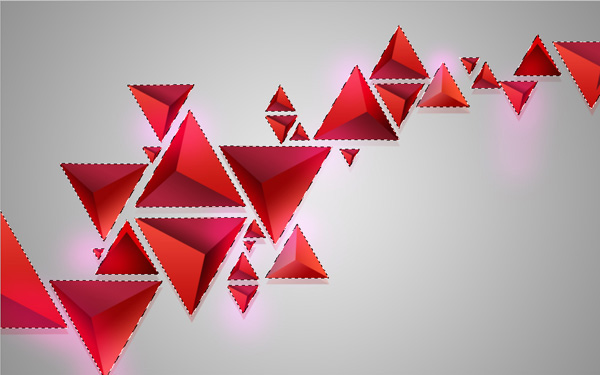
Now, on the layer using the pink brush, click on the bottom part of the Layers panel, select Add layer mask . This way we will cut the color points.

Create a copy of the rasterized tetrahedron. Place the top copy of all layers and select the Free Transform (Ctrl + T) command to flip the copy layer and use CTRL + SHIFT + U to Desaturate (convert the color image into a black and white image).
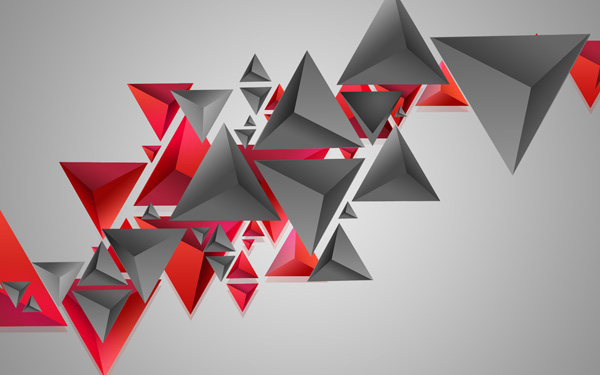
Set the Fill to 14% for this layer and change the Blending mode to Subtract .

Cut the colorless shadows after the same tetrahedron as described above by inserting a mask into the selection.

Create a new layer and use it on the Soft Round brush to show many points with the color # F008D (the Opacity of the brush is 30% ).

Set the Fill to 20% for this layer and change the Blending Mode to Pin Light .

Click Create new fill or adjustment layer from the bottom part of the Layers panel and click Curves to adjust the curve as shown below to make a small color modification.
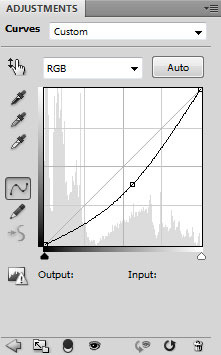
We have the next result:

Set Fill to 45% for this layer.

Insert the mask into this layer by selecting Add layer mask at the bottom of the Layers panel, press CTRL + I to Inverse (reverse) the color of the mask, select Soft Round white brush (set Opacity to 65% in Options bar ).
Paint the mask using this brush to hide the effect, she shows smooth points on the tetrahedron.

Create a new layer and use a Soft Round brush mentioned above to highlight with yellow ( Opacity of the brush is 20% ).
Set Fill to 40% for this layer and change the Blending mode to Screen .

Next we will create a new layer and select Soft Round brush with white color ( Opacity of the brush is 30% ) to create a highlight on the tetrahedron.

Set Fill to 50% for this layer and change the Blending mode to Hard Mix .

Make sure this layer is selected in the Layers panel , then press the Ctrl button and click the rasterize layer of the tetrahedron (we'll get a selection) and insert the mask into this active layer. White highlights are cut.

Create a new layer and use the Soft Round brush mentioned above. Select white brush ( Opacity of brush is 15% to show the luminescence emitted from the tetrahedron).

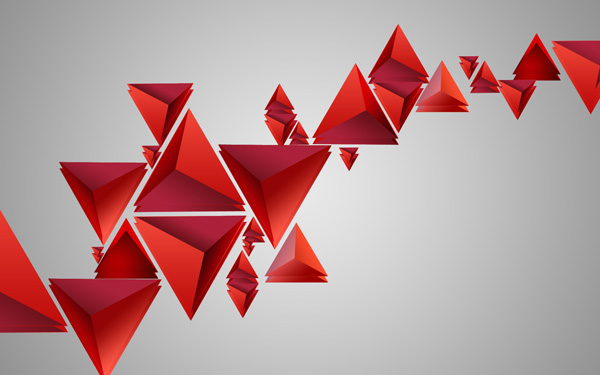
Finally create a new layer and apply a Soft Round white brush to create many different diameter dots.
We have the final image:

Free download Layered PSD file.
You can see more:
- How to use Photoshop CS6 (Part 1): Create digital photos
- How to use Photoshop CS6 (Part 2): Create fashion collage images
- How to use Photoshop CS6 (Part 3) - Create Manipulation artwork with exposure effect
- How to use Photoshop CS6 (Part 4): Create a fading effect
- Instructions for using Photoshop CS6 (Part 5): Create christmas cards with snowflakes on a red background
Was this article helpful?
Your feedback helps us improve.
Related Articles
 Photoshop CS6: How to create abstract geometric shapes10 minutes read
 How to use Photoshop CS5 - Part 6: Digital art8 minutes read
 49 smart Photoshop tips you need to know (Part 3)15 minutes read
 How to use Photoshop CS6 (Part 2): Create fashion collage images23 minutes read
 49 smart Photoshop tips you need to know (Part 2)9 minutes read
 How to use Photoshop CS6 (Part 3) - Create Manipulation artwork with exposure effect14 minutes read
Reader Comments 0
Sign in with email or Google to join the discussion.