Website design tutorial in Photoshop (Part 3): Create professional website layout

Beautiful, clean and practical interface design is an essential part of Web designers. In this tutorial, we will create a clean and professional web layout in Photoshop.

Beautiful, clean and practical interface design is an essential part of Web designers. In this tutorial, we will create a clean and professional web layout in Photoshop.

  1. 10 common problems in Photoshop and basic remedies

Document

  1. Function icon set - wefunction.com
  2. Twitter icon - iconeden.com
  3. Bebas fonts - dafont.com

Step 1: Use Mockup

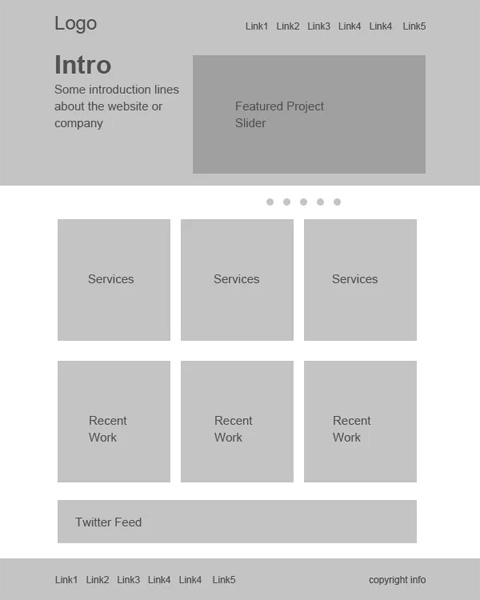
Before you start designing, you need to plan requirements, interfaces and functions, then turn them into layout ideas. Mockup and wire frames are very useful for creating layouts with a lot of flexibility.

Here we will use gray tones, this way will remove colors from the scene and to focus on the overall layout and avoid messing up the colors. That allows to quickly change and rearrange everything. A mockup provides as much detail as you want.

images 1 of Website design tutorial in Photoshop (Part 3): Create professional website layout
Images 1 of Website design tutorial in Photoshop (Part 3): Create professional website layout

Step 2: Set up Canvas

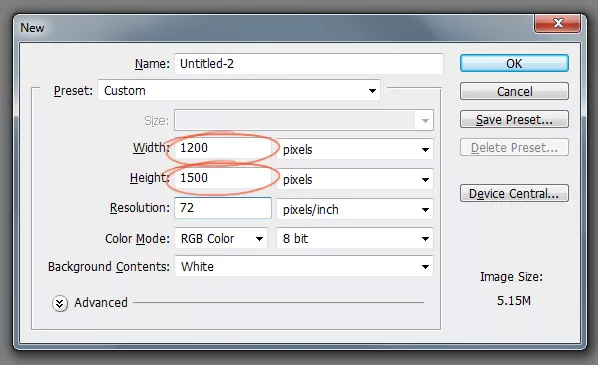
Here we have a blueprint for the web layout, so let's redesign it together. Create a new document with dimensions of 1200 x 1500 pixels.

images 2 of Website design tutorial in Photoshop (Part 3): Create professional website layout
Images 2 of Website design tutorial in Photoshop (Part 3): Create professional website layout

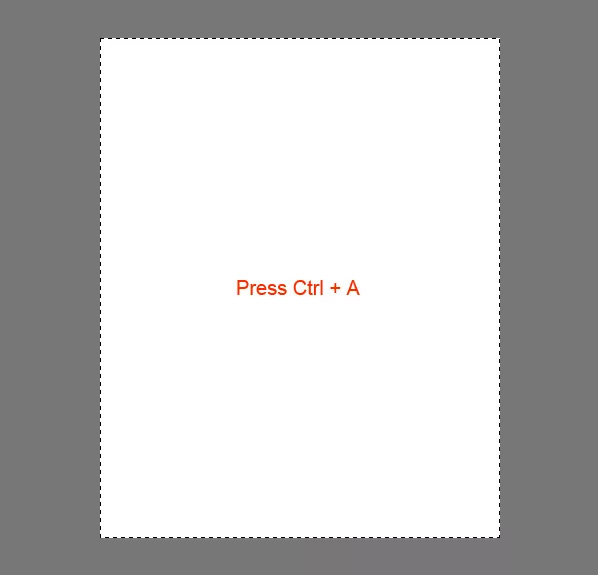
Here we need a 960 pixel layout so we need to define the working area by adding a path. Press Ctrl + A to select the entire document.

images 3 of Website design tutorial in Photoshop (Part 3): Create professional website layout
Images 3 of Website design tutorial in Photoshop (Part 3): Create professional website layout

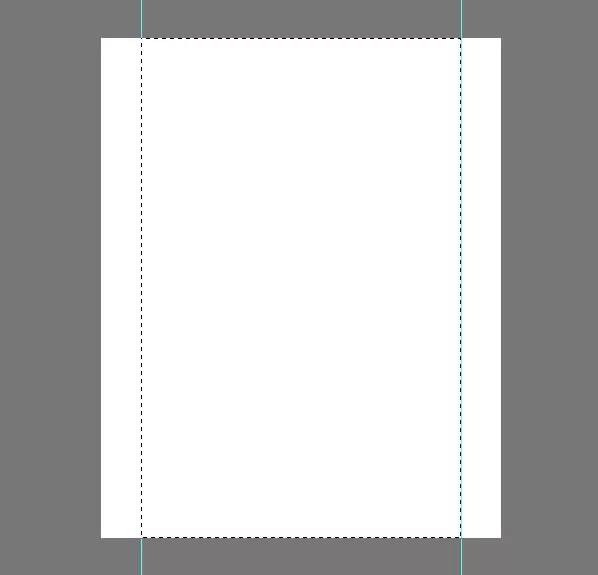
Go to Select> Transform Selection , shrink the selection down to 960 pixels wide. That is the working area of ​​the layout.

images 4 of Website design tutorial in Photoshop (Part 3): Create professional website layout
Images 4 of Website design tutorial in Photoshop (Part 3): Create professional website layout

Add a guide to the selection.

images 5 of Website design tutorial in Photoshop (Part 3): Create professional website layout
Images 5 of Website design tutorial in Photoshop (Part 3): Create professional website layout

Create some distance between borders and content to add later. With the area selected, select the Transform Selection again, resize the selection to a 920 pixel width. That means 20 pixels on each side, 40 pixels in total.

images 6 of Website design tutorial in Photoshop (Part 3): Create professional website layout
Images 6 of Website design tutorial in Photoshop (Part 3): Create professional website layout

Add a path to the selected area.

images 7 of Website design tutorial in Photoshop (Part 3): Create professional website layout
Images 7 of Website design tutorial in Photoshop (Part 3): Create professional website layout

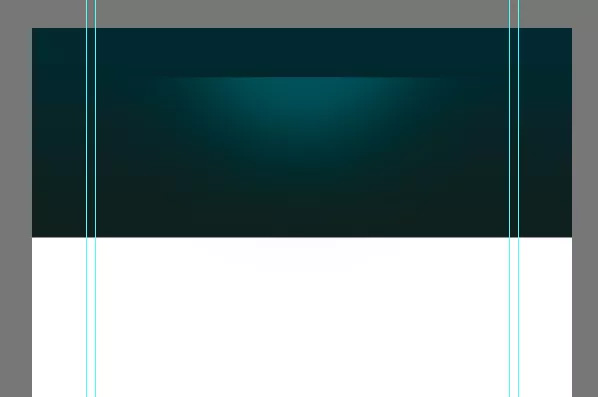
Step 3: Create a title

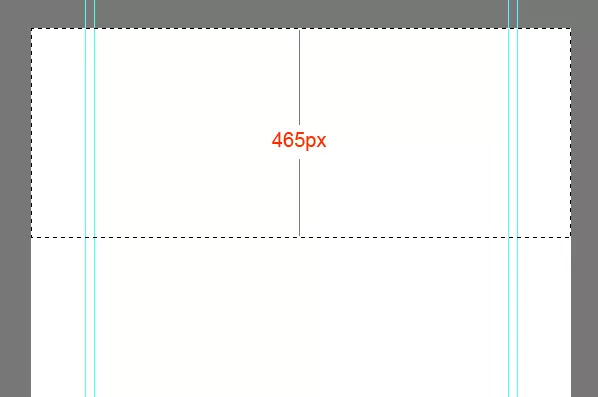
Create a title for the layout, choose a height of 465 pixels.

images 8 of Website design tutorial in Photoshop (Part 3): Create professional website layout
Images 8 of Website design tutorial in Photoshop (Part 3): Create professional website layout

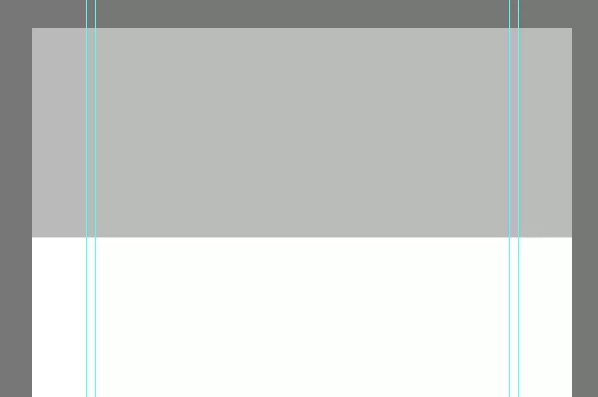
Fill this selection with gray and then use Layer Styles to add colors and gradients. Follow this style throughout the design process to maintain the visual hierarchy.

images 9 of Website design tutorial in Photoshop (Part 3): Create professional website layout
Images 9 of Website design tutorial in Photoshop (Part 3): Create professional website layout

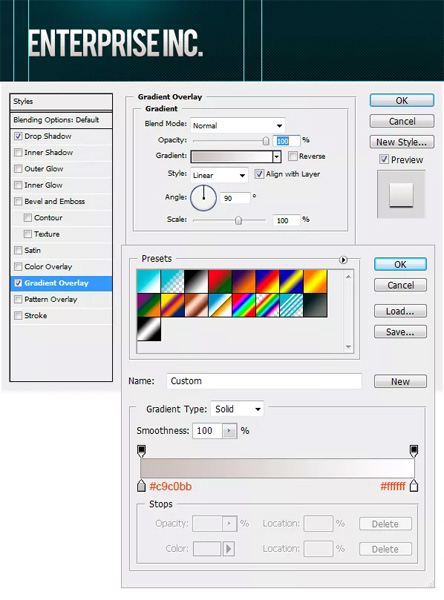
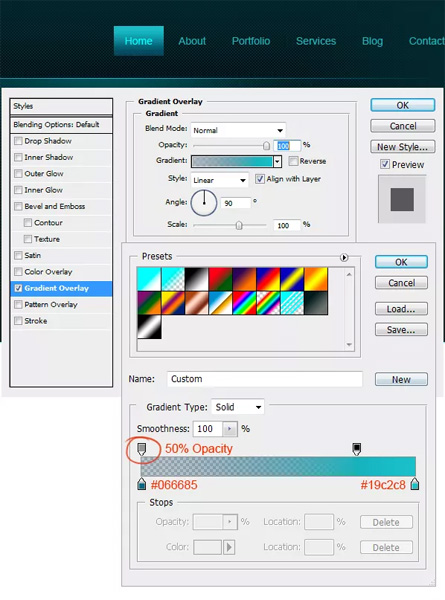
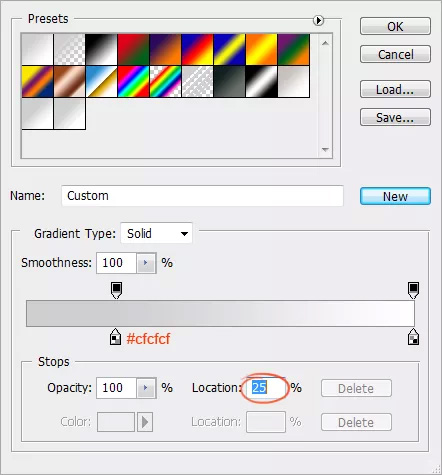
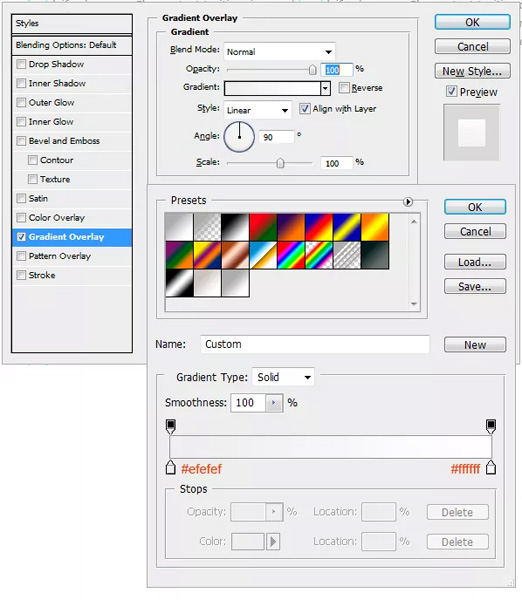
Add Gradient to the title. Double click the layer thumbnail, select Gradient Overlay . Create 2 gradient colors using the settings shown below.

images 10 of Website design tutorial in Photoshop (Part 3): Create professional website layout
Images 10 of Website design tutorial in Photoshop (Part 3): Create professional website layout

We get the following result:

images 11 of Website design tutorial in Photoshop (Part 3): Create professional website layout
Images 11 of Website design tutorial in Photoshop (Part 3): Create professional website layout

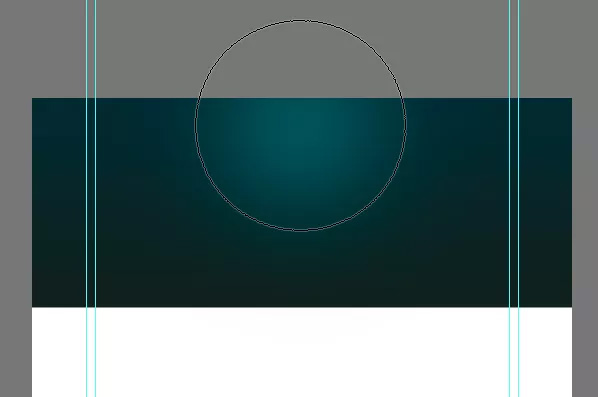
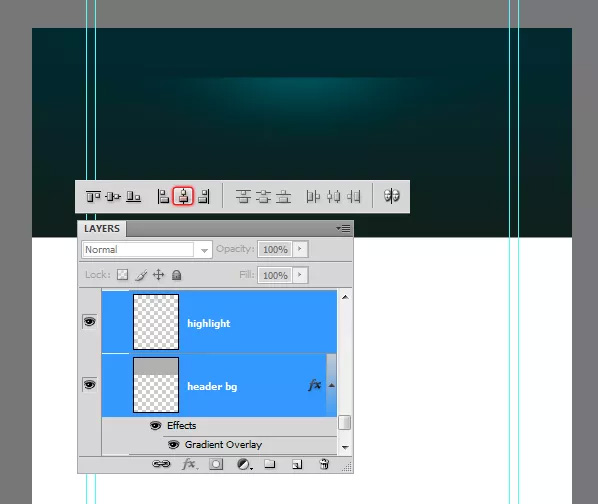
Next need to add a highlight for the title. Create a new layer by pressing Ctrl + Alt + Shift + N. Choose Soft brush with diameter 600px and color # 19535a and just click once on the middle of the title to create highlights.

images 12 of Website design tutorial in Photoshop (Part 3): Create professional website layout
Images 12 of Website design tutorial in Photoshop (Part 3): Create professional website layout

Select the top part with 110 pixels height.

images 13 of Website design tutorial in Photoshop (Part 3): Create professional website layout
Images 13 of Website design tutorial in Photoshop (Part 3): Create professional website layout

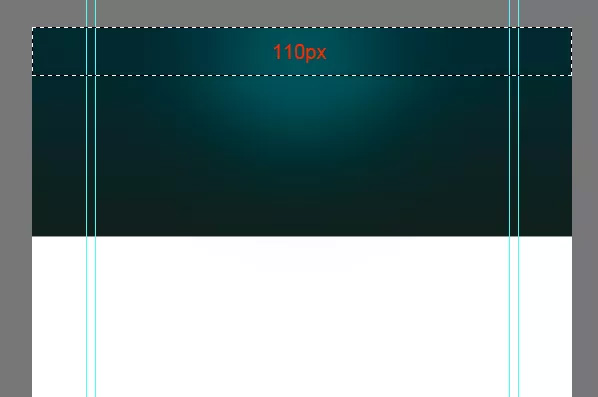
Click Delete to delete the selected part.

images 14 of Website design tutorial in Photoshop (Part 3): Create professional website layout
Images 14 of Website design tutorial in Photoshop (Part 3): Create professional website layout

Narrow it vertically by pressing Ctrl + T.

images 15 of Website design tutorial in Photoshop (Part 3): Create professional website layout
Images 15 of Website design tutorial in Photoshop (Part 3): Create professional website layout

To make sure the highlight is at the center of the title, select the title and highlight layers, then press "V" to move to the Move Tool . On the Options Panel , select the Align Horizontal Centers button.

images 16 of Website design tutorial in Photoshop (Part 3): Create professional website layout
Images 16 of Website design tutorial in Photoshop (Part 3): Create professional website layout

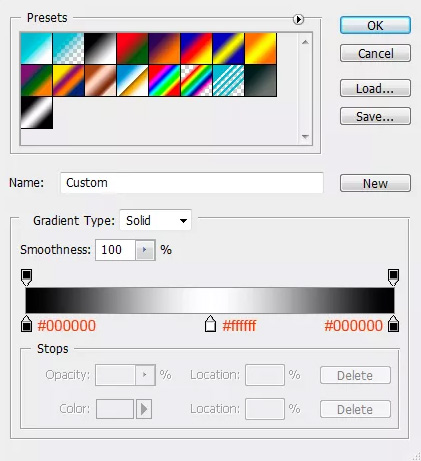
Create a new layer, draw a 1 pixel highlight line using the Pencil Tool with the color # 01bfd2 .

images 17 of Website design tutorial in Photoshop (Part 3): Create professional website layout
Images 17 of Website design tutorial in Photoshop (Part 3): Create professional website layout

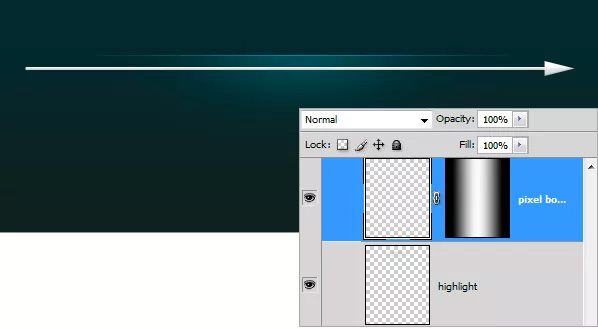
Hide the edges using a gradient mask. Select the Gradient Tool , create a gradient like below in the Options panel.

images 18 of Website design tutorial in Photoshop (Part 3): Create professional website layout
Images 18 of Website design tutorial in Photoshop (Part 3): Create professional website layout

Apply the gradient above.

images 19 of Website design tutorial in Photoshop (Part 3): Create professional website layout
Images 19 of Website design tutorial in Photoshop (Part 3): Create professional website layout

Step 4: Create texture samples

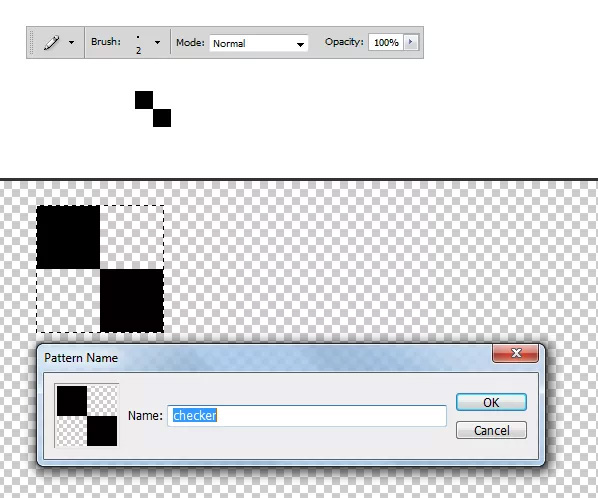
Now create a simple test template and apply it to the title. Select the Pencil Tool , use a 2 pixel size brush and add two square dots to touch each corner. Turn off the background and select the dots then choose Edit> Define Pattern .

images 20 of Website design tutorial in Photoshop (Part 3): Create professional website layout
Images 20 of Website design tutorial in Photoshop (Part 3): Create professional website layout

Create a new layer and place it under the highlighted layer above. Select the area you want to apply the template to, press Shift + F5 to load the Fill dialog. Select the template you just created and click OK.

images 21 of Website design tutorial in Photoshop (Part 3): Create professional website layout
Images 21 of Website design tutorial in Photoshop (Part 3): Create professional website layout

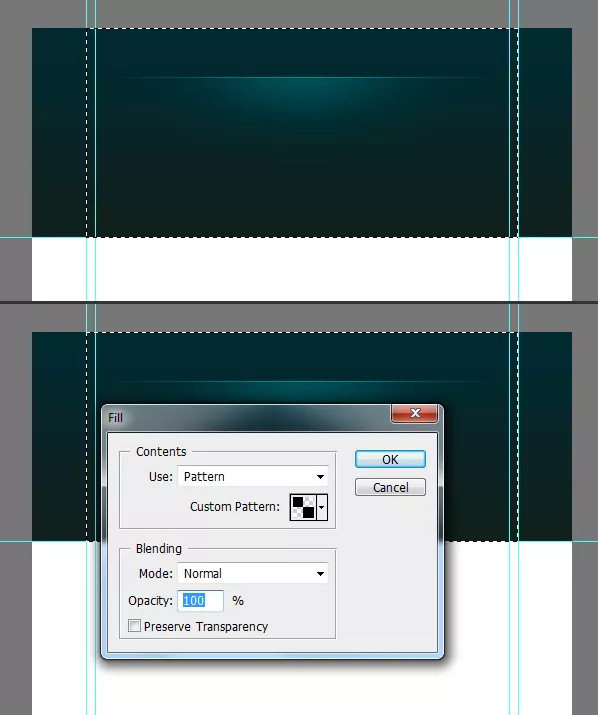
Cover the selection with the created template.

images 22 of Website design tutorial in Photoshop (Part 3): Create professional website layout
Images 22 of Website design tutorial in Photoshop (Part 3): Create professional website layout

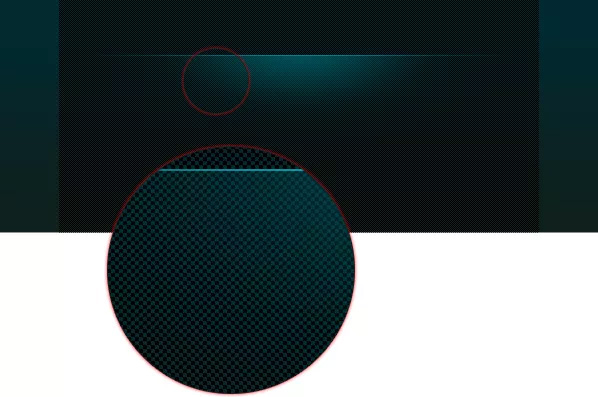
Mix the sample harmoniously with the title. Add a Layer Mask to this template layer. Choose a large soft brush with the color #ffffff. Reduce Opacity to about 60% and paint. If you find it too strong, you can adjust the opacity of this layer.

images 23 of Website design tutorial in Photoshop (Part 3): Create professional website layout
Images 23 of Website design tutorial in Photoshop (Part 3): Create professional website layout

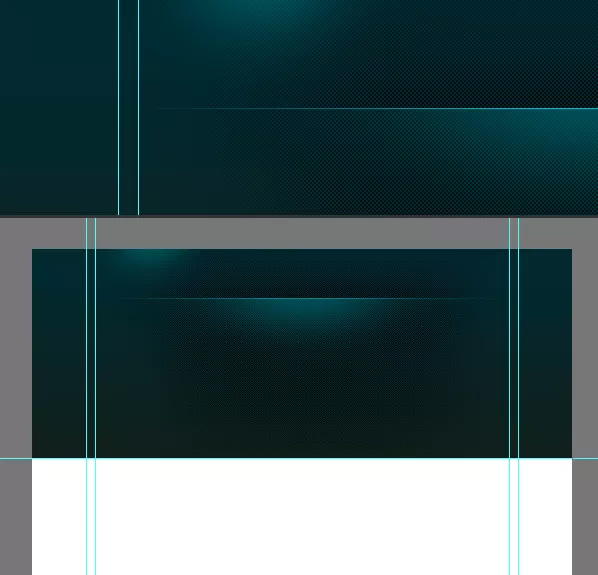
We have the following result:

images 24 of Website design tutorial in Photoshop (Part 3): Create professional website layout
Images 24 of Website design tutorial in Photoshop (Part 3): Create professional website layout

Step 5: Add ogo

After completing the background, now go to the logo creation step. Before adding styles, add a highlight behind the logo. Select Soft brush with color # 19535a and add a dot.

images 25 of Website design tutorial in Photoshop (Part 3): Create professional website layout
Images 25 of Website design tutorial in Photoshop (Part 3): Create professional website layout

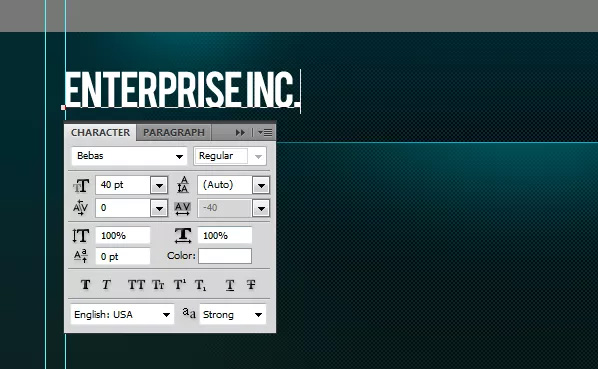
Type the text, using the font you like, in this example use the font "Bebas".

images 26 of Website design tutorial in Photoshop (Part 3): Create professional website layout
Images 26 of Website design tutorial in Photoshop (Part 3): Create professional website layout

Apply subtle effects to the logo.

images 27 of Website design tutorial in Photoshop (Part 3): Create professional website layout
Images 27 of Website design tutorial in Photoshop (Part 3): Create professional website layout

images 28 of Website design tutorial in Photoshop (Part 3): Create professional website layout
Images 28 of Website design tutorial in Photoshop (Part 3): Create professional website layout

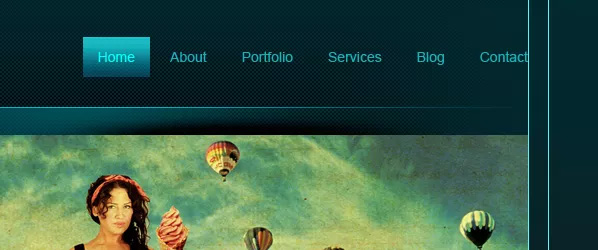
Step 6: Add navigation bar

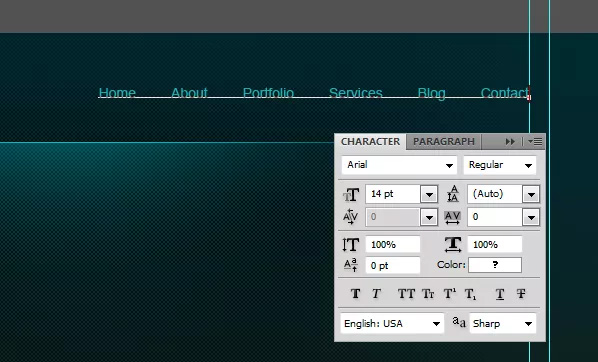
Add navigation links.

images 29 of Website design tutorial in Photoshop (Part 3): Create professional website layout
Images 29 of Website design tutorial in Photoshop (Part 3): Create professional website layout

Create navigation button. Using the Rectangular Marquee Tool , fill it with any color and let the Opacity Fill to 0.

images 30 of Website design tutorial in Photoshop (Part 3): Create professional website layout
Images 30 of Website design tutorial in Photoshop (Part 3): Create professional website layout

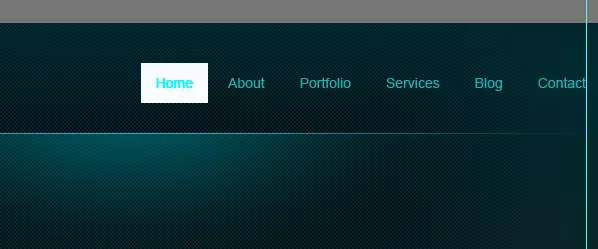
Double click the layer thumbnail, select Gradient Overlay and apply this setting.

images 31 of Website design tutorial in Photoshop (Part 3): Create professional website layout
Images 31 of Website design tutorial in Photoshop (Part 3): Create professional website layout

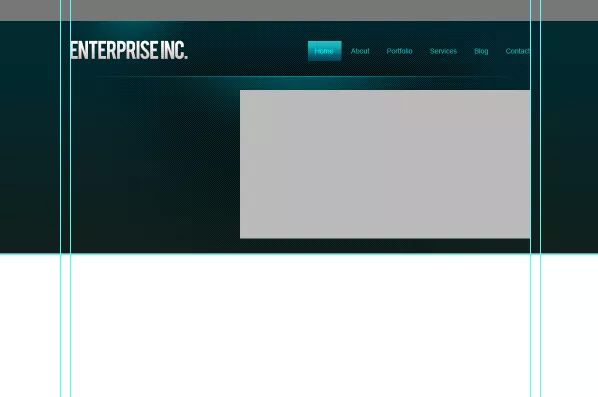
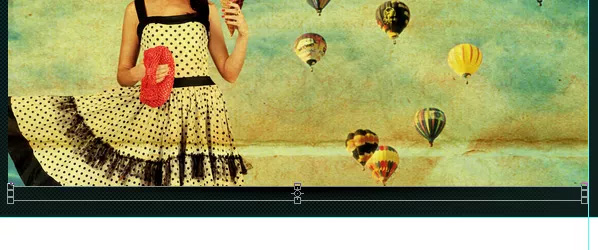
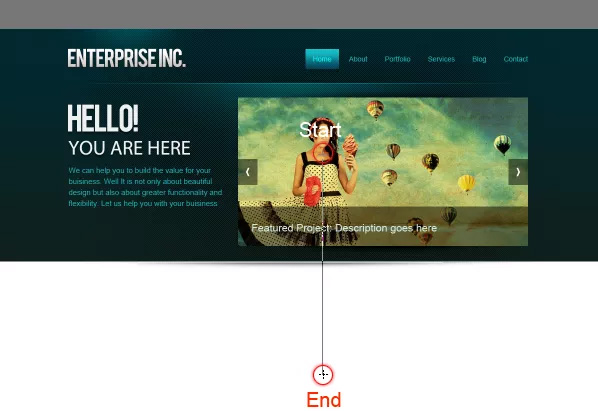
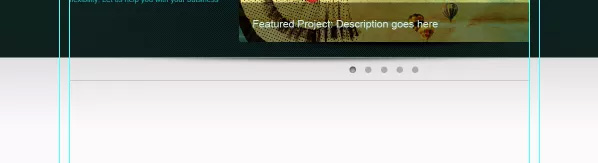
Step 7: Content slider
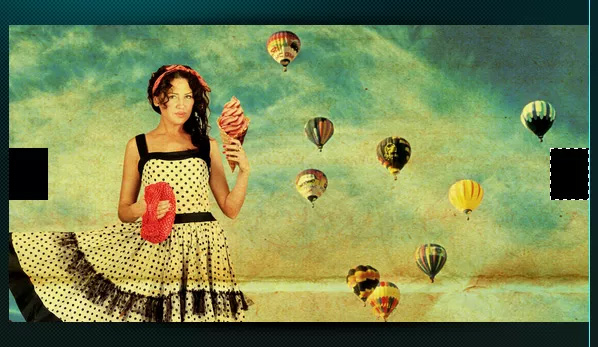
Choose an area of ​​580 x 295 pixels.

images 32 of Website design tutorial in Photoshop (Part 3): Create professional website layout
Images 32 of Website design tutorial in Photoshop (Part 3): Create professional website layout

Cover this selection with gray tones.

images 33 of Website design tutorial in Photoshop (Part 3): Create professional website layout
Images 33 of Website design tutorial in Photoshop (Part 3): Create professional website layout

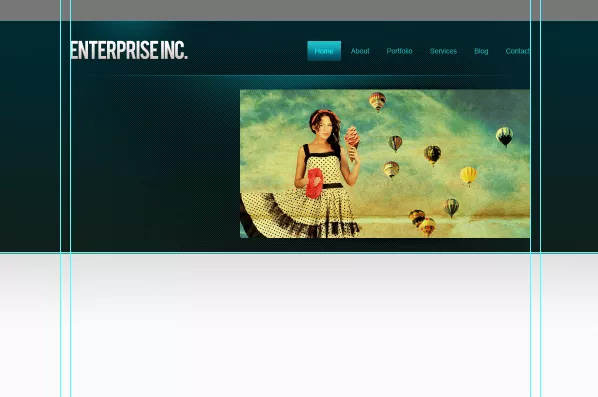
Upload photos to the class we just created above.

images 34 of Website design tutorial in Photoshop (Part 3): Create professional website layout
Images 34 of Website design tutorial in Photoshop (Part 3): Create professional website layout

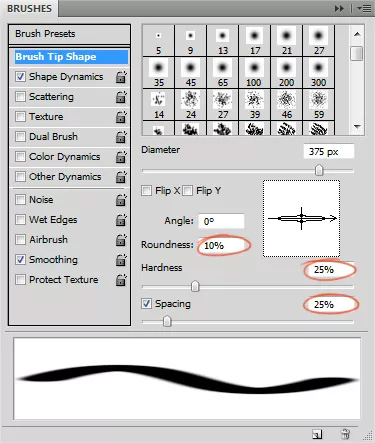
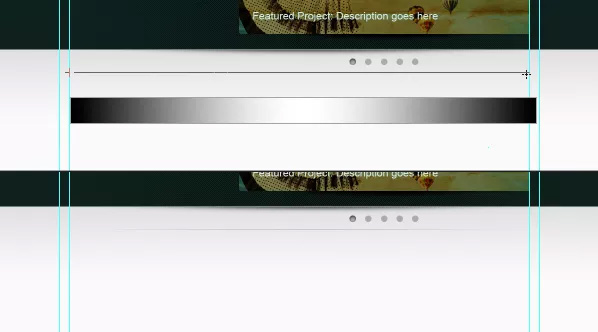
Now add the shadow effect to the slider. Create a new layer, select the Brush Tool , set the diameter up to 400 pixels. Open the Brushes panel, reduce the Roundness level with the settings below.

images 35 of Website design tutorial in Photoshop (Part 3): Create professional website layout
Images 35 of Website design tutorial in Photoshop (Part 3): Create professional website layout

Use the color brush # 000000 and add a black strip.

images 36 of Website design tutorial in Photoshop (Part 3): Create professional website layout
Images 36 of Website design tutorial in Photoshop (Part 3): Create professional website layout

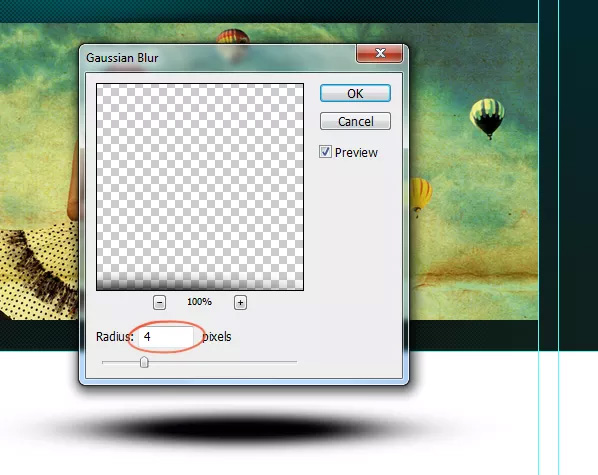
Apply Gaussian Blur to soften the edges.

images 37 of Website design tutorial in Photoshop (Part 3): Create professional website layout
Images 37 of Website design tutorial in Photoshop (Part 3): Create professional website layout

Select the bottom part of the shadow and delete it.

images 38 of Website design tutorial in Photoshop (Part 3): Create professional website layout
Images 38 of Website design tutorial in Photoshop (Part 3): Create professional website layout

Reposition the ball right on the slider.

images 39 of Website design tutorial in Photoshop (Part 3): Create professional website layout
Images 39 of Website design tutorial in Photoshop (Part 3): Create professional website layout

Then narrow down vertically and center the slider. Select both layers and on the Options panel click the Align Horizontal Centers button.

images 40 of Website design tutorial in Photoshop (Part 3): Create professional website layout
Images 40 of Website design tutorial in Photoshop (Part 3): Create professional website layout

Copy this shadow layer and rotate it vertically, place it on the bottom edge of the slider.

images 41 of Website design tutorial in Photoshop (Part 3): Create professional website layout
Images 41 of Website design tutorial in Photoshop (Part 3): Create professional website layout

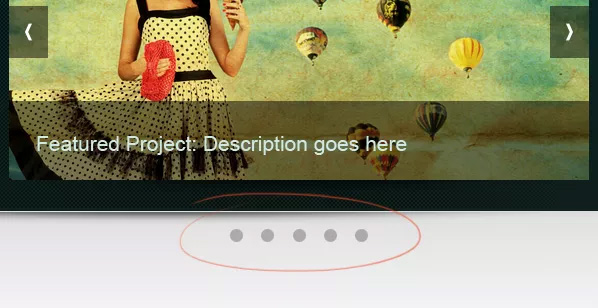
Create a slider control button with the Marquee Rectangular tool and cover with # 000000 color.

images 42 of Website design tutorial in Photoshop (Part 3): Create professional website layout
Images 42 of Website design tutorial in Photoshop (Part 3): Create professional website layout

Reduce Opacity to 50%.

images 43 of Website design tutorial in Photoshop (Part 3): Create professional website layout
Images 43 of Website design tutorial in Photoshop (Part 3): Create professional website layout

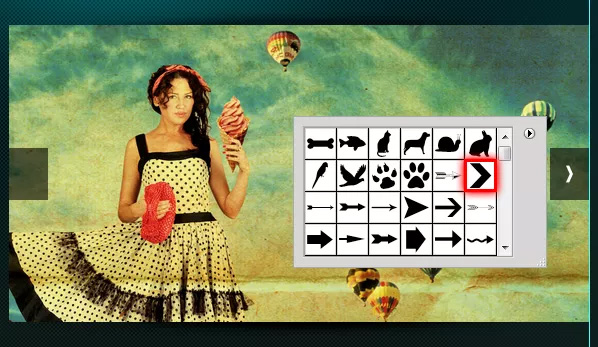
Open the automatic shape in the Options Panel and select the arrow as shown, then add it to the button.

images 44 of Website design tutorial in Photoshop (Part 3): Create professional website layout
Images 44 of Website design tutorial in Photoshop (Part 3): Create professional website layout

Create a frame with color # 000000.

images 45 of Website design tutorial in Photoshop (Part 3): Create professional website layout
Images 45 of Website design tutorial in Photoshop (Part 3): Create professional website layout

Reduce Opacity to 50%.

images 46 of Website design tutorial in Photoshop (Part 3): Create professional website layout
Images 46 of Website design tutorial in Photoshop (Part 3): Create professional website layout

Add more description about the project.

images 47 of Website design tutorial in Photoshop (Part 3): Create professional website layout
Images 47 of Website design tutorial in Photoshop (Part 3): Create professional website layout

Step 8: Add some lines to help

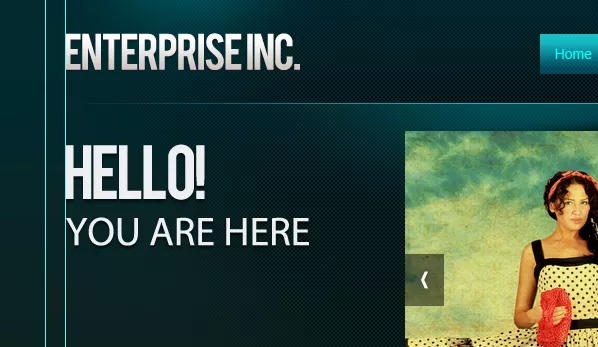
A welcome message and some description of the site.

images 48 of Website design tutorial in Photoshop (Part 3): Create professional website layout
Images 48 of Website design tutorial in Photoshop (Part 3): Create professional website layout

images 49 of Website design tutorial in Photoshop (Part 3): Create professional website layout
Images 49 of Website design tutorial in Photoshop (Part 3): Create professional website layout

Step 9: Complete the title

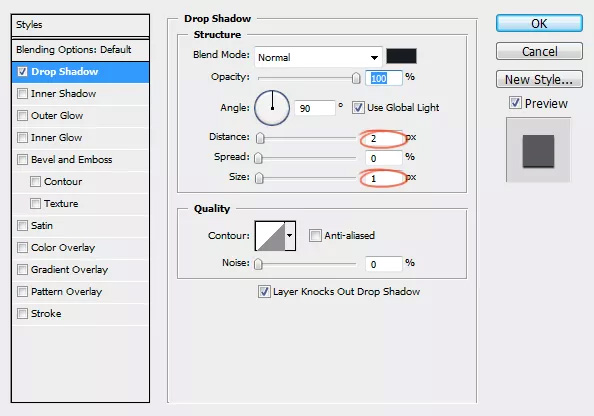
We have almost completed the title. Now just need to add a subtle shadow effect to finish. Create a shadow as previously created using the Brush tool.

images 50 of Website design tutorial in Photoshop (Part 3): Create professional website layout
Images 50 of Website design tutorial in Photoshop (Part 3): Create professional website layout

Leave a distance of 1px between the head and the shadow.

images 51 of Website design tutorial in Photoshop (Part 3): Create professional website layout
Images 51 of Website design tutorial in Photoshop (Part 3): Create professional website layout

Step 10: Use the Gradient for the background

Create a gradient from light gray to white.

images 52 of Website design tutorial in Photoshop (Part 3): Create professional website layout
Images 52 of Website design tutorial in Photoshop (Part 3): Create professional website layout

Create a new layer below the title and apply the gradient color on.

images 53 of Website design tutorial in Photoshop (Part 3): Create professional website layout
Images 53 of Website design tutorial in Photoshop (Part 3): Create professional website layout

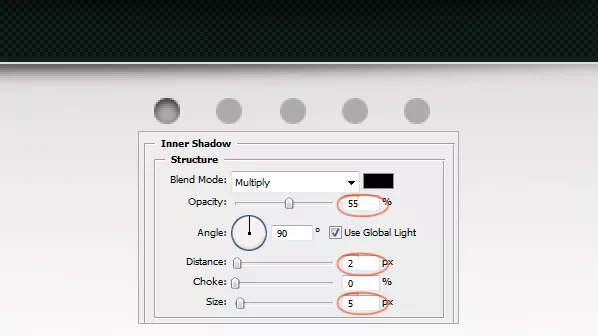
Step 11: Add the x slider bar

Create a rotating slider

images 54 of Website design tutorial in Photoshop (Part 3): Create professional website layout
Images 54 of Website design tutorial in Photoshop (Part 3): Create professional website layout

Apply Inner Shadow to a point to see the active item in the slider.

images 55 of Website design tutorial in Photoshop (Part 3): Create professional website layout
Images 55 of Website design tutorial in Photoshop (Part 3): Create professional website layout

Step 12: Create content division lines

Select the Pencil Tool and draw a 1 pixel line with light gray (#aaaaaa).

images 56 of Website design tutorial in Photoshop (Part 3): Create professional website layout
Images 56 of Website design tutorial in Photoshop (Part 3): Create professional website layout

Hide smooth edges using gradient masks.

images 57 of Website design tutorial in Photoshop (Part 3): Create professional website layout
Images 57 of Website design tutorial in Photoshop (Part 3): Create professional website layout

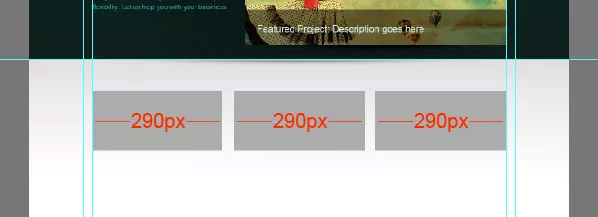
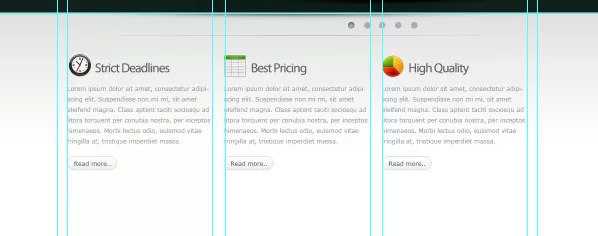
Step 13: Add the main content

This is a 3 column layout so we need to create 3 equal columns with a distance between them. Here perform a simple calculation and divide the available space into 3 equal parts and the distance between them is 25 pixels.

images 58 of Website design tutorial in Photoshop (Part 3): Create professional website layout
Images 58 of Website design tutorial in Photoshop (Part 3): Create professional website layout

Add the guides to the sections, then remove the sections.

images 59 of Website design tutorial in Photoshop (Part 3): Create professional website layout
Images 59 of Website design tutorial in Photoshop (Part 3): Create professional website layout

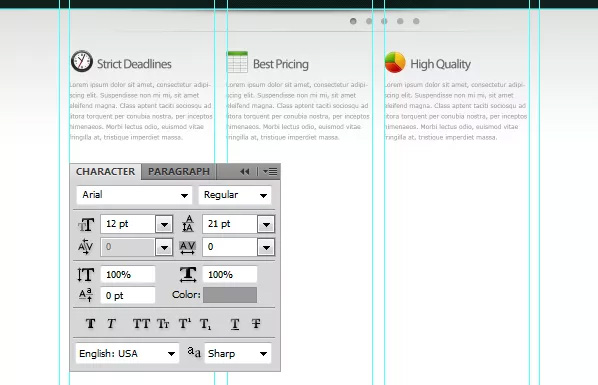
Add some featured services by dropping the icons from the Function icon set. Maintain the distance between homogeneous objects.

images 60 of Website design tutorial in Photoshop (Part 3): Create professional website layout
Images 60 of Website design tutorial in Photoshop (Part 3): Create professional website layout

images 61 of Website design tutorial in Photoshop (Part 3): Create professional website layout
Images 61 of Website design tutorial in Photoshop (Part 3): Create professional website layout

Create a simple " Read More " button by selecting the Rectangle Tool to draw the shape.

images 62 of Website design tutorial in Photoshop (Part 3): Create professional website layout
Images 62 of Website design tutorial in Photoshop (Part 3): Create professional website layout

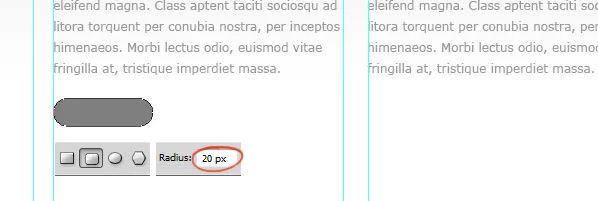
Apply Gradient Overlay and Stroke for this button.

images 63 of Website design tutorial in Photoshop (Part 3): Create professional website layout
Images 63 of Website design tutorial in Photoshop (Part 3): Create professional website layout

images 64 of Website design tutorial in Photoshop (Part 3): Create professional website layout
Images 64 of Website design tutorial in Photoshop (Part 3): Create professional website layout

Copy this button to other sections.

images 65 of Website design tutorial in Photoshop (Part 3): Create professional website layout
Images 65 of Website design tutorial in Photoshop (Part 3): Create professional website layout

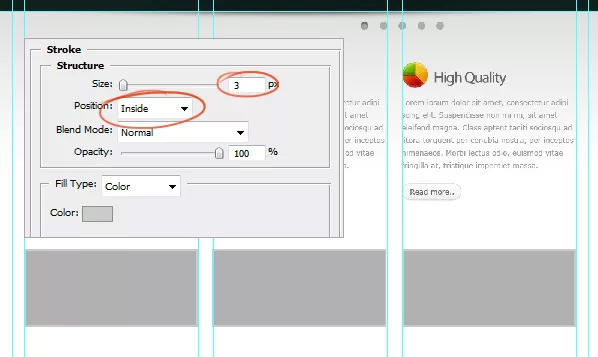
We will add some recent work items by drawing three image hold boxes and applying a 3 pixel stroke.

images 66 of Website design tutorial in Photoshop (Part 3): Create professional website layout
Images 66 of Website design tutorial in Photoshop (Part 3): Create professional website layout

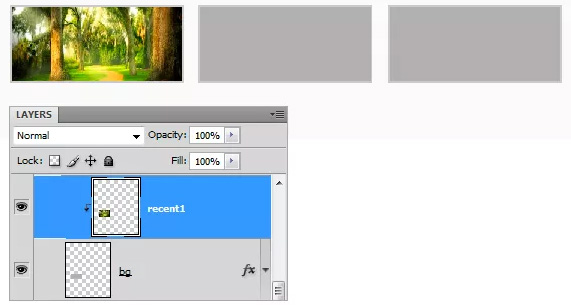
Drag the image into the boxes.

images 67 of Website design tutorial in Photoshop (Part 3): Create professional website layout
Images 67 of Website design tutorial in Photoshop (Part 3): Create professional website layout

images 68 of Website design tutorial in Photoshop (Part 3): Create professional website layout
Images 68 of Website design tutorial in Photoshop (Part 3): Create professional website layout

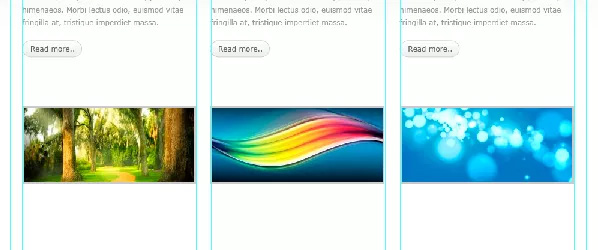
Create the ball as you did before and place it under the box.

images 69 of Website design tutorial in Photoshop (Part 3): Create professional website layout
Images 69 of Website design tutorial in Photoshop (Part 3): Create professional website layout

Add some project descriptions.

images 70 of Website design tutorial in Photoshop (Part 3): Create professional website layout
Images 70 of Website design tutorial in Photoshop (Part 3): Create professional website layout

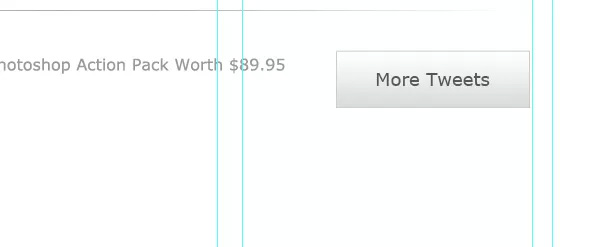
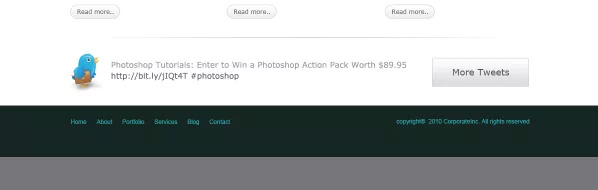
Create a Twitter feed. Drop on the Twitter bird icon.

images 71 of Website design tutorial in Photoshop (Part 3): Create professional website layout
Images 71 of Website design tutorial in Photoshop (Part 3): Create professional website layout

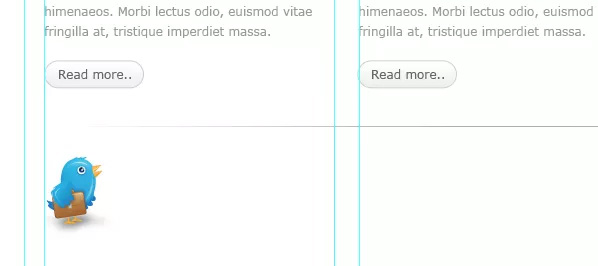
Add a Twitter notification.

images 72 of Website design tutorial in Photoshop (Part 3): Create professional website layout
Images 72 of Website design tutorial in Photoshop (Part 3): Create professional website layout

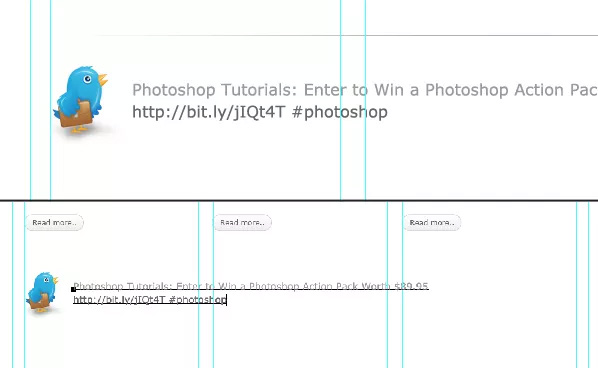
Create a button for More Tweets.

images 73 of Website design tutorial in Photoshop (Part 3): Create professional website layout
Images 73 of Website design tutorial in Photoshop (Part 3): Create professional website layout

Apply the styles like the image below.

images 74 of Website design tutorial in Photoshop (Part 3): Create professional website layout
Images 74 of Website design tutorial in Photoshop (Part 3): Create professional website layout

images 75 of Website design tutorial in Photoshop (Part 3): Create professional website layout
Images 75 of Website design tutorial in Photoshop (Part 3): Create professional website layout

Add text content.

images 76 of Website design tutorial in Photoshop (Part 3): Create professional website layout
Images 76 of Website design tutorial in Photoshop (Part 3): Create professional website layout

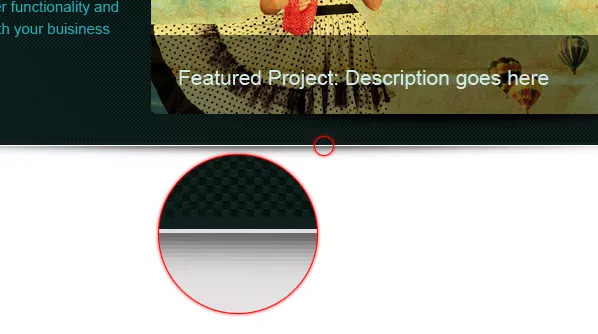
Step 14: Create footer and finish

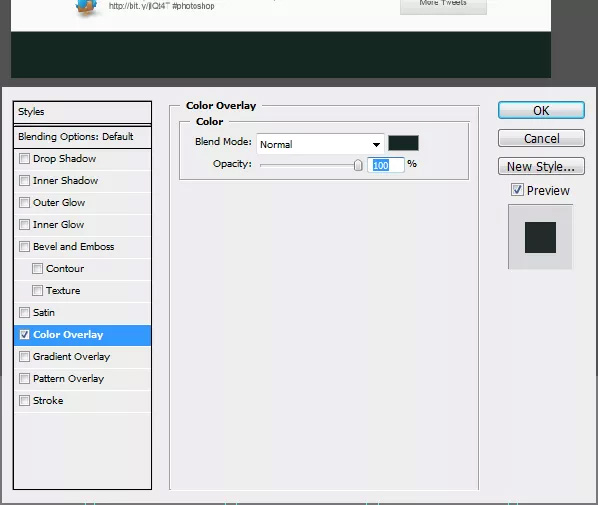
Select an area for the footer and fill it with gray.

images 77 of Website design tutorial in Photoshop (Part 3): Create professional website layout
Images 77 of Website design tutorial in Photoshop (Part 3): Create professional website layout

Apply Color Overlay as shown below.

images 78 of Website design tutorial in Photoshop (Part 3): Create professional website layout
Images 78 of Website design tutorial in Photoshop (Part 3): Create professional website layout

Finally add a foot navigation and copyright information.
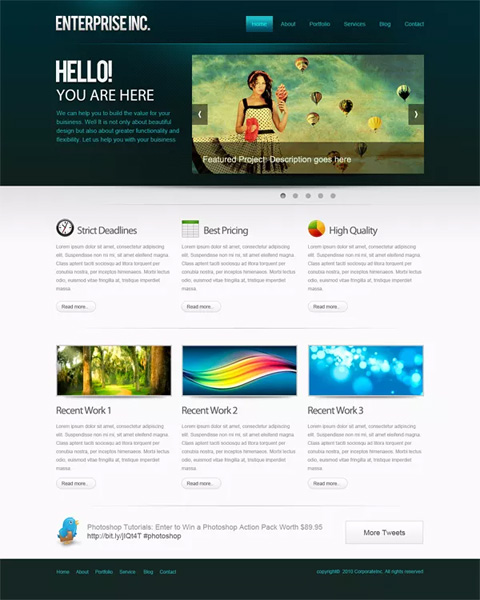
images 79 of Website design tutorial in Photoshop (Part 3): Create professional website layout
Images 79 of Website design tutorial in Photoshop (Part 3): Create professional website layout

Final result

images 80 of Website design tutorial in Photoshop (Part 3): Create professional website layout
Images 80 of Website design tutorial in Photoshop (Part 3): Create professional website layout

Download: PSD file

See more:

  1. How to design a website in Photoshop (Part 1): Create a theme for the craft shop
  2. How to design a website in Photoshop (Part 2): Create a Landing page for travel websites

I wish you all success!

4 | 2 Vote
« PREV : The best photo...
Instructions for... : NEXT »