How to use Photoshop Blending Mode
Photoshop blending mode is one of the most creative and interesting tools in your workspace.
Table of Contents
Photoshop blending mode is one of the most creative and interesting tools in your workspace. By using a variety of layers with many different properties, you can create all kinds of visual tricks.
Due to the extended nature, Photoshop's Blending mode can be a bit overwhelming. So to help beginners understand this tool, let's explore the basics of Photoshop blending mode.
Step 1: Set up the file
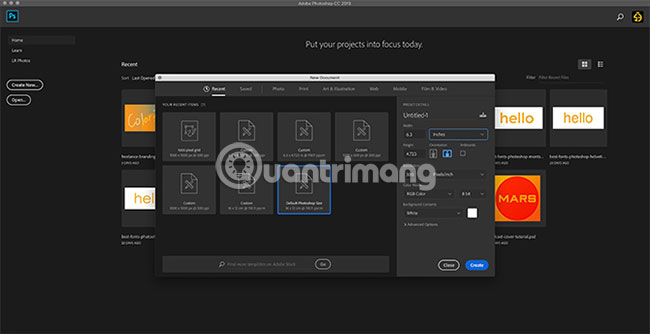
As shown in the tutorial on how to create texture in Photoshop, the first thing to do is set the file.
For this tutorial, you don't need specific dimensions. So it's best to use Adobe's default Photoshop size.

After creating a new file, you will see your entire workspace. The central part is a large white square.
Looking down at the lower right corner of the screen, you will see another small white square. This is where the image is displayed as a preview in the Layers panel .

The Layers panel is something the rest of this tutorial will focus on.
If you zoom in, you can see your image on a locked layer, with a small padlock icon next to it. At the top of the Layers panel , you will see 3 tabs: Layers, Channels and Paths .
Layers are the main tab that we will use. You can also use the Channels tab to check your blending properties.
Step 2: Explore the Channels tab
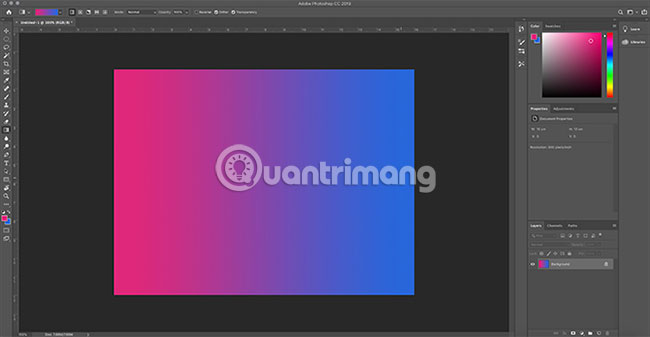
First, add some color to the image. For this tutorial, we will apply a simple gradient to see how the blending mode will affect a layer through the blue to red spectrum.
If you are unsure about this step, see the TipsMake.com tutorial on how to create a custom gradient in Photoshop.
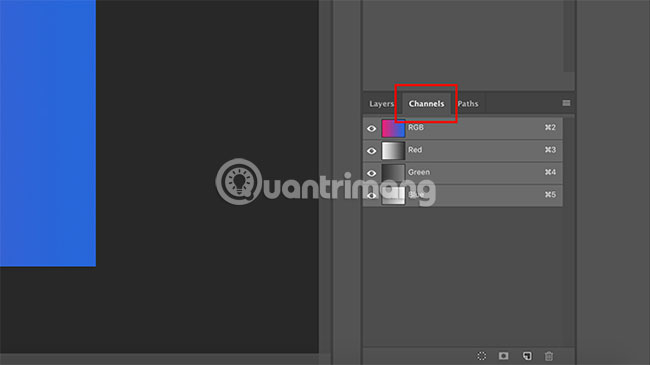
Next, go to the Layers panel and click Channels.
This is where Photoshop stores all the image color information. By controlling the visibility of these colors, by activating the eye icon next to the individual channels, you can see how each color interacts in a layer.
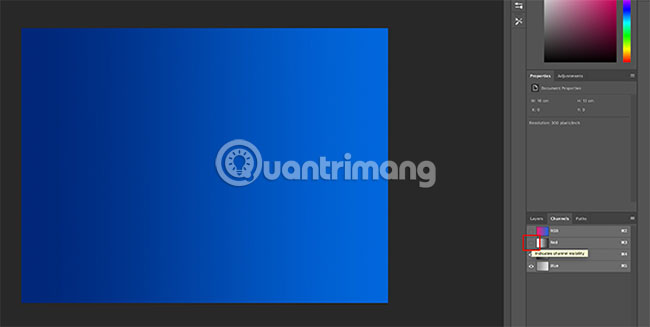
For example, if Red (red) is turned off in Channels, everything in the image will turn green. That's because you disabled the visibility of anything in red.
To turn on red, click the empty box next to Red, so that the eye icon reappears.
Note : Turning off the visibility on the color channel does not mean that the color will be deleted from the image when saved.
Step 3: Add a blending element
Next, we'll add another element in the second layer to see how the two layers blend together.
To make things simple, create a new layer in the Layers panel . Make sure the layer is above the gradient. Add a little color with paintbrush.
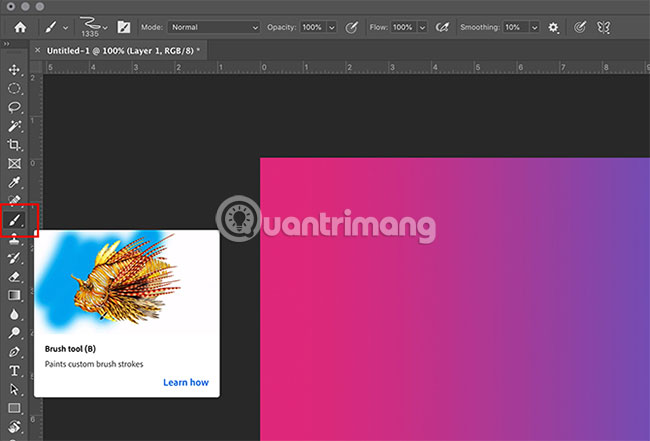
To add a color, click on the Brush tool , found on the left toolbar.
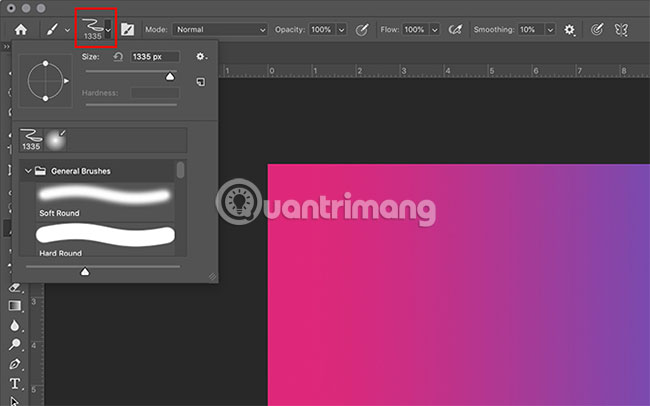
Next, click the preset Brush icon found in the top left corner of the workspace.
To select a brush, scroll through the presets (presets) until you find a subfolder named General Brush. Open that folder.
This tutorial will use the Hard Round brush and increase the size of this brush. This will allow you to create a large circle without using the Ellipse tool .
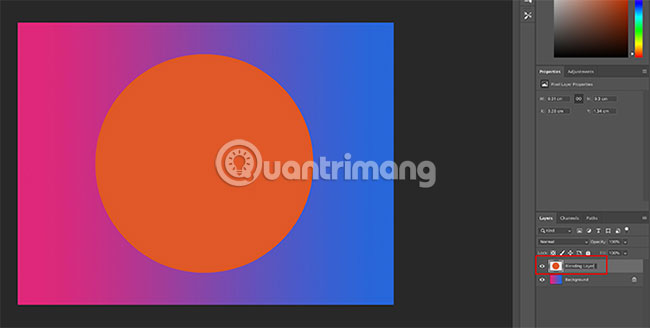
After you put your color on this new layer, name it to remember what you do. Today's tutorial will call this layer 'Blending Layer'.
Step 4: Experiment with the blending mode
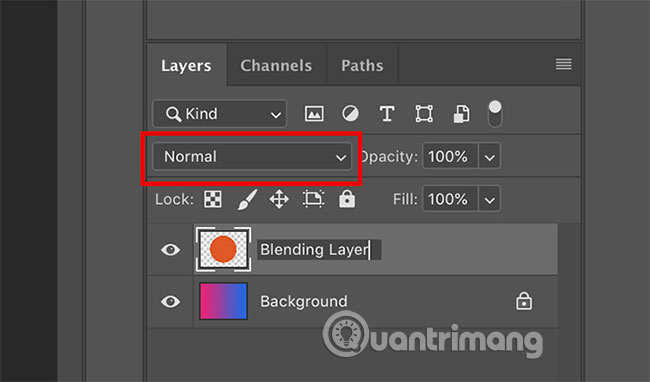
Now you have set up your layer blending. It's time to experiment with the blending mode! The drop-down menu that you will work with is the menu highlighted in red in the image below.
As you can see, the blending mode is now set to Normal, which means that the orange circle is at the top of the gradient and there is no interaction with it.
Click on 'Blending Layer' to make sure it works, then click on the drop-down menu to start testing the effects.
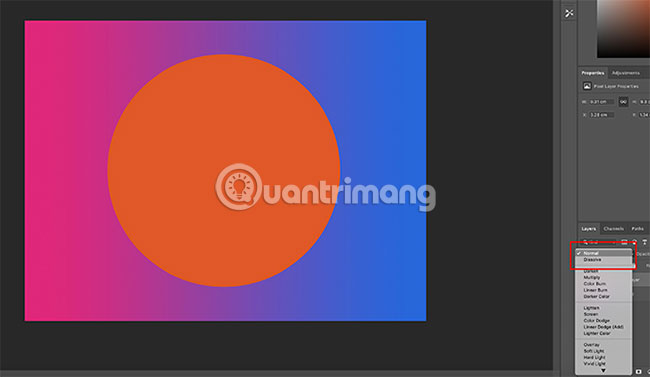
There are many different blending modes in this drop-down menu.
An interesting thing about Photoshop is that instead of having to click on each individual option to see how it creates the effect, Adobe will automatically preview the mode when you hover over it.
You can see that there are soft gray lines between some blending modes. The reason is that Adobe groups those modes based on the type of effect they create.

If you scroll down and click on an option, such as Multiply, the circle becomes darker.

If you are looking for ways to make your circle brighter, scroll down to the next section and click on blending modes like Screen or Lighten.
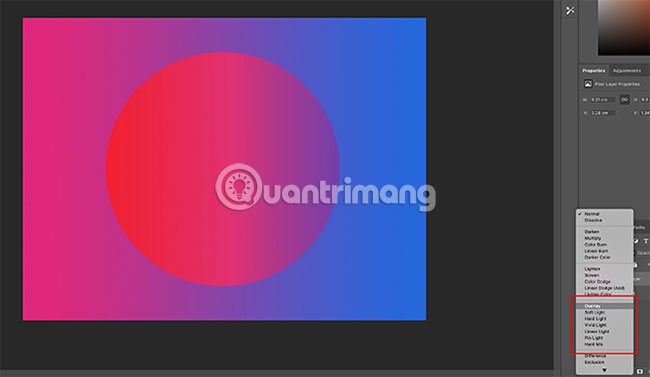
You can also try the Overlay section . The effects in this section vary greatly, but basically, they take dark and light colors from both layers, plus many other colors and combine them all to create new effects.
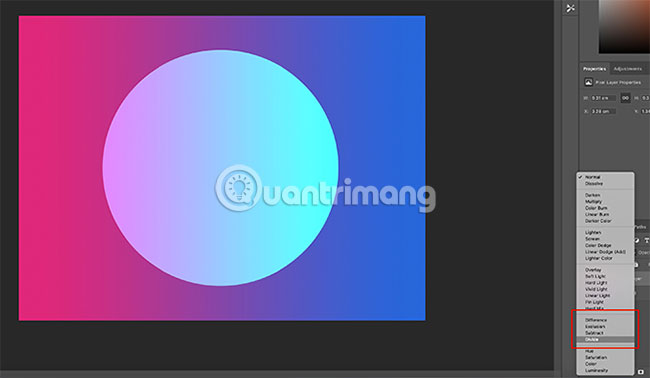
Going down, you will find a group of blending modes with options for Difference, Exclusion, Subtract and Divide .
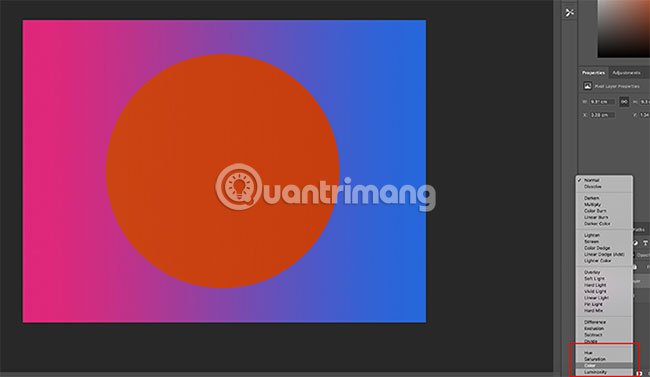
Finally, you'll see a section with Hue, Saturation, Color and Luminosity options .
Step 5: Change Opacity

Everything is almost complete, there are only a few small things left before the end.
On the Layers panel next to the blending mode, you can also change the layer 's Opacity .
By sliding the arrow left or right along the Opacity slider , you can create more unique effects.
Step 6: Access Blending Options

In addition, you can create blending effects by clicking on the fx icon at the bottom of the Layers panel . Then, click Blending Options.
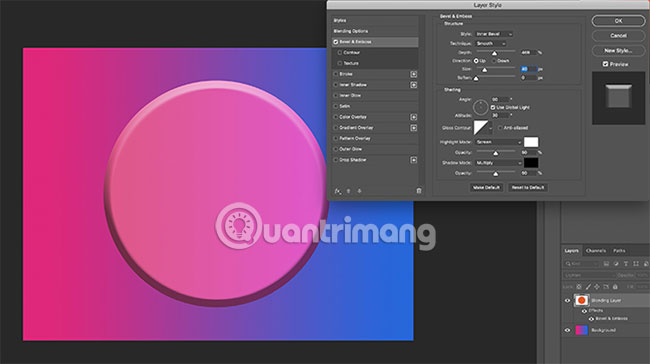
A new box called Layer Style will pop up. Here you can switch to a variety of interesting options to apply to your images.
You should try each one to see how they can produce effects.
Step 7: Lock the layer
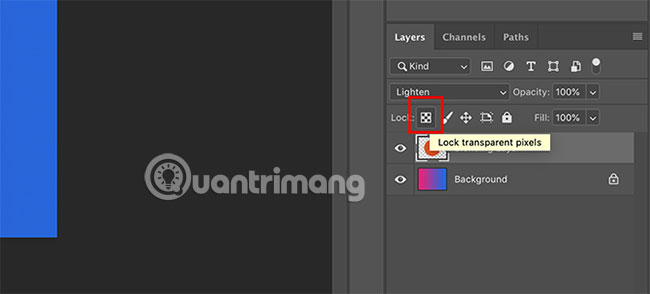
Finally, after you've done all the operations and don't want to add any changes to the layer, you can prevent further changes from happening by locking the layer:
1. Go to the Layers panel .
2. Click on the layer you want to lock.
3. Click the chessboard icon or padlock icon.
The chessboard icon blocks transparent pixels on the screen, meaning you can only draw inside the created circle.
The padlock icon locks all pixels, meaning nothing can be edited or moved, including circles.
When finished, click File> Save As to save the image.
Photoshop blending mode is a great tool and by learning the basics, you can create unique and attractive images.
If there are other parts you want to explore in Photoshop, why not start with the article: How to use Photoshop for newbies?
Hope you are succesful.
Was this article helpful?
Your feedback helps us improve.
Related Articles
 Ways of blending 80s image colors in Photoshop3 minutes read
 New features of Photoshop CC 20197 minutes read
 How to switch between light and dark background themes in Photoshop2 minutes read
 How to quickly edit backlighting in Photoshop2 minutes read
 49 smart Photoshop tips you need to know (Part 3)15 minutes read
 49 smart Photoshop tips you need to know (Part 1)12 minutes read
Reader Comments 0
Sign in with email or Google to join the discussion.