How to create a custom Color Palette in Adobe Photoshop
What if you don't like the default color swatch for Adobe Photoshop? Today's article will show you how to create a custom color palette in Photoshop.
- Instructions for creating custom palettes in Photoshop
- Step 1: Find color inspiration
- Step 2: Learn about the Color Swatches control panel
- Step 3: Delete old colors
- Step 4: Use Eyedropper tool
- Step 5: Create a new color pattern
- Step 6: Complete color modeling
- Step 7: Save the palette
- Step 8: Reset Swatches to default
- Step 9: Reload the color swatches
Adobe Photoshop is an extremely flexible program. Whether it's texture, gradient or paint brush, there seems to be no limit to how you can adjust this program to suit your needs.
However, when it comes to coloring images, what happens if you don't like the default color swatch of Adobe Photoshop? Today's article will show you how to create a custom color palette in Photoshop.
Step 1: Find color inspiration

The first thing to do is open an image where you can get inspired from it.
This tutorial will use the file created in the article to use blending mode in Photoshop.
After opening the file, you will see a screen setup similar to the example. The image will be in the middle of the workspace and the default palette will be on the right.
Step 2: Learn about the Color Swatches control panel

The place where today's article will focus is primarily on the Color Swatches dashboard , located in the top right corner of the workspace.
These are the default color patterns, consisting of a group of squares set to grid.
Along the top row, you will see a series of seemingly random colors. These are the colors I used recently with Photoshop's Eyedropper tool. Photoshop puts them there so users can quickly reuse them again if needed.
Below these patterns is a rectangular grid. This grid contains the default color palette in Photoshop.
This grid is also quite good, but as mentioned, we are creating a custom palette, so this grid is not needed. Ignore those swatches.
Step 3: Delete old colors
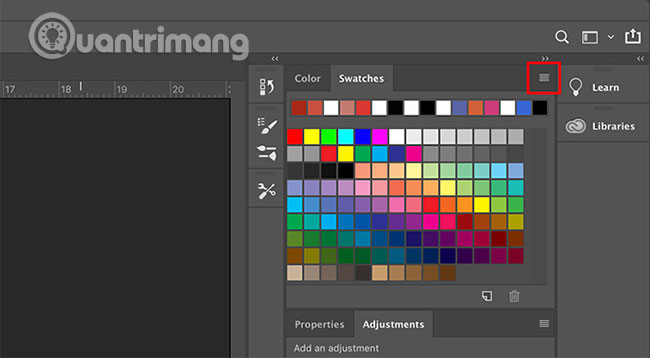
To remove these color swatches, click the drop-down menu icon in the top right corner of the Swatches panel .

Next, a giant menu will appear. This menu will give you a list of all possible actions with the Swatches control panel .
Photoshop will also give you a list of default colors available in this application. Click Preset Manager.
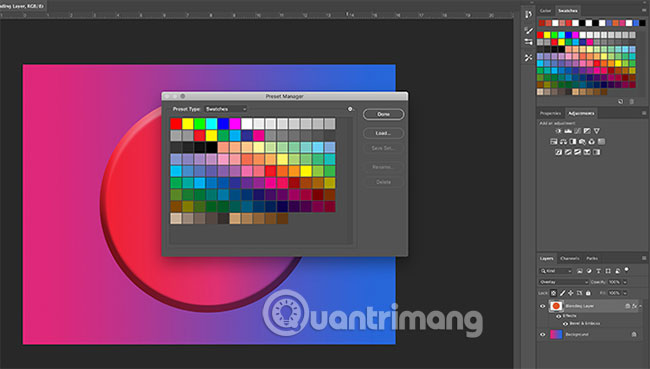
When you click Preset Manager, a new pop-up box will appear. In this box, you can control the currently active color swatches in your Swatches control panel.
Besides, you can also:
- Load more colors to have more options for the color palette.
- Clear color.
- Rearranging color grid.
- Rename the colors you already have.
- Create a whole new set of colors.
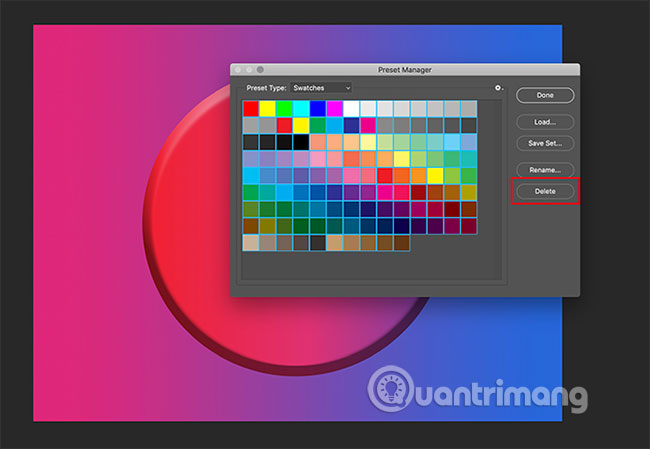
To delete these default colors, left-click the first color.
Then left click, and press Shift key on the last color, to highlight the entire palette (there will be blue borders around the squares).
Next, click Delete, then select Done.
Don't worry that this will permanently change your default palette. Photoshop has saved the template for you to call back later.
Step 4: Use Eyedropper tool
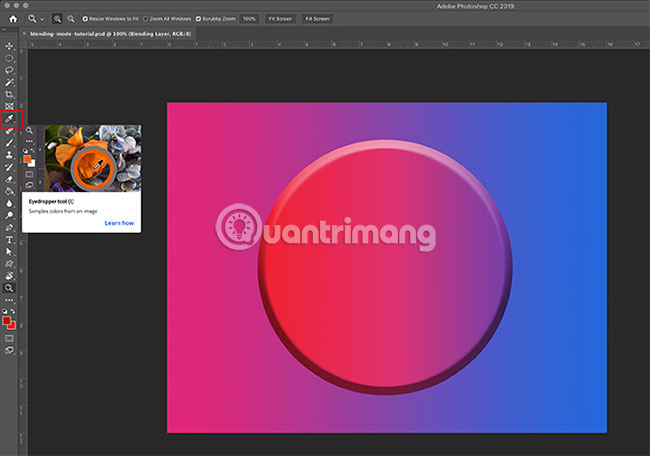
You have now removed the default colors and ready to create new colors.
To select individual colors for a custom palette, activate the Eyedropper tool , found in the left toolbar.
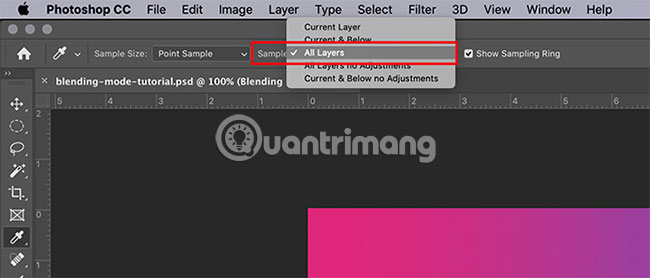
Next, in the top left corner, where you see the drop-down menu named Sample, click and select All Layers.
This All Layers option means that you can sample all layers in a file when they appear in an 'finished' image, rather than the color on the individual layers.
This option will make the color selection process much faster.
Step 5: Create a new color pattern

After selecting the Eyedropper tool and All Layers, click on the page where you want to sample a new color.
You can see a color wheel that appears around the color you sampled. On the top of this color circle, you will see the color you are currently sampling (in this example, bright pink). Along the bottom will be the color you sampled earlier with the Eyedropper tool (red in this example).
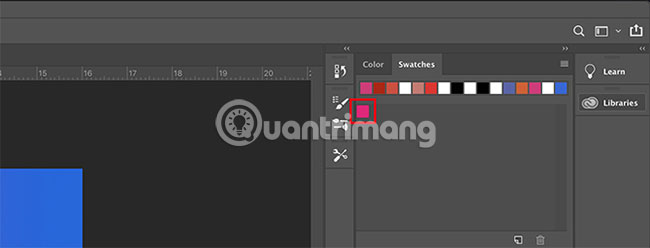
Once you have the colors you want, move the Eyedropper tool through the blank Swatches panel. You can notice that the cursor changes from the Eyedropper icon to Paint Bucket.
When the icon switches, left-click the blank Swatches panel. Photoshop will immediately drop the new color into the panel window.

After you drop the color swatches, a window called Color Swatch Name will appear. This is where you will name your new swatch and can save it in the library. After naming the color, click OK.
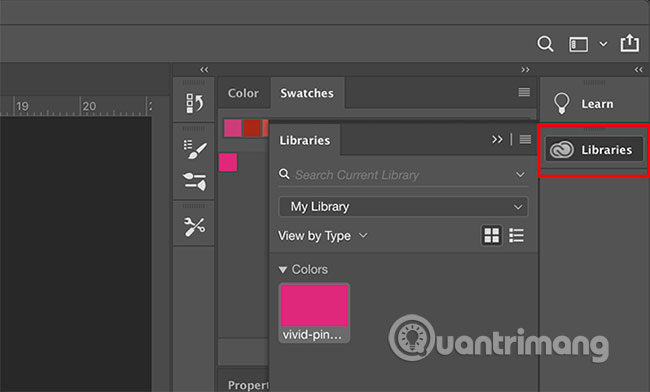
If you click the option to save the color to the library, you can see the Libraries panel appear and expand on the Swatches panel , especially if this is the first time you have completed this step.
If you click on the button that says Libraries, this panel will be collapsed and you can continue working on Swatches.
Step 6: Complete color modeling
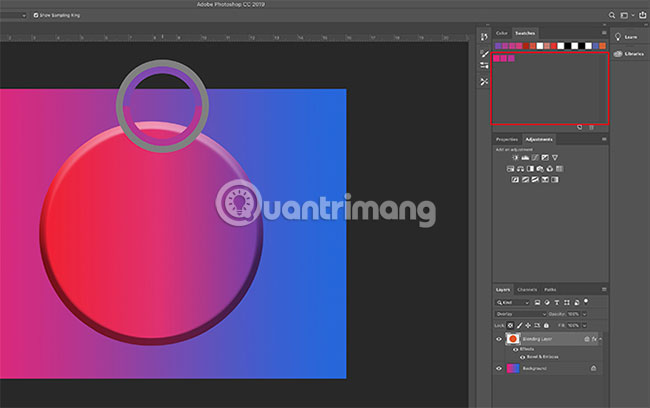
After you complete step 5, repeat the above steps several times, until you have the right amount of colors you need for the custom palette.
Every time you add a new color, it will display in the Swatches control panel .
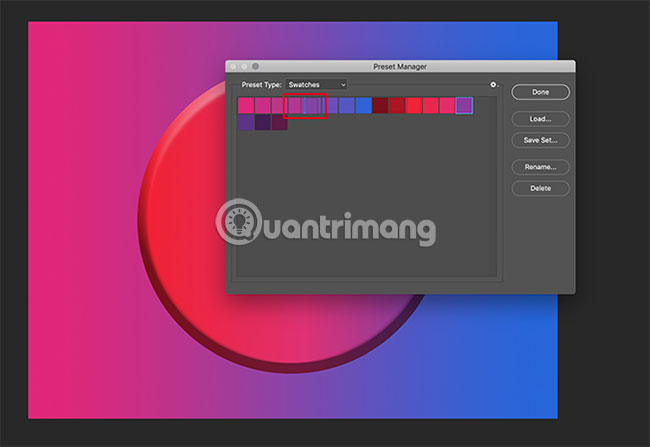
When you have all the colors you need, click the Swatches drop-down menu , then click Preset Manager.
As I did when I first opened Preset Manager, you will see Load, Save Set, Rename and Delete options.
However, instead of deleting the colors, we will rearrange them based on the colors.
To rearrange the colors, click on the color to highlight it. Then click and drag the color to where you want it to appear. You can know where you dragged this color with the blue line that appears when you drag it over the color swatches.
Arranging colors like this allows you to control whether to sample the same color twice.

In this case, the author took the same color sample twice. To delete a duplicate color template, click it and then click Delete.
After you are satisfied with the sorted palette, click Done. Photoshop will exit Preset Manager.
Step 7: Save the palette
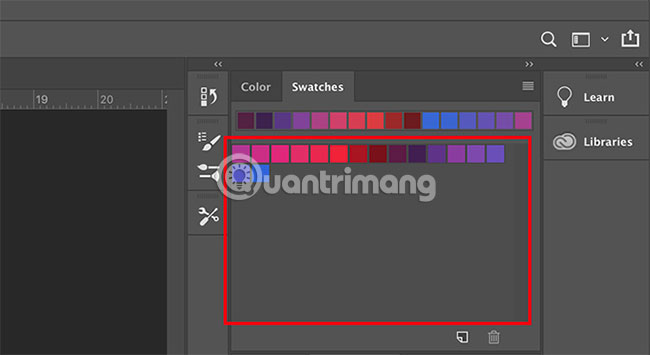
After leaving Preset Manager, you can check what colors look like in the Swatches control panel .
If you are satisfied with what you have, save this palette.

To save these color swatches as a custom palette, click the Swatches drop-down menu , then select Save Swatches.
The Save As dialog box will appear and you can name your palette there. Choose a meaningful and easy-to-remember name.
Step 8: Reset Swatches to default

Suppose you don't want to use this custom palette anymore and want to go back to the default option.
To do this, click the Swatches drop-down menu . Then click Reset Swatches.
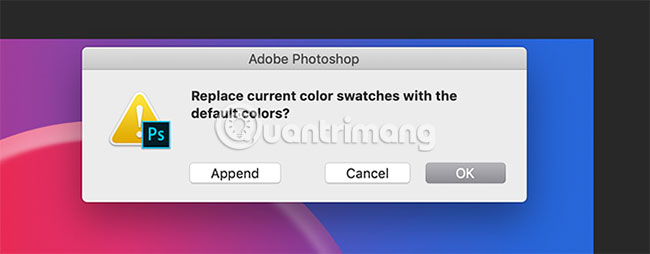
When Photoshop prompts you to replace the current color, click OK.
The important thing to note is that don't click Append here. If you do so, the default colors will be added to the custom palette, rather than replacing them.
Step 9: Reload the color swatches
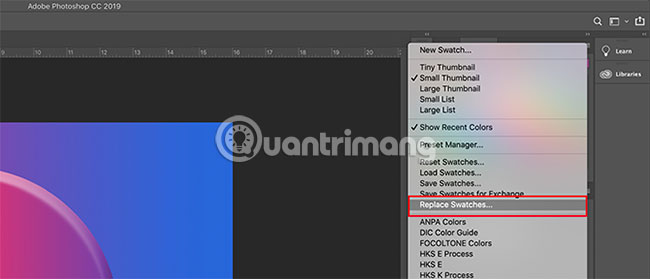
Now, the default color palette is working, how can you find your custom color patterns?
Again, this process is very simple. Just go to the Swatches control panel , click on the Swatches drop-down menu , then click Replace Swatches.
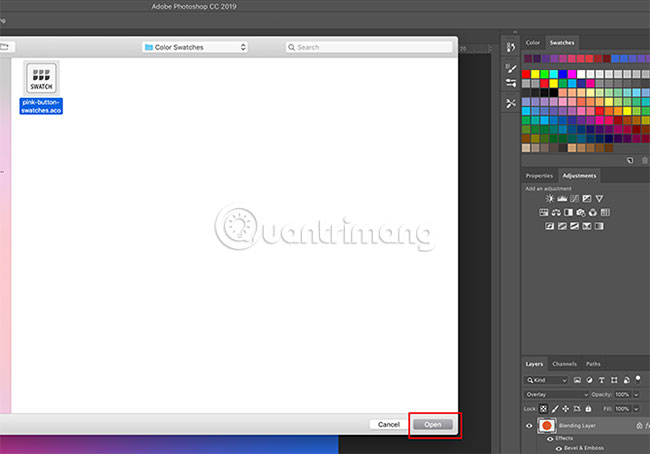
In the Color Swatches folder , you will find the file for the palette you want to use. Select the file you need, click Open and it will load.
Everything is complete!
Now that you have learned how to create custom palettes in Photoshop, you can use this skill when designing your next image.
Are you looking for other ways to customize Photoshop applications? Take a look at how to create a custom brush with TipsMake.com 's Photoshop for more details.
Hope you are succesful.
You've just finished reading the article "How to create a custom Color Palette in Adobe Photoshop" edited by the TipsMake team. You can save how-to-create-a-custom-color-palette-in-adobe-photoshop.pdf to your computer here to read later or print it out. We hope this article has provided you with many useful tech tips and tricks. You can search for similar articles on tips and guides. Thank you for reading and for following us regularly.
- How to create custom grid systems in Photoshop
- How to use Photoshop CS6 (Part 1): Create digital photos
- The terminology of color, wheel color and skill used to color
- How to create custom gradients using Photoshop CC
- How to use Custom Shape Tool in Adobe Photoshop
- Instructions for using Photoshop for newbies