Table of Contents
MP3 Cut is a small Windows utility for splitting an audio file into multiple clips. It can divide a track by duration, target file size, or a chosen number of equal-length parts. That makes it useful for breaking up a long recording, but it is not the best tool for selecting one precise passage for a ringtone.
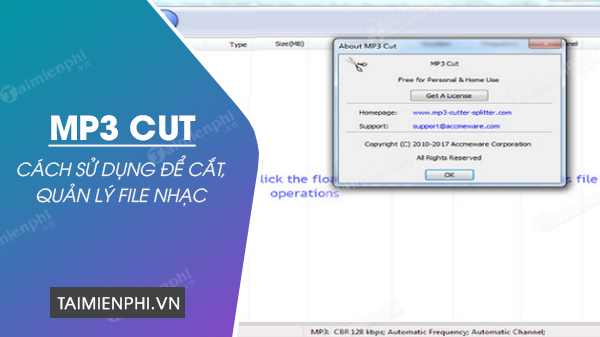
Safety note: this is a legacy program and a dependable current developer page is difficult to verify. If it is not already installed, avoid random “download” sites and use a maintained editor instead. mp3DirectCut is better suited to choosing exact start and end points, while an audio editor provides waveform editing and effects.
Understand the MP3 Cut interface
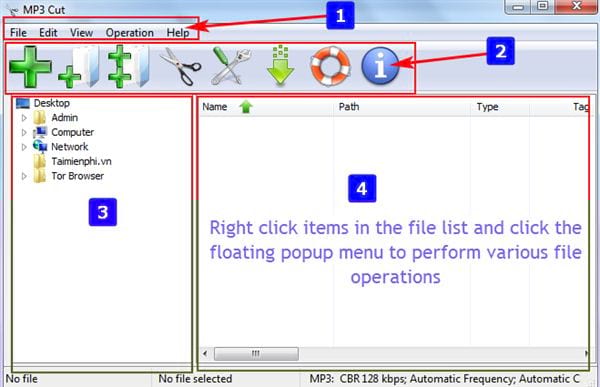
The main window has four useful areas:
- the menu bar;
- the toolbar for adding files, changing output settings, and starting a split job;
- the folder browser;
- the list of audio files waiting to be processed.
The toolbar shortcuts shown in this version are:
- F6: add one or more audio files;
- F7: add audio from a selected folder;
- F8: include audio from a folder and its subfolders;
- F3: start splitting the files in the queue;
- Ctrl + O: open output and encoding settings.
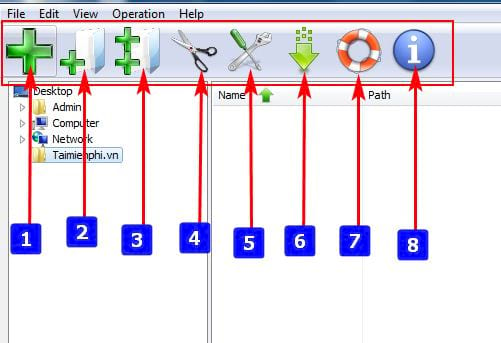
Shortcuts and icons may differ in another release, so use the menu labels if a key does not perform the expected action.
Split an MP3 file
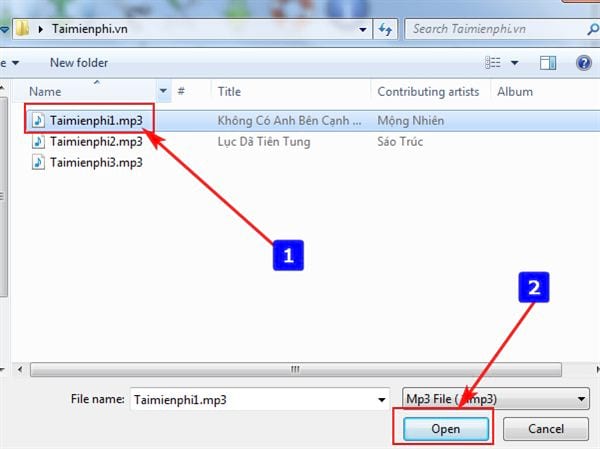
- Click the plus button or press F6.
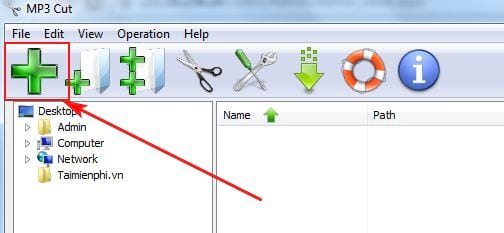
- Browse to the audio file, select it, and click Open. Add a copy rather than the only copy of an important recording.
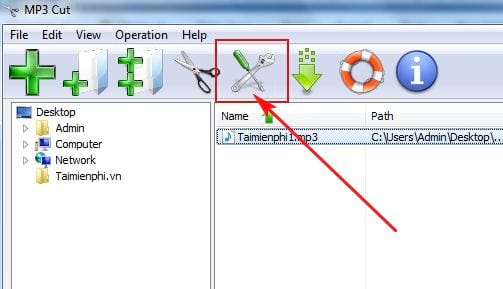
- Click the screwdriver-and-wrench icon or press Ctrl + O to open the output settings.
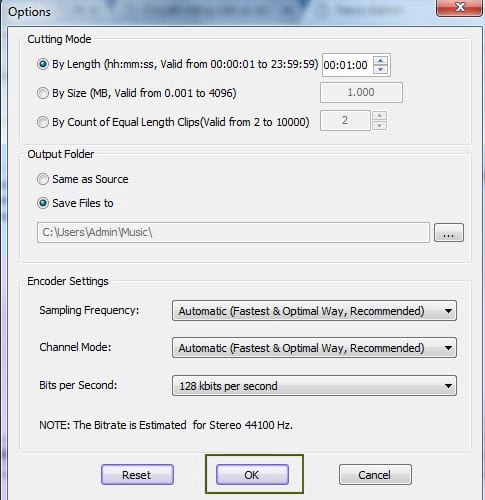
- Choose one Cutting Mode:
- By Length: creates clips with a specified duration. Use this for a lecture, interview, or long recording that needs regular sections.
- By Size: creates parts near a target megabyte size. Use this only when a service or storage device imposes a file-size limit.
- By Count of Equal Length Clips: divides the track into the number of parts you specify.
- Under Output Folder, choose the same folder as the source or select a separate destination. A separate folder makes the results easier to review and prevents confusion with the original.
- Review Encoder Settings. When possible, keep the source sample rate and channel layout. A lower bits-per-second value produces a smaller file but can reduce sound quality.
- Click OK to save the settings.
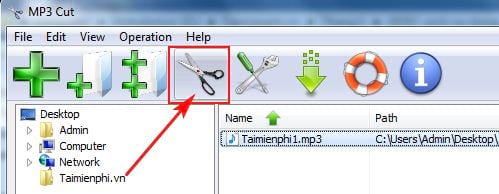
- Click the split button or press F3 to process the files in the list.
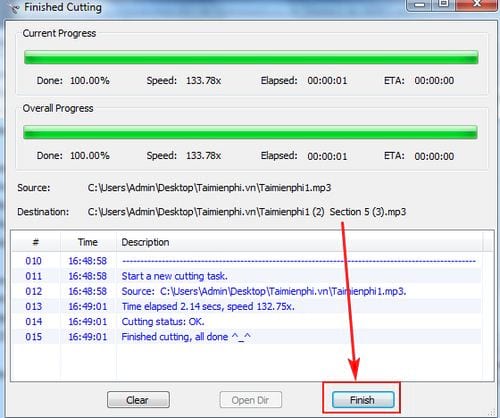
- Wait for processing to finish, then click Finish.
Check the exported clips
Open the destination folder and play the first few seconds and final few seconds of each part. Confirm that no spoken word or musical beat was cut in an awkward place. Splitting by equal length or file size does not understand sentence or song boundaries, so you may need a waveform editor when the cut point matters.
Also compare the output properties with the source:
- the file extension and audio format are what you expected;
- the duration of all parts adds up to the original duration;
- the clips are numbered in the correct order;
- sound is not distorted and stereo has not unexpectedly become mono;
- artist, title, cover art, and other tags were preserved if you need them.
Choose the right cutting method
| Goal | Best method |
|---|---|
| Break a long recording into regular sections | MP3 Cut: By Length |
| Meet an upload-size limit | MP3 Cut: By Size, then verify every part |
| Create a fixed number of chapters | MP3 Cut: Equal Length Clips |
| Extract one chorus or ringtone | A waveform editor with exact start and end markers |
| Remove noise, fade audio, or combine tracks | A full audio editor such as Audacity |
Re-encoding MP3 can reduce quality, especially if the selected bitrate is lower than the source. If the app offers a lossless split mode, use it for simple division; otherwise, keep the original and avoid repeatedly exporting the same clip. For more choices, compare these music-cutting programs.
Related Articles
 To Enable Trim, Use the Trim Command on Windows3 minutes read
 How to Use the Chrome Extension Trim to Make Netflix Better7 minutes read
 How to Enable / Disable TRIM Support for SSDs in Windows 105 minutes read
 All 18 Minecraft Armor Trims and Where to Find Them12 minutes read
 Decorate the Mid-autumn Fruit Tray with Roses, Chrysanthemum, Water6 minutes read
 The TRIM Hard Drive Error on Windows Defrag Has Not Been3 minutes read
Reader Comments 0
Sign in with email or Google to join the discussion.