Table of Contents
Format Factory can reduce a video's file size by re-encoding it with a lower bitrate, a smaller resolution, or both. For broad device compatibility, MP4 with H.264 video is a practical starting point. Keep the original file until you have watched the compressed copy and confirmed that its picture, sound, and subtitles are acceptable.

Compression always involves a trade-off. A noticeably smaller file usually loses some visual detail, even when that loss is hard to see during normal playback. The goal is not “unchanged quality,” but the smallest file that still looks and sounds good for its intended use.
Before you start
- Download Format Factory from the developer's official Format Factory page, not from an unknown installer mirror.
- Make a copy of important footage. Format Factory creates a new output file, but keeping the source gives you another chance if the settings are too aggressive.
- Check the original video's resolution, frame rate, and approximate size in File Explorer by right-clicking it and choosing Properties > Details.
- Decide where the result will be used. Email and messaging may need a much smaller file than local archiving or playback on a large television.
Compress the video in Format Factory
The names and positions of controls may vary slightly between releases, but the workflow remains the same.
- Open Format Factory. In the Video section, select MP4 as the output format.
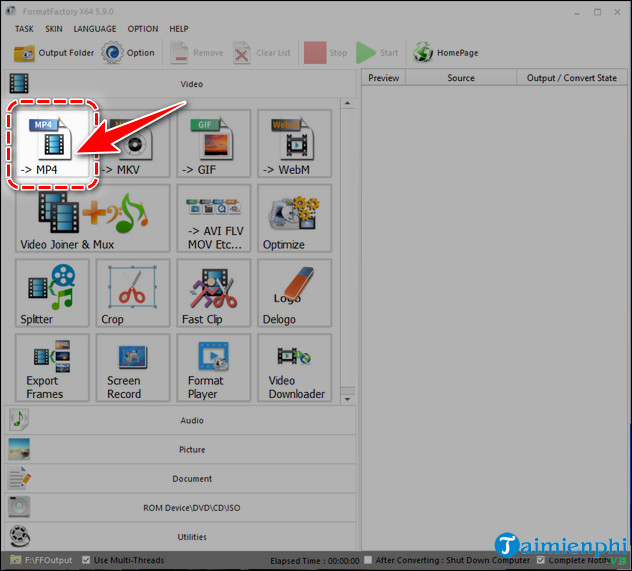
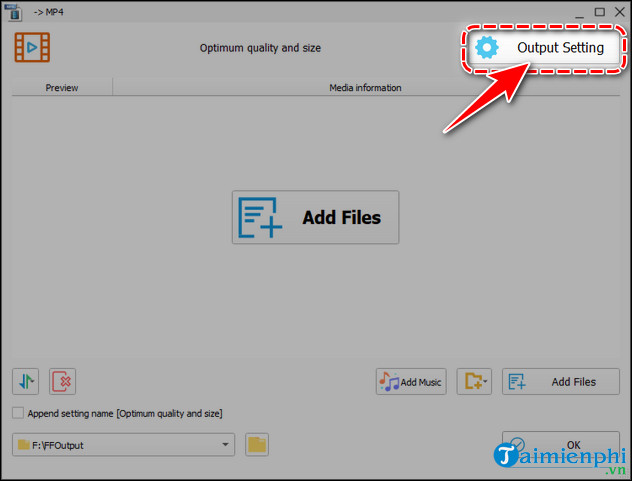
- In the MP4 conversion window, choose Output Setting.
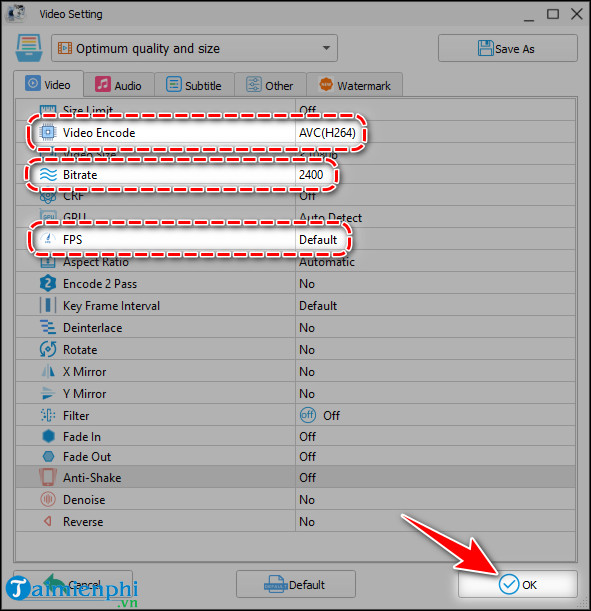
- Set Video Codec to AVC (H.264) for a good balance of compression and compatibility.
- Choose a lower Video Bitrate than the source. Do not apply one bitrate to every video: resolution, motion, frame rate, and source quality all affect how much data is needed.
- Leave FPS at Default or match the source frame rate. Increasing it does not improve the original footage and can make the file larger.
- If a much smaller result is required, reduce the output resolution one step. This saves more space but also removes detail, so avoid downscaling when text or fine interface elements must remain readable.
- For speech, you can also reduce the audio bitrate moderately. Music and complex sound generally need more audio data than voice alone. Click OK when the settings are ready.
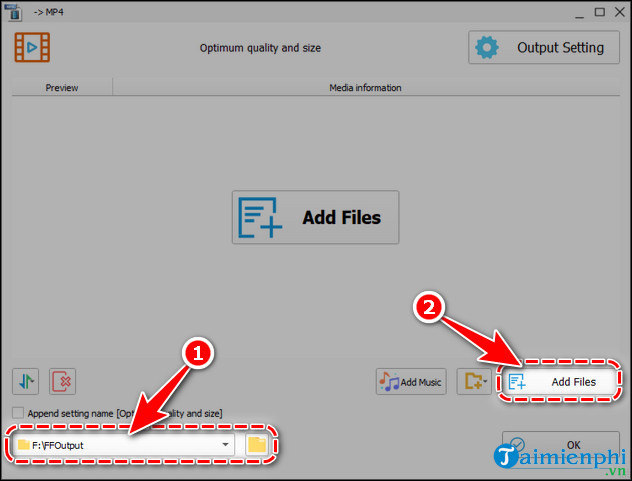
- Select the output folder, then click Add Files.
- Choose the source video and click Open.
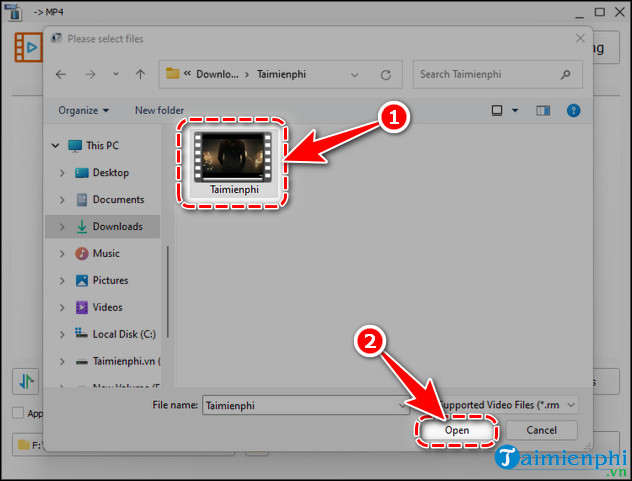
- Review the selected file and settings, then click OK to add the conversion job to the main queue.
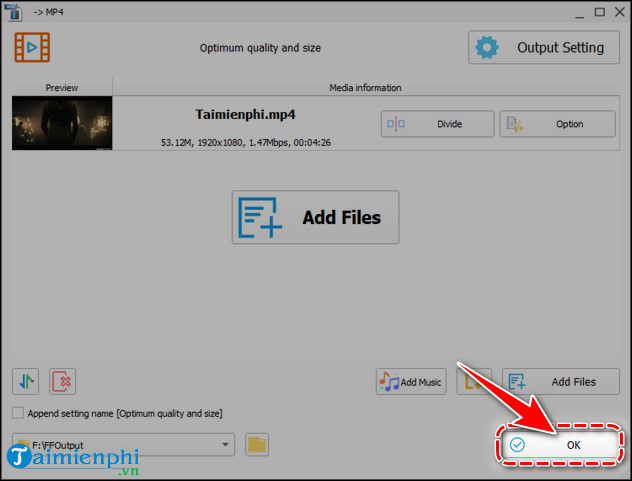
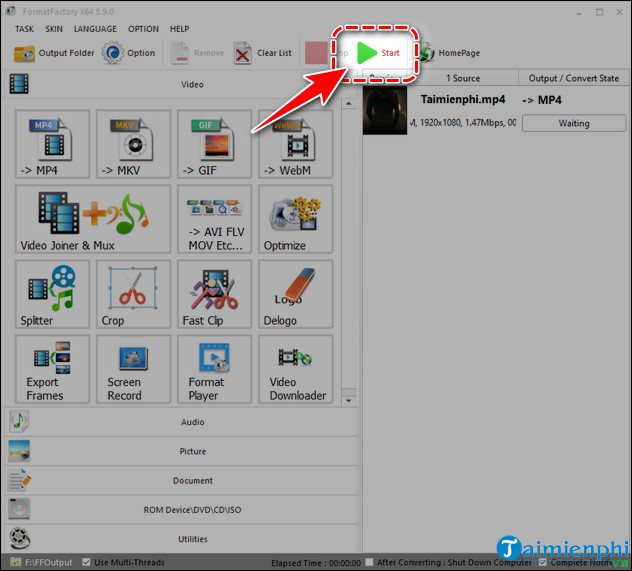
- Click Start. Encoding time depends on the video's duration, resolution, selected codec, and the computer's processor.
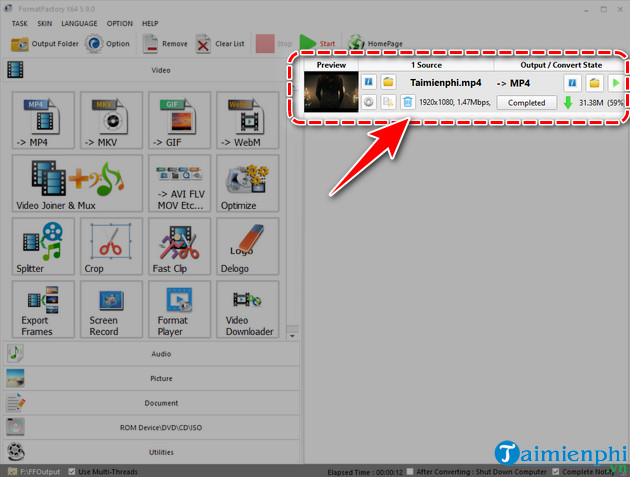
- Wait until the job shows Completed. Open the output file from Format Factory or its destination folder.
Check the compressed video
Compare the source and output files in File Explorer using Properties. The output should be smaller, but file size alone is not enough. Watch the beginning, a scene with motion, a dark scene, and the end. Confirm that:
- the image is not blocky or unusually soft;
- speech and music remain synchronized with the picture;
- the frame is not stretched or cropped;
- subtitles, extra audio tracks, and rotation metadata were preserved if you need them;
- the file plays on the target phone, television, browser, or messaging app.
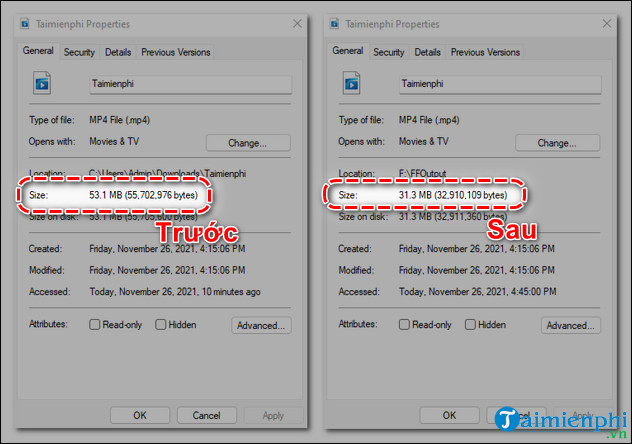
If the result looks poor, return to Output Setting and increase the video bitrate or restore the original resolution. If it is still too large, lower one setting at a time and export a short test clip before processing the entire video.
Which setting makes the biggest difference?
| Setting | Effect on size | Main trade-off |
|---|---|---|
| Video bitrate | Directly controls how much data is used over time | Too low creates blocks, smearing, and lost detail |
| Resolution | Fewer pixels usually require less data | Fine detail and text become less sharp |
| Frame rate | Fewer frames can reduce the required data | Motion may look less smooth |
| Codec | Newer codecs may compress more efficiently | Playback and editing compatibility may be lower |
| Audio bitrate | Useful for speech-heavy video | Low settings can make music sound dull or watery |
Avoid converting repeatedly. Each lossy re-encode can remove more detail, so return to the original source whenever you need a different output. If you also need to change containers or formats, see our overview of video-to-audio and conversion tools. Format Factory can also add subtitles to a video and cut or join clips.
Related Articles
 How to Reduce the Size of Video by Format Factory3 minutes read
 How to Compress Video Capacity by Format Factory6 minutes read
 Link to Download Format Factory 5.5.0.09 minutes read
 How to Install Format Factory on Your Computer5 minutes read
 How to Reduce Video Size but Keep Quality: Step-by-Step Guide7 minutes read
 How to Reduce Video File Size with Ffmpeg from Linux Terminal6 minutes read
Reader Comments 0
Sign in with email or Google to join the discussion.