Table of Contents
mp3DirectCut can remove unwanted sections from an MP3 without decoding and re-encoding the whole file. That makes a simple trim fast and avoids the quality loss that can occur when lossy audio is encoded again. The safest workflow is to keep the source file, mark the audio you do not want, preview the cut, and save the result under a new name.

Before you start
- Download the Windows version from the official mp3DirectCut website.
- Work on a copy or save the edited file with a different name so the original remains available.
- Decide roughly where the ringtone or clip should begin and end. Many phones accept clips of 20–40 seconds, but the actual limit and supported format depend on the device and ringtone method.
mp3DirectCut focuses on direct MP3/AAC editing. If you need noise removal, multitrack mixing, or conversion between many formats, choose a full audio editor instead; TipsMake's list of Audacity alternatives provides options.
Open and play the MP3
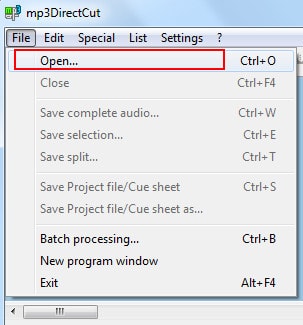
- Launch mp3DirectCut and choose File > Open, or press Ctrl+O.
- Select the MP3 file. The program displays an audio graph and playback controls.
- Press Play and use the position bar to locate the part you want to keep.
Trim the beginning and end
The most reliable approach is to delete the material before and after the desired clip:
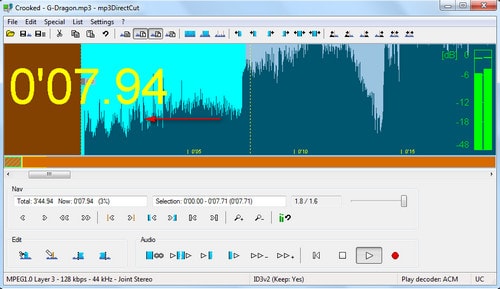
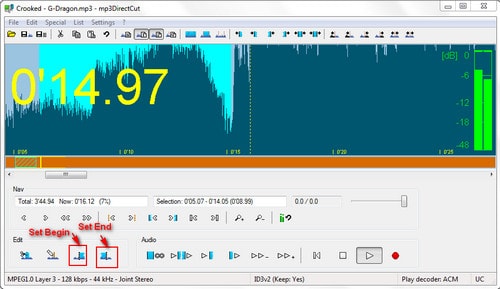
- Move to the intended start. Drag across the unwanted audio at the beginning, or use Set begin and Set end to define that selection.
- Use the cut-preview control before deleting. If the boundary is wrong, adjust the selection edge and listen again.
- Press Delete or choose the cut command to remove the selected opening.
- Repeat the process for the unwanted audio after the clip.
Undo with Ctrl+Z if a cut is incorrect. Direct MP3 editing works on encoded frames, so the cut point may not be sample-accurate; use the fine-adjustment and pre-listen controls to find the cleanest boundary.
Optional: add a fade
A short fade can prevent an abrupt ending. Place the cursor where the fade should begin or end, choose a fade command from the Edit menu, and adjust its handle. Listen to the transition before saving. The developer's official crop and fade tutorial shows the current control sequence.
Save the trimmed file
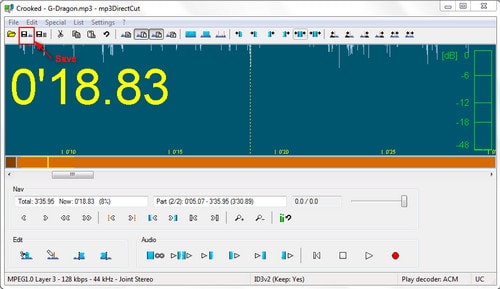
- Choose File > Save complete audio to save the remaining clip, or use the option that saves only a selected range when that matches your workflow.
- Enter a new filename instead of replacing the source.
- Open the saved file in a media player and check the beginning, ending, duration, and volume.
Use the clip as a ringtone
Copy or sync the finished file using the method supported by your phone. Android devices often accept an MP3 directly, while an iPhone ringtone normally requires Apple's ringtone format and an Apple-supported import workflow. Do not simply rename an extension and assume the audio has been converted.
If the result is too large for a messaging or upload limit, see these ways to reduce audio file size. Remember that recompressing an MP3 can reduce quality, so trim first and convert only when the destination requires it.
Related Articles
 How to Create Ringtones on Android as You Like with Ringtone Maker6 minutes read
 How to Create Super Fast iPhone Ringtones with iTunes on macOS4 minutes read
 Top 8 Best Free Ringtone Download Websites8 minutes read
 Guide to Making Phone Ringtones Using Format Factory3 minutes read
 How to Add Ringtone to Android Phone: Clear Instructions7 minutes read
 Cut Music Online with the Online Audio Cutter Tool6 minutes read
Reader Comments 0
Sign in with email or Google to join the discussion.