How to Use Greenscreen on Windows Movie Maker
This wikiHow teaches you how to add a fake background to a video via a green screen on a Windows computer. If you have Windows Movie Maker 6.0 or older on a Windows 7 computer, you may be able to use it to perform this process; however,...
Table of Contents
Method 1 of 2:
Using Windows Movie Maker
-
 Make sure that you have your green screen film on your computer. If you filmed against a green screen, you'll need to move the file from your camera or phone onto your computer before proceeding.
- It helps to have your green screen file and your background file in the same location (e.g., the desktop) on your computer.
-
 Download the green screen transition file. Go to the RehanFX site to prompt the screen transition file that will serve as your green screen file to download.
 -
 Install the transition file. Double-click the transition file that you just downloaded, then do the following:
- Click Yes if prompted.
- Click I agree or I accept
- Click Next
- Click Next
- Click Install
-
 Open Windows Movie Maker. Click Start, then type in windows movie maker and click the Movie Maker film strip icon at the top of the Start window.
-
 Import your movie files. You will need two files: the video that you shot using the green screen, and a video that has the background that you want to use in place of the green screen. To do so:
- Click File
- Click Open in the drop-down menu.
- Select your movie files.
- Click Open in the bottom-right corner.
-
 Place both files in the timeline. Click and drag your background movie file down onto the timeline at the bottom of the window, then drag your green screen video onto the timeline as well. The background video should be before the green screen video om the timeline.
 -
 Select the first movie file. This should be the background video.
 -
 Click Transitions. It's a tab on the left side of the Windows Movie Maker window, just under the "Edit" heading there. A list of the currently available transitions will open.
- If you don't see this tab on the left side of the window, click the Edit tab at the top of the window and then select transitions.
-
 Click Green Chroma 1. You'll find this on the Transitions page, though you may have to scroll down to find it. This will add the green screen transition to the timeline.
- You can also select one of the other Green Chroma options here.
-
 Apply the transition. Click and drag the second video (the green screen video) over the background clip, then release it when you see a blue triangle appear in the timeline.
- If you drag the video too far, the videos will just switch positions. If this happens, press Ctrl+Z to reset the clips and try again.
-
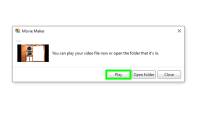
 Preview your video. Click the triangle-shaped "Play" button on the right side of the window to see if your effect was properly applied.
- If the green screen wasn't properly applied, try using a different Green Chroma option as a transition. You can also try using Shotcut instead of Windows Movie Maker.
Method 2 of 2:
Using Shotcut
-
 Check your computer's bit number. In order to download Shotcut, you need to know whether your computer uses a 32-bit system or a 64-bit system.
 -
 Download and install Shotcut. Go to https://www.shotcut.org/download/ in your browser, click the "installer" link for your computer's bit number, and then do the following once the file finishes downloading:
- Double-click the Shotcut setup file.
- Click Yes if prompted.
- Click I agree
- Click Next
- Click Install
- Click Close
-
 Open Shotcut. Open Start, type in shotcut, and click the teal Shotcut icon at the top of the Start window.
-
 Click both the Playlist tab and the Timeline tab. Both of these options are at the top of the Shotcut window. Doing this adds a "Timeline" section at the bottom of the window and a "Playlist" section on the left side of the window.
 -
 Add files to Shotcut. Click Open File in the upper-left side of the Shotcut window, then select the files that you want to add to Shotcut and click Open.
- You should have at least two files: the green screen video, and the background video or image that you want to use to replace the green screen.
-
 Create two video channels. Click ≡ in the upper-left side of the Timeline section that's at the bottom of the window, click Add video track, then repeat this process once more.
 -
 Insert your video in the first channel. Click and drag your green screen video from the "Playlist" window onto the top video channel, then release it.
 -
 Add your background to the second channel. Click and drag the background video or image onto the second channel, then release it.
- If you're using a background video, the video should be the same length as your green screen video.
- If you're using a background image, you'll need to click and drag the image's left or right edge to extend it to be the length of the video.
-
 Select the green screen video. It should be at the top of the "Timeline" section.
 -
 Click the Filters tab. This option is at the top of the window. A "Filters" menu will appear in the "Playlists" section.
 -
 Click +. You'll find this below the "Filters" menu in the "Playlists" section. Doing so will open a list of filters in the "Playlist" section on the left side of the window.
 -
 Click the "Video" icon. It's a computer monitor-shaped icon below the "Playlist" window.
 -
 Click Chromakey (Simple). You'll find this in the middle of the "Playlist" window. Doing so opens the green screen settings.
 -
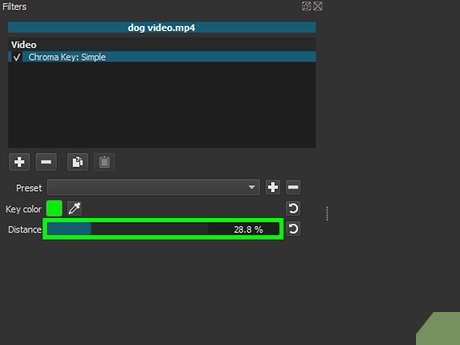 Adjust the green screen distance. Click and drag the "Distance" slider to the right until your green screen replacement image or video appears on the right side of the window.
- As a general rule, you want to avoid moving this slider over to the "100%" mark.
-
 Preview your movie. Click the "Play" triangle below the movie window on the right side of the window, then adjust your green screen as needed. If you can see a large amount of the green screen, drag the "Distance" slider to the right; if you can't see enough of the background, drag the slider left.
 -
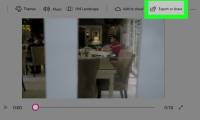
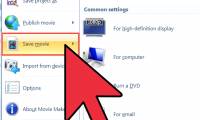
 Export your movie. Click File, click Export Video..., click Export File at the bottom of the menu, and type name.mp4 into the "File name" text field. Click Save when you're done to begin exporting the file.
- Replace "name" with whatever you want to name your video.
- Exporting may take several minutes to several hours based on the video's size and resolution.
Was this article helpful?
Your feedback helps us improve.
Related Articles
 How to Use Windows Movie Maker14 minutes read
 How to rotate the video in reverse, tilt with Windows Movie Maker4 minutes read
 How to Make a Slideshow with Windows Movie Maker6 minutes read
 How to Use Story Remix4 minutes read
 50 useful shortcuts for Windows Movie Maker4 minutes read
 How to Make a Video in Windows Movie Maker8 minutes read
Reader Comments 0
Sign in with email or Google to join the discussion.