How to Use Windows Movie Maker
Part 1 of 5:
Installing Windows Movie Maker
-
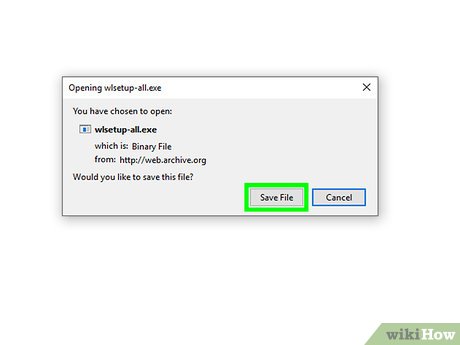
 Download the Windows Live Essentials setup file. Go to the Windows Live Essentials download page to prompt the WLE setup file to begin downloading.
- This page is largely blank, and may take several seconds to a minute before downloading the file.
-
 Open the setup file. Double-click the wlsetup-all file in your computer's default downloads location to open it.
 -
 Click Yes when prompted. This will prompt the Windows Essentials installation window to open.
 -
 Click Install all of Windows Essentials (recommended). It's at the top of the page. Most of the Windows Essentials programs aren't compatible with Windows 10, but you can install Windows Movie Maker by clicking this option.
 -
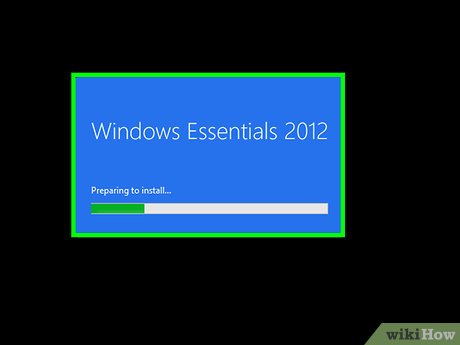
 Click Show Details. This is in the bottom-left corner of the window. You should see a percentage of progress appear, as well as a line telling you which program is currently installing.
 -
 Wait for Windows Movie Maker to install. The first program to install will most likely be Windows Movie Maker. Wait for this program to finish installing; when you see the program name switch to a different program (e.g., "Mail"), you can proceed.
 -
 Open Start. Click the Windows logo in the bottom-left corner of the screen.
-
 Type in windows movie maker. This will search your computer for the now-installed Windows Movie Maker app.
 -
 Click Movie Maker. It's a film reel icon at the top of the Start menu. This will prompt the Windows Essentials terms of use window to open.
 -
 Click Accept. This option is in the bottom-right corner of the window. Movie Maker should open after you do this.
- If clicking Accept doesn't open Movie Maker, re-open Start, type movie maker back in, and click the Movie Maker result again to open it.
- Don't close the installation window before opening Movie Maker.
-
 Close the Windows Essentials installation. When the installation window pops up with an error message, just click Close and confirm the decision when prompted. You can now proceed with using Windows Movie Maker.
Part 2 of 5:
Adding Project Files
-
 Create a new project. Click File, click Save project as in the drop-down menu, enter a name for your project, select a destination folder on the left side of the window (e.g., Desktop), and click Save. This will save your new project in your destination file.
- At any point in the creation process, you can save your progress by pressing Ctrl+S.
-
 Click the "Project" window. It's the large, blank window on the right side of the Windows Movie Maker window. Clicking it will prompt a File Explorer window to open.
 -
 Go to a folder that contains images or videos. In the left-hand sidebar of the File Explorer window, click a folder that contains videos or images.
- You may have to navigate through several folders to find the one that you want.
-
 Select photos or videos. Click and drag your mouse across a list of photos and/or videos to select all of them, or hold down Ctrl while clicking individual files to select them independent of one another.
 -
 Click Open. It's a button in the bottom-right corner of the window. This will upload your selected files to the Windows Movie Maker program.
 -
 Add more photos and videos if needed. To do so, just click the Add videos and photos button at the top of the Windows Movie Maker window, then select the files in question and click Open again.
- You can also right-click the "Project" window and then click Add videos and photos in the drop-down menu.
-
 Add a music track. Click Add music at the top of the Windows Movie Maker window, click Add music... in the drop-down menu, go to a folder with music files in it, select the file(s) that you want to use, and click Open. This will place the music below the currently selected image or video.
Part 3 of 5:
Organizing Project Files
-
 Determine a file order. Review your project files and decide which one should go first, second, and so on. You should also figure out where you want the music to start.
 -
 Re-order your files. Click and drag the file that you want to use at the beginning of the video to the top-left corner of the "Project" window to anchor it there, then drag the next-up file over and drop it to the right of the beginning file.
- You should see a vertical line appear between the two files. This signifies that if you release the mouse button, the files will snap together.
-
 Position the music. Click and drag the green music bar that's located below the files to the left or right, then release it to reposition it.
- Keep in mind that the end of the music will lock to the end of the last video or image if the combined length of the files doesn't add up to the music's play time.
-
 Edit an image's properties. Double-click an image to open its properties in the toolbar at the top of the window, then change any of the following:
- Duration - Click the "Duration" text box, then type in the number of seconds for which you want the image to display.
- End Point - Click and drag the black vertical bar in the "Project" window to a section in the photo or video where you want to cut off the photo or video and move on to the next one, then click Set end point in the toolbar.
-
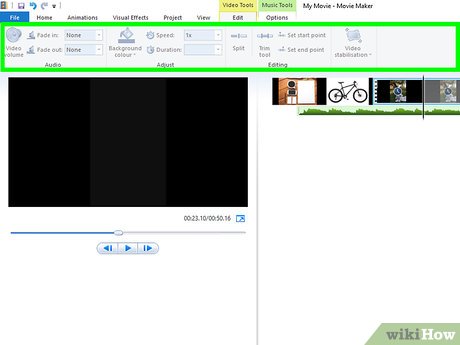
 Edit a video's properties. Double-click a video in the "Project" window to open its properties in the toolbar, then change any of the following:
- Volume - Click Video volume, then click and drag the volume slider left or right.
- Fade - Click the "Fade in" or "Fade out" box, then click Slow, Medium, or Fast.
- Speed - Click the "Speed" drop-down box, then select a video speed. You can also type in a custom speed.
- Trim - Click Trim tool, click and drag one of the sliders below the video to crop the video's play time, and click Save trim at the top of the window.
- This tool serves the same purpose as the "Start/End Point" feature.
- Stabilization - Click Video stabilization, then select a stabilization feature in the drop-down menu.
- You can also split some videos by dragging the vertical bar to the point where you want to split the video and then clicking Split. This will allow you to insert another file in between the two sections of the video (e.g., commentary or a picture).
-
 Edit the music's properties. Double-click the music bar, then change any of the following in the toolbar:
- Volume - Click Music volume', then click and drag the slider left or right.
- Fade - Click the "Fade in" or "Fade out" box, then click Slow, Medium, or Fast.
- Start Time - Type the time stamp (in seconds) of a point in the song at which you want it to start into the "Start time" text box.
- Start Point - Type a time stamp (in seconds) of a point in the video at which you want the song to start into the "Start point" text box.
- End Point - Type Type a time stamp (in seconds) of a point in the video at which you want the song to end into the "End point" text box.
-
 Make sure that each file is edited to your liking. In order for your movie to come out properly, you'll want to edit each file's run time (and other options, if available) to fine-tune the overall presentation of the movie.
 -
 Preview your movie. Click the "Play" button below the movie's preview window on the left side of the Windows Movie Maker window. If the movie plays adequately, you're ready to move on to adding effects to your movie.
Part 4 of 5:
Adding Effects
-
 Click the Home tab. It's in the upper-left side of the window. This will take you back to the editing toolbar.
 -
 Click Title. This option is in the "Add" section of the Home toolbar.
 -
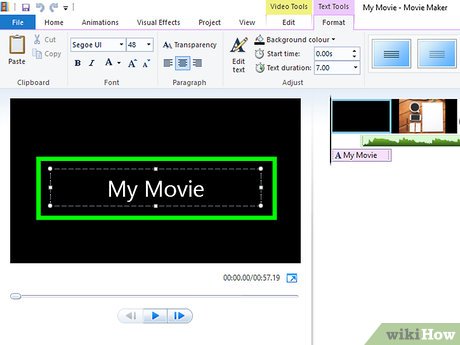
 Enter title text. In the text box that appears on the video preview window, type in the title that you want to assign to your video.
- You can also edit the title slide's length in the "Adjust" section of the toolbar by clicking the text box to the right of the clock with a green arrow in it and then selecting a new time.
- If you want to change the title size, font, or formatting, you can do so in the "Font" section of the toolbar.
-
 Add a transition to your title. Click one of the icons in the "Effects" section of the toolbar, then preview the effect; if you like it, your title is set.
 -
 Return to the Home tab. Click Home again to go back to the editing toolbar.
 -
 Insert a caption on a file. Click a photo or video on which you want to add a caption, then click Caption in the "Add" section of the toolbar.
 -
 Enter the caption text. Type in the text that you want to use for your caption, then press ↵ Enter. This will create your caption below the selected file.
- You can edit the caption exactly like you edited the title text.
- If you want to move the caption to a different place on the file, click and drag the pink caption box left or right and then drop it to reposition it.
-
 Add any other captions or titles as necessary. You can create more title slides to serve as transitions between sections in your movie, or you can add captions to more files.
- You can also add credits to the end of the movie by clicking the Credits option in the "Add" section of the Home tab.
Part 5 of 5:
Saving the Movie
-
 Preview your movie. Click the "Play" button below the movie preview window on the left side of the window. If your movie looks the way you want it to, you're ready to save the movie.
- If the movie needs finessing, make any adjustments that are necessary before you continue.
- During the editing process, your music may end up off-beat or too short; if so, make sure that your music is properly edited to compensate before proceeding.
-
 Click Save movie. It's a button in the upper-right side of the window. A drop-down menu will appear.
 -
 Select a save type. If you don't know what format to use, click Recommended for this project at the top of the drop-down menu; otherwise, click the format that you want to use.
 -
 Enter a name for your movie. Type in the name that you want to use for the movie file itself.
 -
 Select a save folder. On the left side of the window, click a folder in which you want to save the movie file.
 -
 Click Save. It's near the bottom-right corner of the window. This will save your movie file and begin exporting your project. Be patient—exporting can take a long time, especially for a detailed project.
 -
 Click Play when prompted. Doing so will play your movie in your computer's default video player.
Share by
Lesley Montoya
Update 05 March 2020


