How to Use Excel
This wikiHow teaches you how to set up and use Microsoft Excel on your Windows or Mac computer. Install Microsoft Office if you don't have it. Microsoft Excel isn't available as a standalone program, but it is included in a Microsoft...
Table of Contents
Part 1 of 5:
Preparing to Use Excel
-
 Install Microsoft Office if you don't have it. Microsoft Excel isn't available as a standalone program, but it is included in a Microsoft Office package or subscription.
 -
 Open an existing Excel document. If you want to open an existing Excel document at any time, simply double-click the document in question. This will bring up the document in an Excel window.
- Skip this step if you want to open a new document in Excel.
-
 Open Excel. Click or double-click the Excel app icon, which resembles a white "X" on a dark-green background.
 -
 Select a template if necessary. If you want to use an Excel template (e.g., a budget planner template), scroll down until you find the template you want to use and then click it once to open its window.
- If you just want to open a new blank Excel document, click the Blank option in the upper-left side of the page and then skip the next step.
-
 Click Create. It's to the right of the template's name.
 -
 Wait for the Excel workbook to open. This will take a few seconds. Once you see the Excel template or blank page, you can proceed with entering your sheet's data.
Part 2 of 5:
Entering Data
-
 Familiarize yourself with the Excel ribbon tabs. In the green "ribbon" at the top of the Excel window, you'll see a series of tabs. Each of these tabs can be used to access different Excel tools; the main ones you'll need to know include the following:
- Home — Contains options for formatting text, changing cell background color, and so on.
- Insert — Contains options for tables, charts, graphs, and equations.
- Page Layout — Contains options for page margins, orientation, and themes.
- Formulas — Contains various formula options as well as a function menu.
-
 Consider using the top row of cells for headers. When adding data to a blank spreadsheet, you can use the top cell in each column (e.g., A1, B1, C1, etc.) as your column heading. This is helpful when creating graphs or tables which require labels.
 -
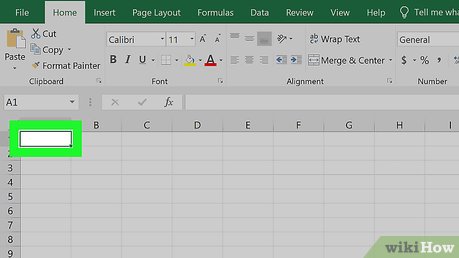 Select a cell. Click the cell into which you want to enter data.
- For example, if you're using a budget-planning template, you might click the first empty cell to select it.
-
 Enter text. Type in whatever you want to add to the cell.
 -
 Press ↵ Enter. Doing so adds it to the cell and moves your selection to the next available cell.
 -
 Edit your data. To go back and edit data later, click the cell you want to edit, then change whatever you need to change in the text box above the top row of cells.
 -
 Format text if necessary. If you want to change the way a cell's text is formatted (e.g., if you want to change it from money formatting to date formatting), click the Home tab, click the drop-down box at the top of the "Number" section, and click the type of formatting you want to use.
- You can also use conditional formatting to cause your cells to change based on factors in the spreadsheet (e.g., if a cell's value is below a certain number, the cell might turn red).
Part 3 of 5:
Using Formulas
-
 Select a cell for your formula. Click the cell in which you want to create a formula.
 -
 Perform basic operations. You can add, subtract, divide, and multiply cell values with the following formulas:
- Add — Type =SUM(cell+cell) (e.g.,
=SUM(A3+B3)) to add two cells' values together, or type {{kbd|=SUM(cell,cell,cell) (e.g.,=SUM(A2,B2,C2)) to add a series of cell values together. - Subtract — Type =SUM(cell-cell) (e.g.,
=SUM(A3-B3)) to subtract one cell value from another cell's value. - Divide — Type =SUM(cell/cell) (e.g.,
=SUM(A6/C5)) to divide one cell's value by another cell's value. - Multiply — Type =SUM(cell*cell) (e.g.,
=SUM(A2*A7)) to multiply two cell values together.
- Add — Type =SUM(cell+cell) (e.g.,
-
![Image titled Use Excel Step 16]()

License: Fair Use (screenshot)
nAdd a whole column of numbers. If you want to add all of the numbers in a whole column (or in a section of a column), type =SUM(cell:cell) (e.g.,=SUM(A1:A12)) into the cell you want to use to display the result. -
 Select a cell for an advanced formula. To use a more advanced formula, you'll use the Insert Function tool. Start by clicking the cell in which you want to display your formula.
 -
 Click Formulas. It's a tab at the top of the Excel window.
 -
 Click Insert Function. This option is in the far-left side of the Formulas toolbar. Doing so opens a window.
 -
 Select a function. Click in the window the function you want to use, then click OK.
- For example, to select the formula for finding the tangent of an angle, you would scroll down and click the TAN option.
-
 Fill out the function's form. When prompted, type in the number (or select a cell) for which you want to use the formula.
- For example, if you select the TAN function, you'll type in the number for which you want to find the tangent.
- Depending on your selected function, you may need to click through a couple of on-screen prompts.
-
 Press ↵ Enter. Doing so applies your function and displays it in your selected cell.

Part 4 of 5:
Creating Charts
-
 Set up the chart's data. If you're creating a line graph or a bar graph, for example, you'll want to use one column of cells for the horizontal axis and one column of cells for the vertical axis.
- Typically speaking, the left column is used for the horizontal axis and the column immediately to the right of it represents the vertical axis.
-
 Select the data. Click and drag your mouse from the top-left cell of the data down to the bottom-right cell of the data.
 -
 Click Insert. It's a tab at the top of the Excel window.
 -
 Click Recommended Charts. You'll find this option in the "Charts" section of the Insert toolbar. A window with different chart templates will appear.
 -
 Select a chart template. Click the chart template you want to use.
 -
 Click OK. It's at the bottom of the window. Doing so creates your chart.
 -
 Edit your chart's title. Double-click the title at the top of the chart, then delete and replace the chart's current title with your own title.
 -
 Change your chart's axis titles. If you want to add axis titles to the chart, you can do so from the "Chart Elements" menu which is accessed by clicking the green + to the right of the selected chart.
Part 5 of 5:
Saving an Excel Project
-
 Click File. It's in the upper-left side of the Excel window (Windows) or the screen (Mac). A menu will appear.
 -
 Click Save As. This is on the left side of the page if you're using Windows.
- On a Mac, you'll click this in the File drop-down menu.
-
 Double-click This PC. It's in the middle of the page.
- On Mac, click On my Mac instead.
-
 Enter a name for your project. Type whatever you want to name your spreadsheet into the "File name" (Windows) or "Name" (Mac) text box in the Save As window.
 -
 Select a save folder. Click the folder in which you want to save your spreadsheet.
- On a Mac, you may first need to click the "Where" drop-down box before you can select a file.
-
 Click Save. It's at the bottom of the window. Doing so saves your spreadsheet in the selected folder under the specified name.
 -
 Save future edits with the "Save" keyboard shortcut. If you're editing the Excel document in the future, pressing Ctrl+S (Windows) or ⌘ Command+S (Mac) will save your changes to the document without bringing up the Save As window.
Was this article helpful?
Your feedback helps us improve.
Related Articles
 Get started with Excel for beginners4 minutes read
 Tips for adding in Excel you need to know3 minutes read
 How to fix the SUM function doesn't add up in Excel2 minutes read
 Guidance on how to align Excel correctly3 minutes read
 How to keep Excel and Excel columns fixed?2 minutes read
 What is ### error in Excel? how to fix ### error in Excel3 minutes read
Reader Comments 0
Sign in with email or Google to join the discussion.