Some ways to fix Start Menu error on Windows 10 stops working
Start Menu is probably the most popular feature of Windows 10. However, for some PC versions, this feature may be broken. In this article, TipsMake.com will guide you how to fix Start Menu errors on Windows 10..
1. Log in again to your account
Logging back into your computer user account is one of the easiest solutions to try. If your Start menu only occasionally doesn't work, use this solution, it's extremely simple and effective.
Step 1: On your keyboard, press the Ctrl+ Alt+ key combination Deleteand click Sign out.
Step 2: Enter your password and log in again.
Step 3: Check if the Start menu is working properly.
If the problem is not resolved, try the solutions below.
2. Restart Windows Explorer
This is also one of the simple solutions to help restore the Start menu to work properly. To restart Windows Explorer, follow the steps below:
Step 1: Press the + + key combination to open Task Manager. CtrlShiftEsc
Step 2: Next on the Task Manager window, scroll down to the Process tab to find the Windows Explorer option .

Step 3: Click to select Windows Explorer, then click Restart in the bottom right corner of the screen.
This solution is simply to kill the Windows Explorer process and restart Windows Explorer.
Once Windows Explorer restarts, the problem should be gone and your Start Menu should be working again. However, this is only a temporary solution, so you will have to repeat this operation if the problem appears again.
3. Create a new user account
Another easily handled solution is to create a new account. And if all functions including the Start menu work well in this new account, please transfer your data to this side to work and delete the faulty account.
To create a new account, please refer to the article: How to create a new User on Windows 10.
After creating a new account, restart your computer and check the Start menu's operation.
4. Fix corrupted files
Step 1: If the Search bar is still active, search for powershell. Then right-click Windows PowerShell in the search results and select Run as administrator .
However, if the Search bar does not work, press the Windows+R key , type the following keyword and press Enter.
powershellRight-click the PowerShell icon on the taskbar and select Pin to taskbar . Close the PowerShell program. Hold down the Shift+Ctrl key while right-clicking the PowerShell icon again. Select Run as administrator .
Step 2: Once you are in the Powershell command line environment, type the following command and press Enter. Then wait a few minutes.
sfc /scannow
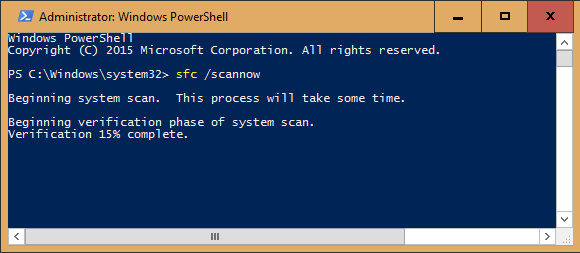
Step 3: If you see the message Windows Resource Protection found corrupt files but was unable to fix some (or all) of them appear after finishing the scanning process, enter the following command and then Enter:
DISM /Online /Cleanup-Image /RestoreHealthRunning this command will take a while, wait and restart your computer after finishing.
Step 4: Check if the Start menu is working normally.
5. Delete and reinstall Metro or Modern apps
Don't worry, this isn't as bad as you think. It only affects Metro or Modern apps you get through the Microsoft store. Old Windows programs will not be affected.
Open PowerShell as administrator as described above. Enter the command below:
Get-AppXPackage -AllUsers | Foreach {Add-AppxPackage -DisableDevelopmentMode -Register "$($_.InstallLocation)AppXManifest.xml"}Once it has completed its task, restart your computer to complete the repair process.
6. Re-register the Start menu in Windows 10
All applications, settings and files can be found on the Start menu. If the Start menu is not working, re-registering the Start menu may help fix this problem.
This section of the guide will show you how to re-register the Start menu for just your account (current user) or all users in Windows 10.
Re-register the Start menu for the current user only
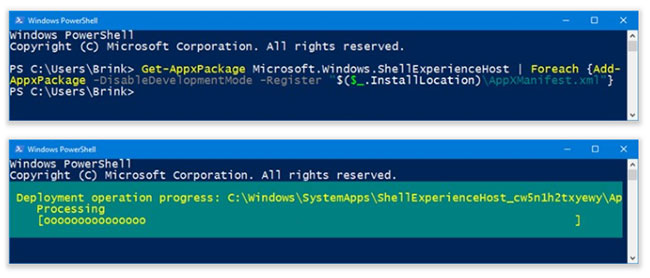
Step 1: Open PowerShell.
Step 2: Copy and paste the command below into PowerShell and press Enter.
Get-AppxPackage Microsoft.Windows.ShellExperienceHost | Foreach {Add-AppxPackage -DisableDevelopmentMode -Register "$($_.InstallLocation)AppXManifest.xml"}Step 3: When done, you can close PowerShell if you want.
Re-register the Start menu for all users
You must be logged in with admin rights to perform this option.
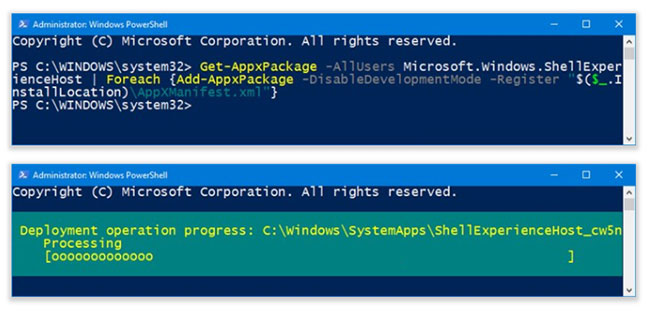
Step 1: Open PowerShell with admin rights.
Step 2: Copy and paste the command below into the opened PowerShell, then press Enter.
Get-AppxPackage -AllUsers Microsoft.Windows.ShellExperienceHost | Foreach {Add-AppxPackage -DisableDevelopmentMode -Register "$($_.InstallLocation)AppXManifest.xml"}Step 3: When done, you can close PowerShell if you want.
7. Reset Windows 10 to its original state
If the above methods cannot fix the error, you may have to reinstall Windows 10 from scratch to fix this problem. Rest assured that this solution will not lose data on your computer. However, to be more certain, you should still copy the contents of the folders and transfer them to an external hard drive.
This process will reset all your PC settings, it's just like a factory reset only it will keep your files.
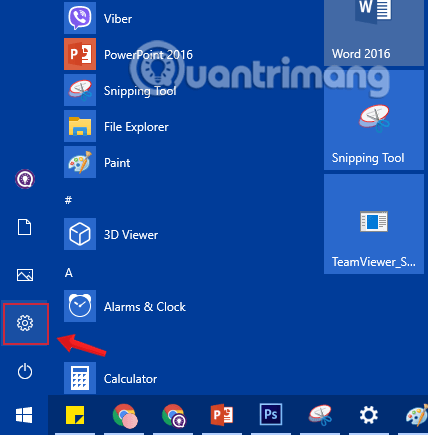
Step 1: Open the Settings application by clicking the Settings icon on the Start menu or pressing the + key combination .WindowsI
Step 2: On the Settings interface , click Update & security.

Step 3: Under Update & security, click Recovery from the left pane of the window.
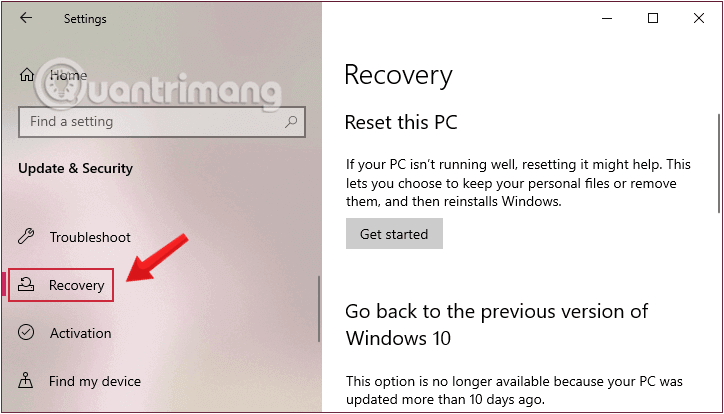
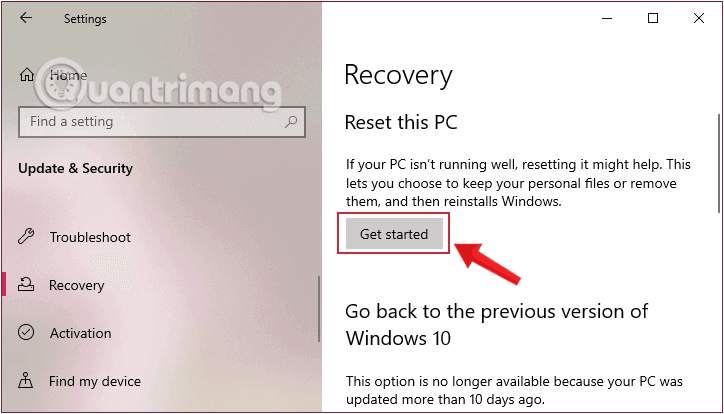
Step 4 : Next, in the right pane of the window, click Get Started in the Reset this PC section.
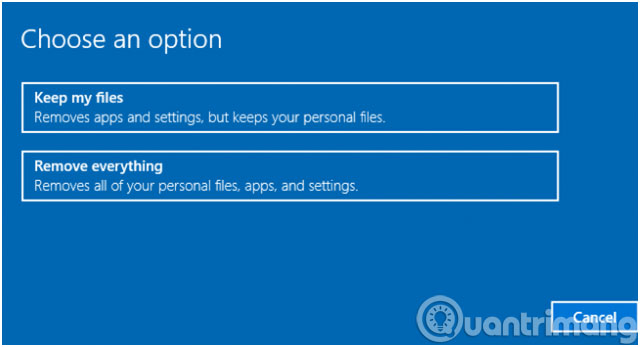
Step 5: In the Choose an option dialog box that appears, you will have two options:
- Keep my files : Delete the apps and settings you have set up but keep your personal files.
- Remove everything : Delete the entire Windows installation drive to its original state or delete the entire device, including data on other hard drive partitions (applicable in cases of selling, exchanging and not continuing to use the device). ).
Depending on your needs, you can choose the appropriate option, but no matter what you choose, all your settings will return to default and the applications will be removed.
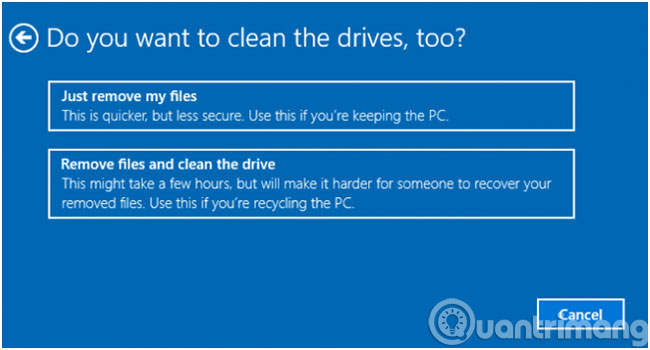
Step 6: If the choice above is Remove everything , you will have the next 2 options:
- Just remove my files: If you are still a computer user, just select Just remove my files to only remove your personal files.
- Remove files and clean the drive: This option will delete all data so it will take more time, but is definitely a good way if you want to sell the device, give it away, or donate it because it is difficult for others to recover the files. has been deleted through this selection.
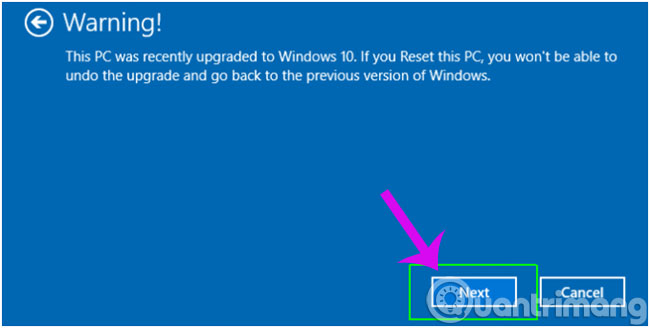
Step 7: Click the Next button if Windows warns you that you won't be able to go back to the previous version of the operating system.
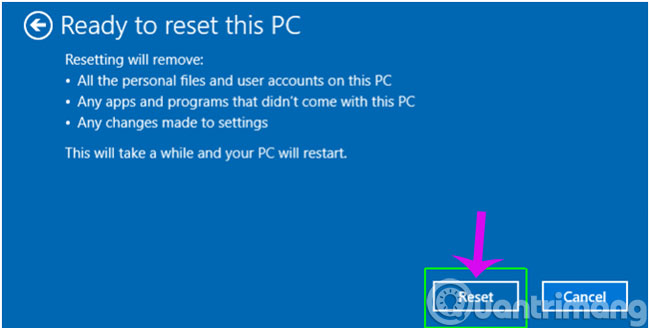
Step 8: Click the Reset button again to confirm. Windows will restart and take a few minutes to reset the system.
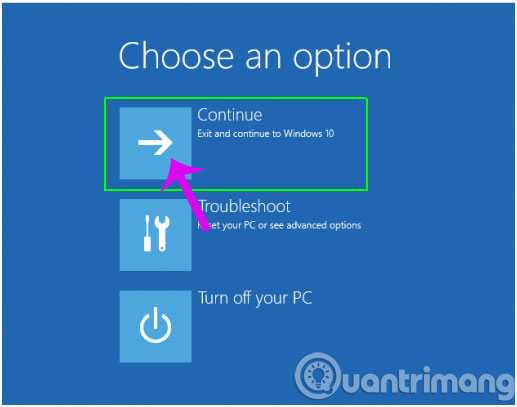
Step 9: In the Choose an option dialog box displayed, click Continue to complete the steps .
When finished, you will have to reinstall all programs that did not come with Windows.
Hopefully the above methods will help you fix the Start Menu not working error on your Windows 10 device!