Table of Contents
This guide explains how to transplant Photos on a Computer Simple, Fast, with clear steps, practical tips, and important checks before you begin.
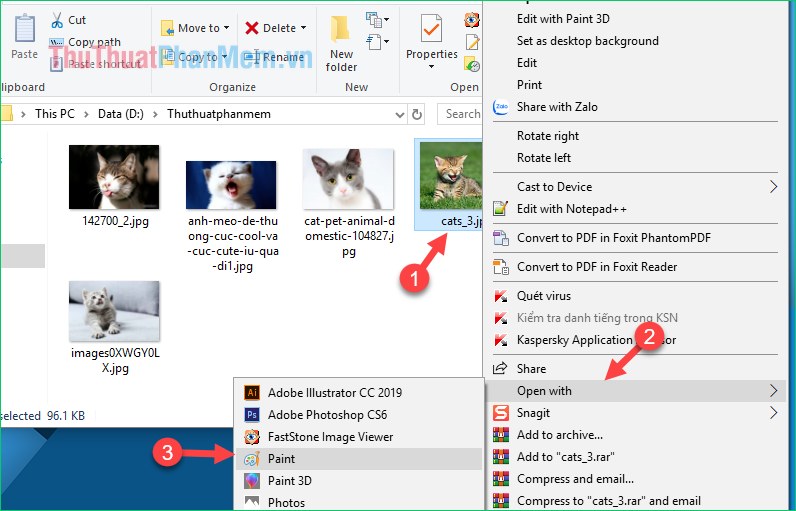
Step 1 : Right-click on any one of the photos you want to merge and select Open with -> Paint
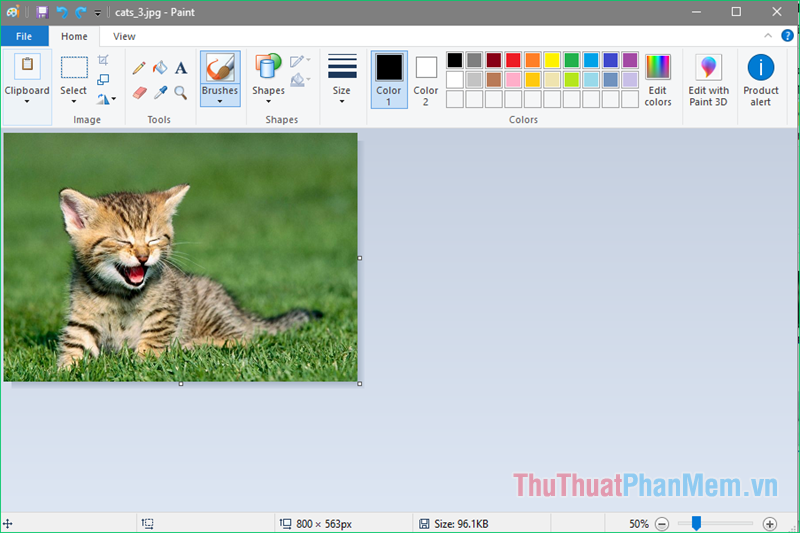
Step 2 : After the image is opened in Paint, you can hold the Ctrl button and scroll the mouse wheel to zoom in or out to make it easier to see.
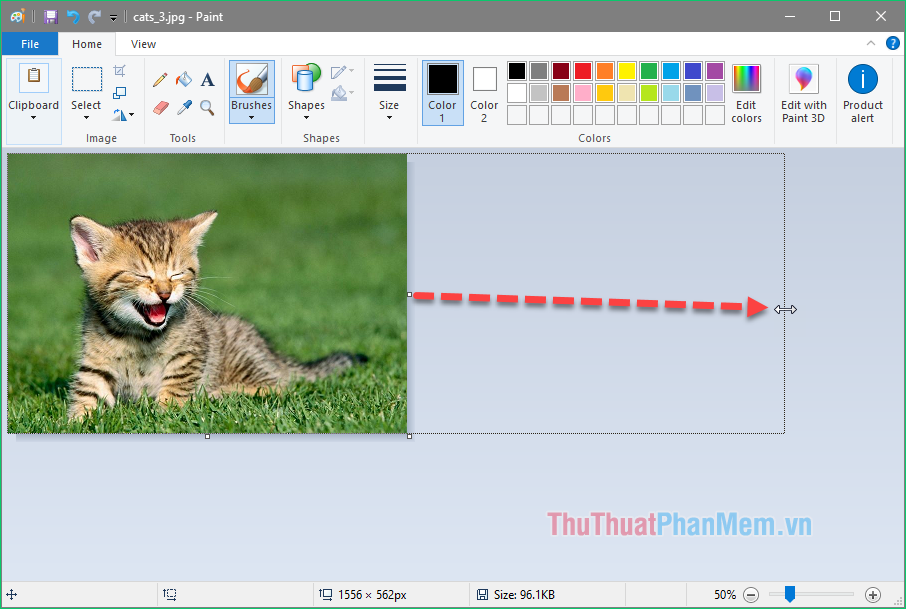
Step 3 : Next, if you want to stitch another photo next to this picture, place the mouse on the right edge of the picture until the mouse pointer turns into a two-way arrow then stretch the photo frame to get it space for the second image to merge.
Step 4: Now you continue to open the 2nd photo you want to merge, how to open similar to the image above, right click and select Open with -> Paint
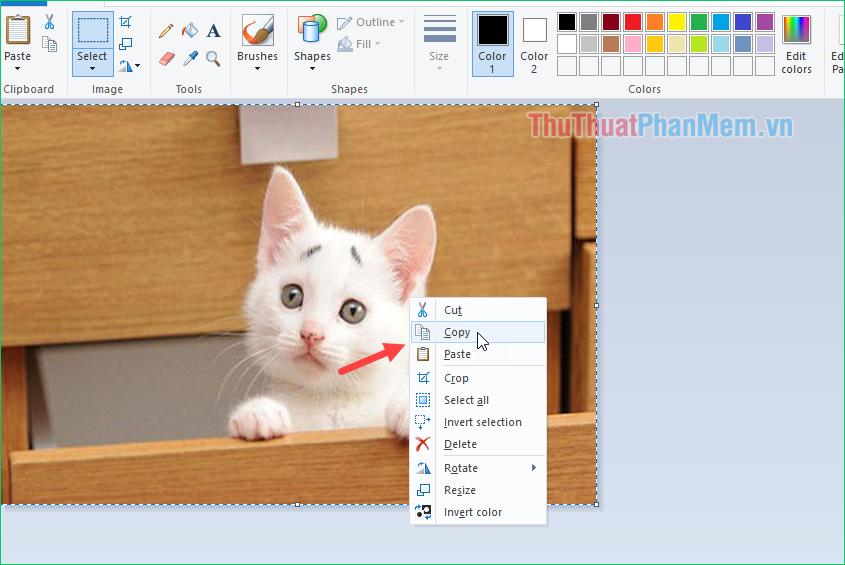
After the image opens, press Ctrl + A to select the image, right click on the image and select Copy
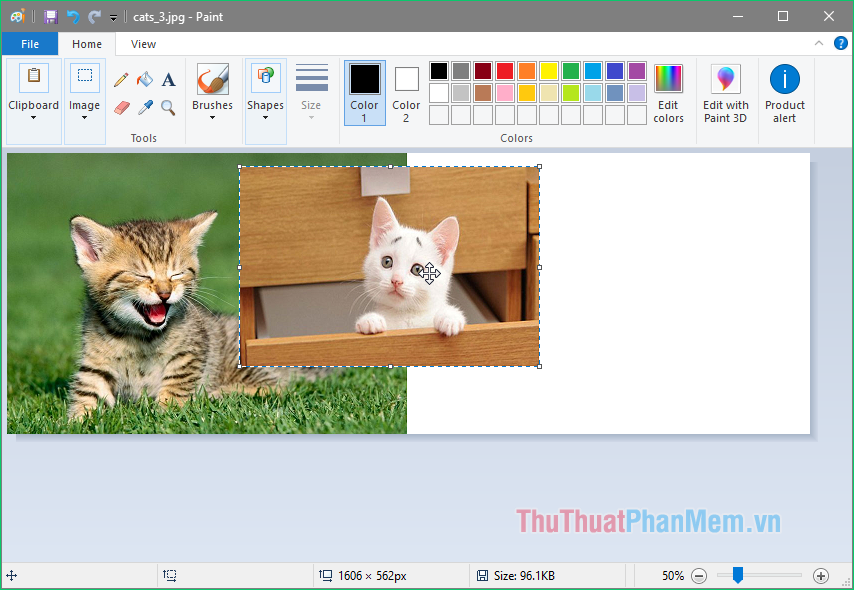
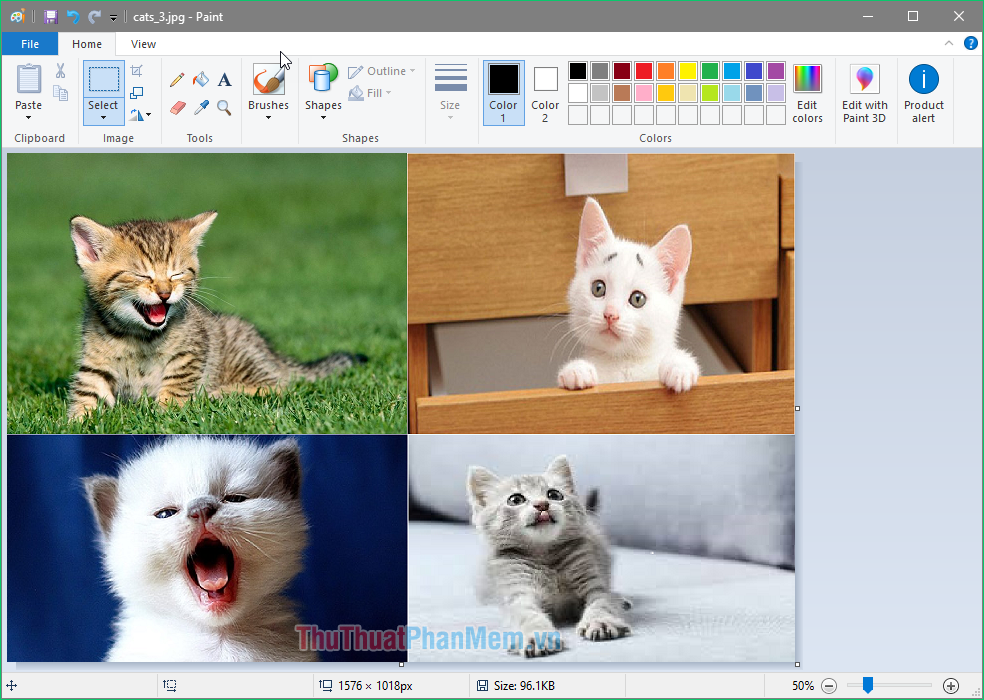
Step 5: Return to the first picture, press Ctrl + V to paste the second photo into the first one. After pasting the 2 photos, they will overlap, you can use the mouse to drag the 2nd image to the gap that we expanded in step 3.
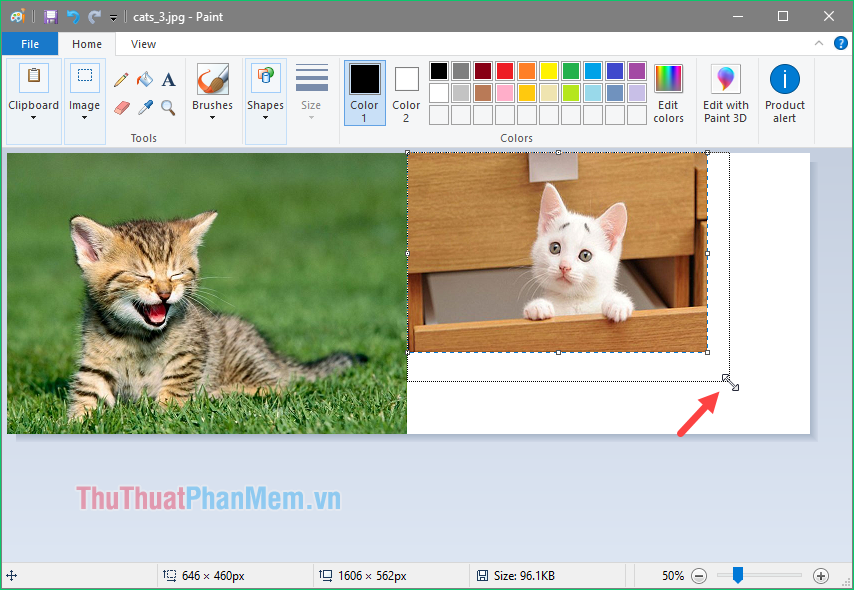
Step 6 : After moving the 2nd image to a reasonable position, if you think the image is smaller or larger than the first image, you can use the mouse to place the corner of the image to resize so that The photos are equal.
Step 7 : After resizing the photos equally, click on the empty area to save changes. Once you click out of an empty area, you will not be able to resize the image.
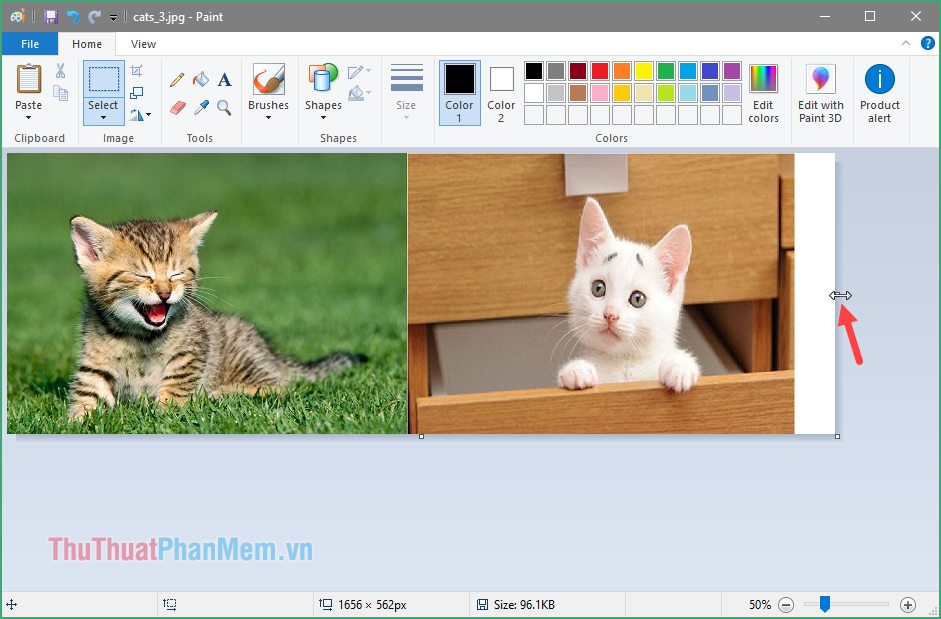
If you find that the image still has a lot of extra space, you can drag it close to the edge of the image to remove the white space.
Similarly, we can add other photos if we want.
For example, we combine 2 more photos below will get a picture as below:
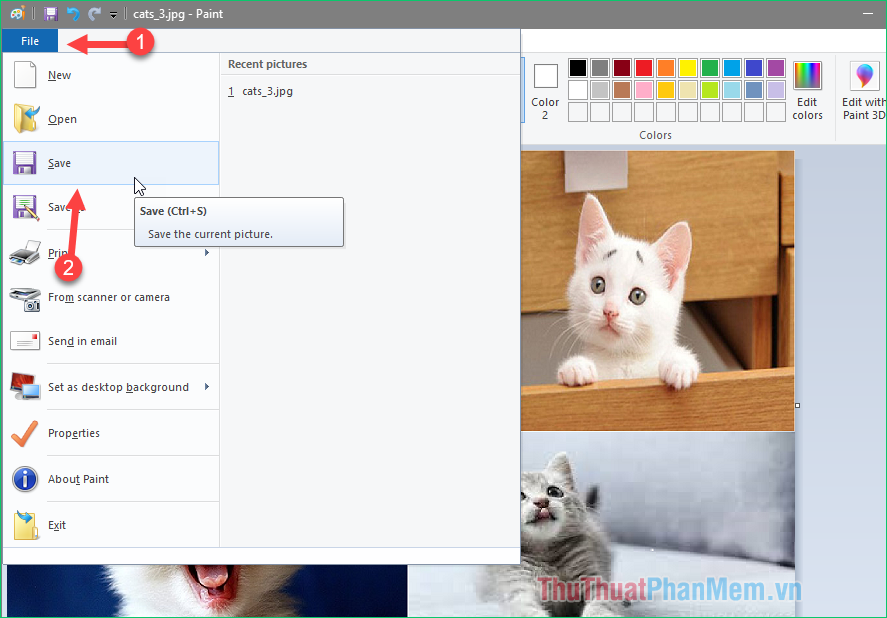
Step 8: After satisfied with the image, select File -> Save to save the image:
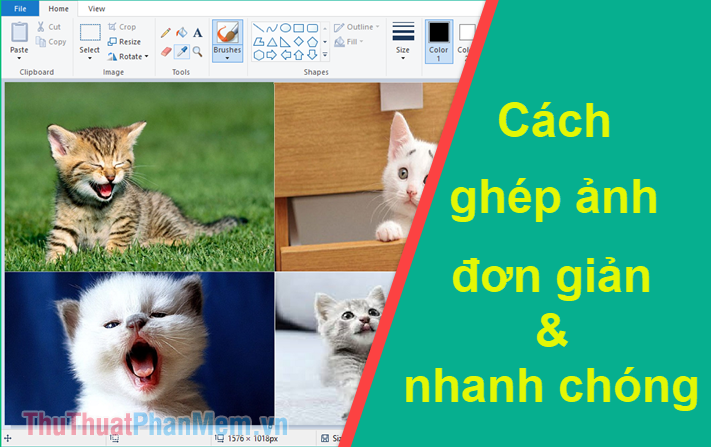
And here is our result after the photo:
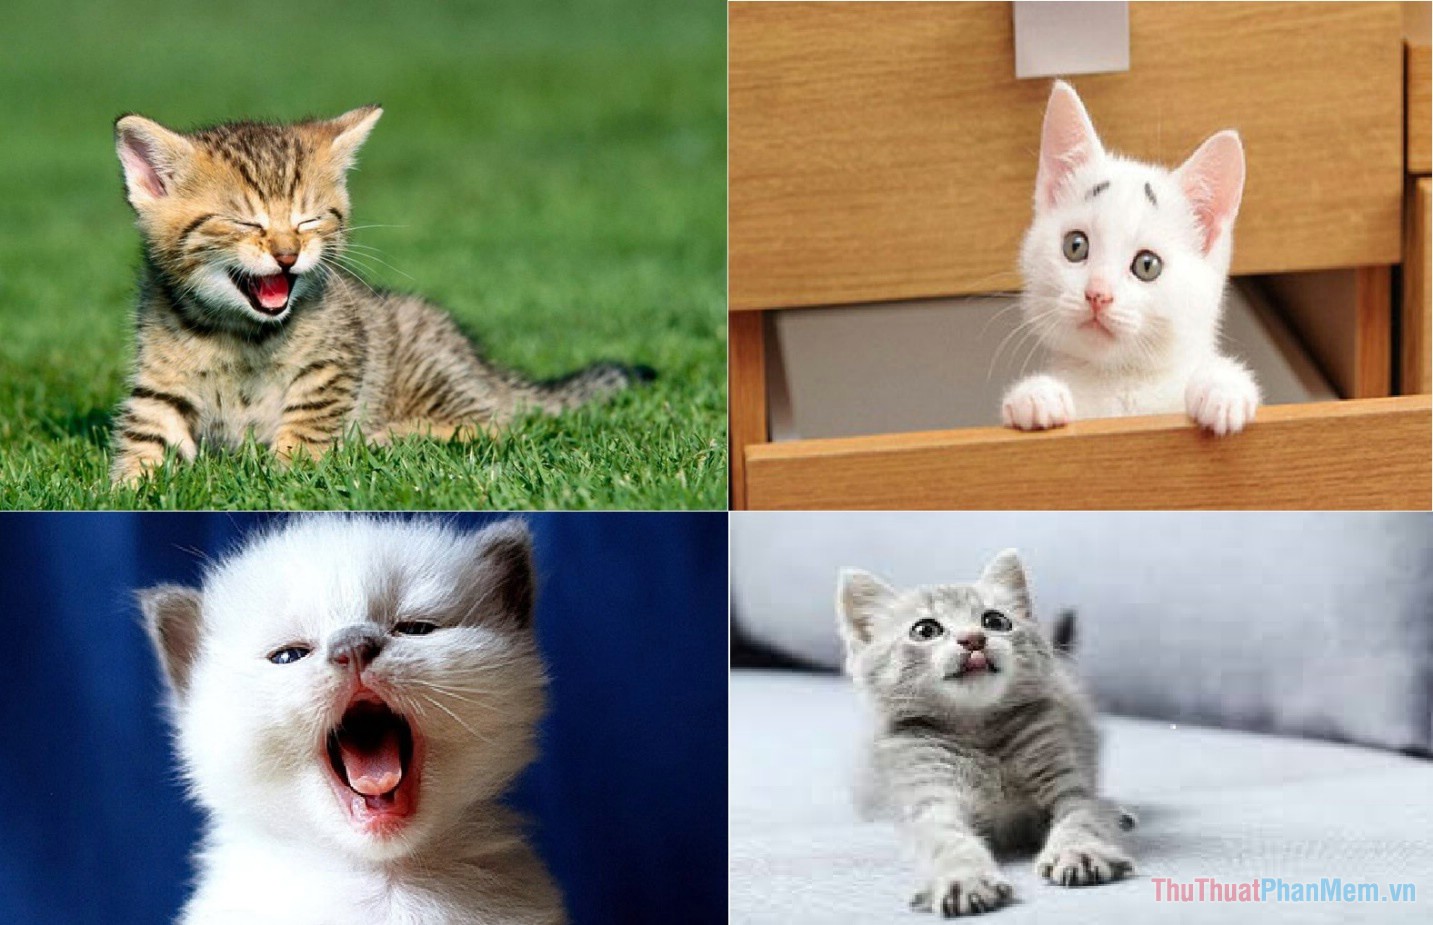
So with Paint software we absolutely can stitch photos simply and quickly with just a few taps. Good luck!
FAQ
What should I know about Transplant Photos on a Computer Simple, Fast?
Focus on the key features, requirements, limitations, and practical use cases explained in this guide.
How do I get the best results with Transplant Photos on a Computer Simple, Fast?
Follow the recommended steps, use current software or information, confirm compatibility, and review settings before major changes.
Are there any risks or limitations?
Potential limitations depend on compatibility, data quality, cost, privacy, support, and how the product or method is used.
Related Articles
 Face Transplant, Face Swap on iPhone6 minutes read
 8 Hottest Apps to Transplant Faces into Photos on Phones: What You Need to Know11 minutes read
 How to Merge Photos into the Frame on Paint4 minutes read
 How to Transplant Faces in Photoshop4 minutes read
 How to Blur Photos with Paint Simple and Fast4 minutes read
 How to Take Screenshots Laptop HP Fast and Simple2 minutes read
Reader Comments 0
Sign in with email or Google to join the discussion.