How to take RAW photos on iPhone
RAW is an image format that contains more data than JPG, it is designed to capture as much data as possible, allowing for more editing. This article will show you how to take RAW photos on your iPhone or iPad.
Difference between RAW and JPG
JPG is a great format to share images, it is widely supported, quite small and supports many sizes and image quality. However, it has some limitations when taking photos as JPG files cannot store much of the information that modern sensors can detect.
RAW is often used with DSLR cameras and other high-end cameras, but now you can also shoot RAW images with a camera on a smartphone. It may contain all the information that the camera captures, such as the full motion sensor range, loading additional color information. When taking photos with iPhone 7 Plus, you will receive a JPG file weighing about 1.5MB and a file that weighs 10MB if shooting in RAW mode.
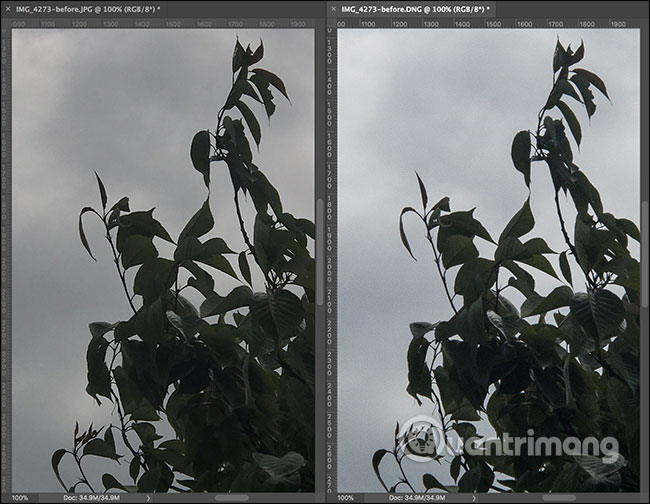
Below is a picture comparison of JPG (left) and RAW (right) taken with the iPhone camera.
And here is the image after making some edits.
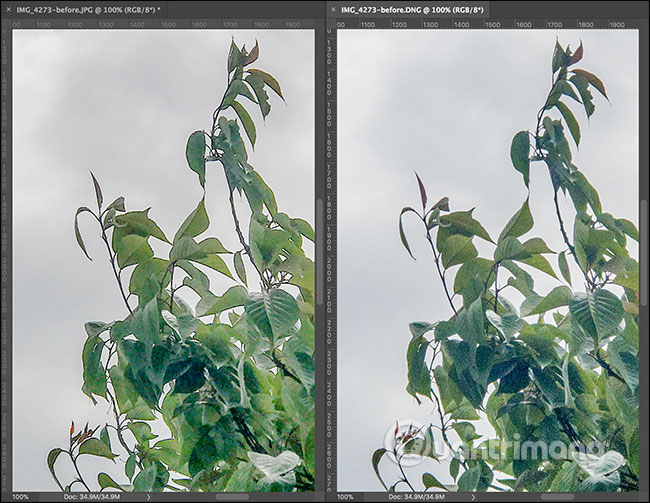
You can see that the leaf texture in the RAW file still looks fine, while the JPG file is no longer clear. Because of the low storage capacity, users always want to get the highest quality image files. No need to be equipped with a high-end camera, you can take RAW photos right on your iPhone and this is how.
- Should photographed RAW mode or not?
How to take RAW photos on iPhone
The original iOS camera application does not support RAW images, so you will need a third-party application. There are a few options for taking RAw photos on the iPhone, but there are two more preferred user choices: VSCO (Free) and Halide Camera (5.99 USD).
VSCO application
VSCO is one of the best photo editing applications available on iOS and its built-in camera can capture RAW images. The great thing about using this app is that you can take a photo, and then edit it immediately with VSCO's great editing tools.
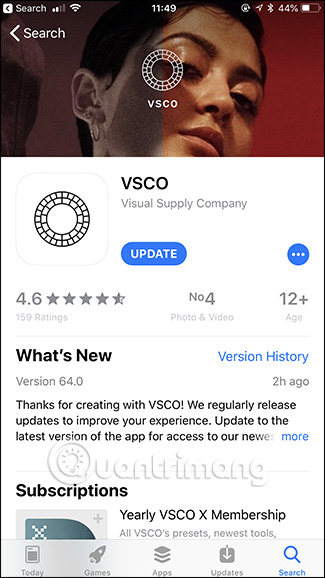
Download VSCO and launch it, click the camera icon at the top of the screen.
- Download : VSCO
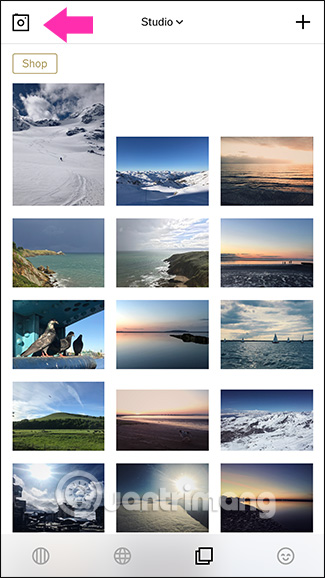
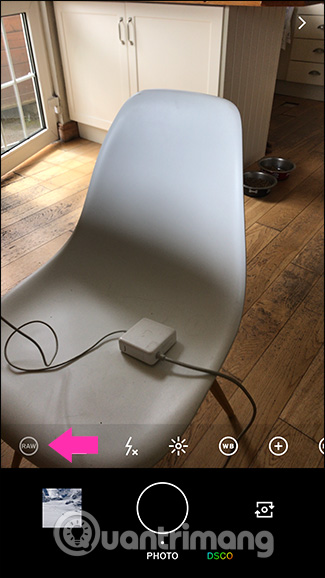
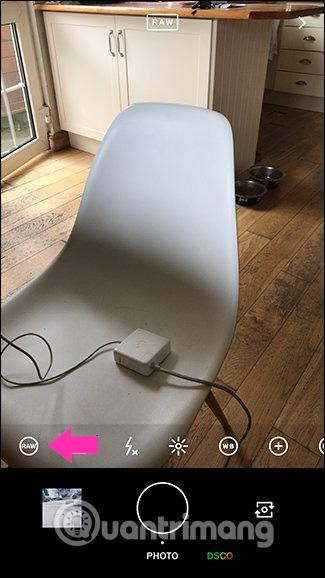
By default, the camera will only take JPG photos. To take a photo in RAW mode, tap the small RAW icon at the bottom left. If it is blurry, it means that you are taking a JPG image, if it is white, then you are shooting in RAW mode. One thing to note is that RAW files can only be captured with the rear camera.
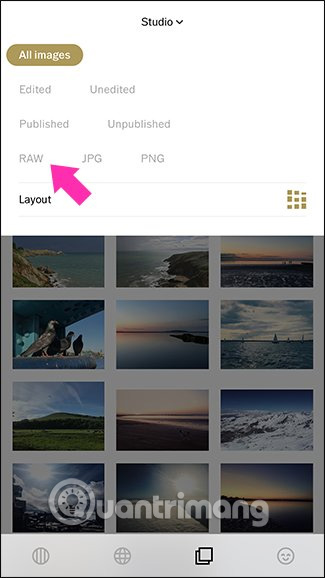
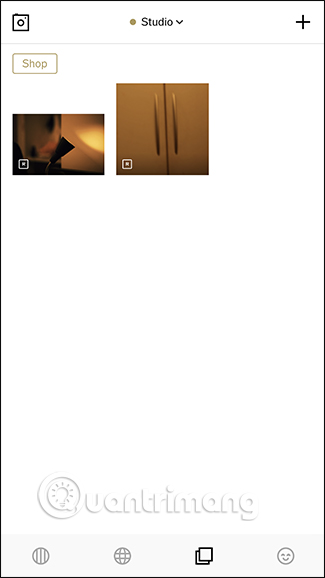
A useful feature of VSCO is that it makes it easy to see any RAW image taken. On the home screen, touch the ' Studio ' drop-down menu, then select the ' RAW ' option.
Halide application
VSCO is a great editing application, but it's not the best pure camera, so you might want another app, try Halie. It costs $ 5.99, for such an expensive app, but it's worth it if you use the iPhone camera regularly. In addition to supporting RAW, it takes fast, easy-to-control images.
Download and open Halide.
Download : Halide
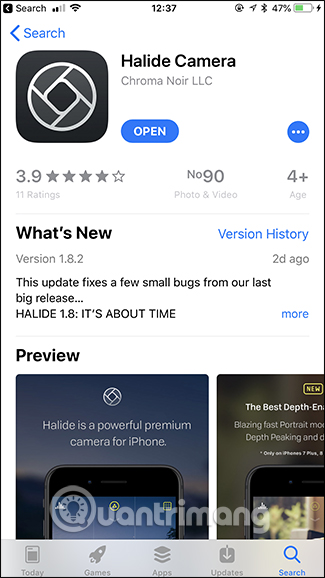
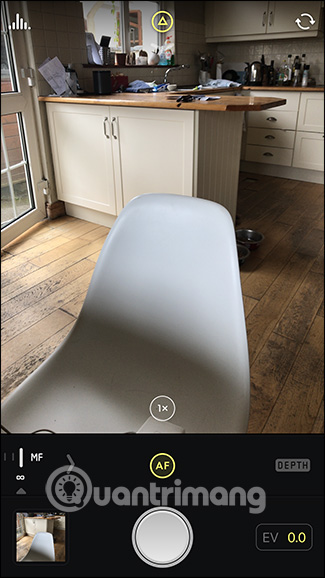
By default, Halide will capture RAW files. If you want to turn them off, drag down from the top of the screen, then touch the ' RAW ' option. When you see yellow, you are capturing RAW files; when white, you're taking JPG.
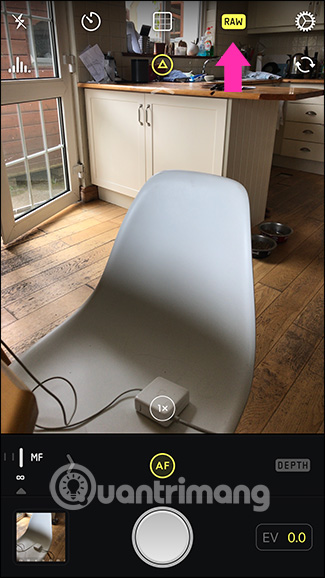
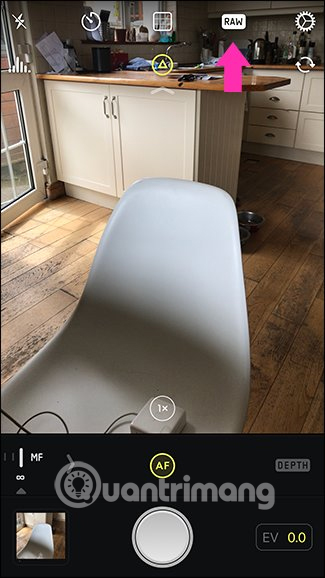
Like VSCO, you can only capture RAW files with the rear camera.
Edit RAW photos on iPhone
Although you can edit RAW files with iOS's Photos app, this is not the best tool for this job. It has no particularly powerful tool to make the most of additional data and when editing RAW images, you will not be able to edit RAW data in any other image editing application.
The best applications for editing RAW files on iPhone are VSCO (Free), Snapseed (Free) and Lightroom Mobile (free - $ 9.99 / month).
The real power of VSCO is an image editing application. If you take RAW files with your camera, you can also edit them with it. You can also import RAW files taken with other cameras into the application.
Snapseed is one of the best mobile editing apps available. If you want a general purpose editing application that can handle RAW files, this is the application to consider.
Lightroom Mobile is the smartphone version of Adobe Photoshop Lightroom. Lightroom is not only an editor, it is also a portfolio and image management application. The mobile version has all the best features of desktop apps, including incredible RAW support. If you take a lot of photos, want to synchronize photos with Lightroom catalog on your computer or want the best editing tools, you should use this application. The only downside is to unlock all Lightroom Mobile features, you need to pay $ 4.99 / month for mobile apps or $ 9.99 as part of the Adobe Creative Cloud Photography Plan.
See more:
- How to take RAW photos on Galaxy S8 / S8 Plus
- 5 steps 'turn' RAW images into black and white
- 30 tools to support online photo editing without using Photoshop