How to Use iCloud Photos on iPhone, iPad, and Mac
iCloud Photos lets you securely store photos, screenshots, videos, Live Photos, memories, and other items from the Photos app in the cloud.
Table of Contents
iCloud Photos lets you securely store photos, screenshots, videos, Live Photos, memories, and other items from the Photos app in the cloud. iCloud Photos keeps your files up to date on all your devices that have iCloud Photos turned on and are using the same Apple account. If you add, edit, or delete a file on one device, the change is updated on all your other devices. Here's how to use iCloud Photos.
How to use iCloud Photos iPhone
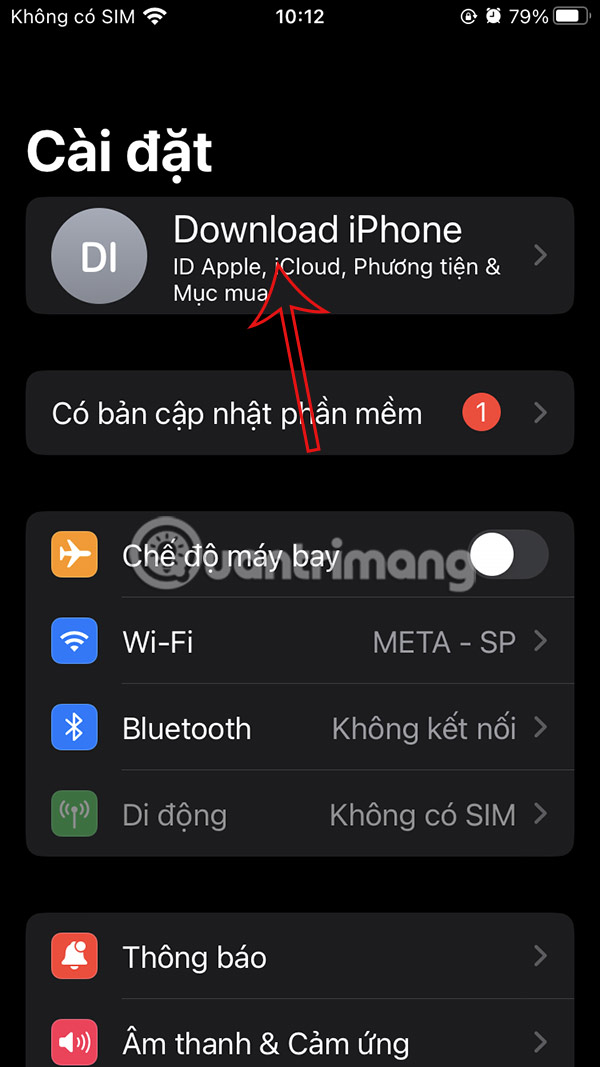
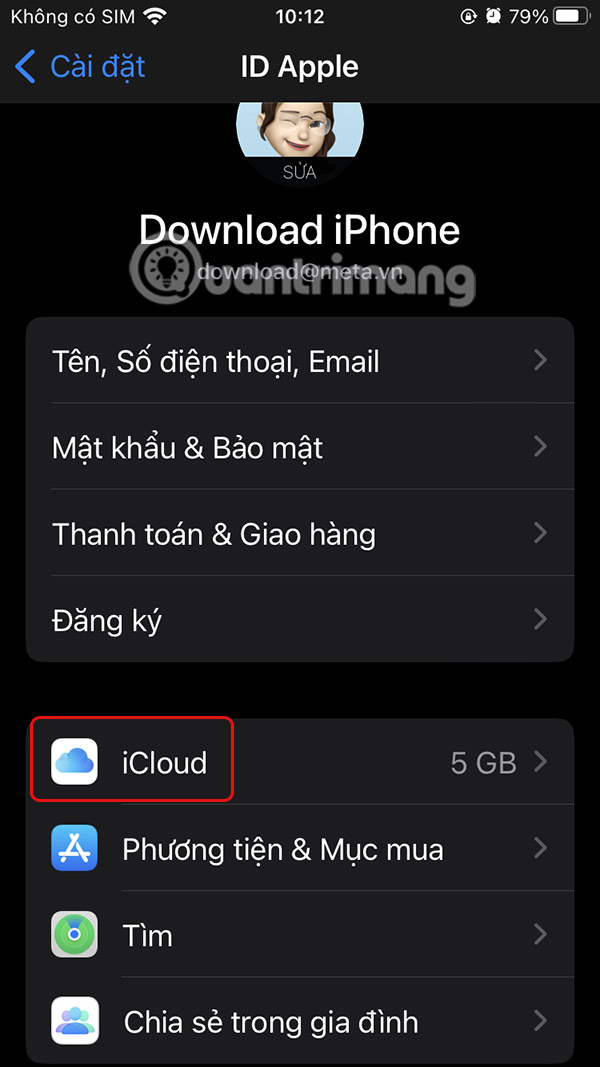
Step 1:
You go to Settings and then click on your Apple account . Next, we select iCloud at the bottom of the interface.
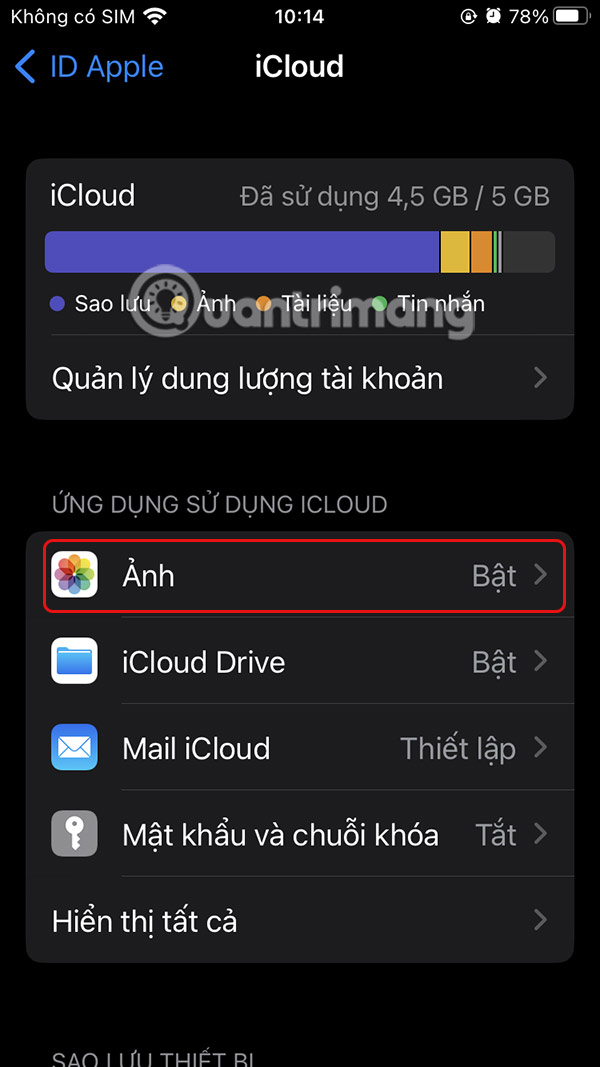
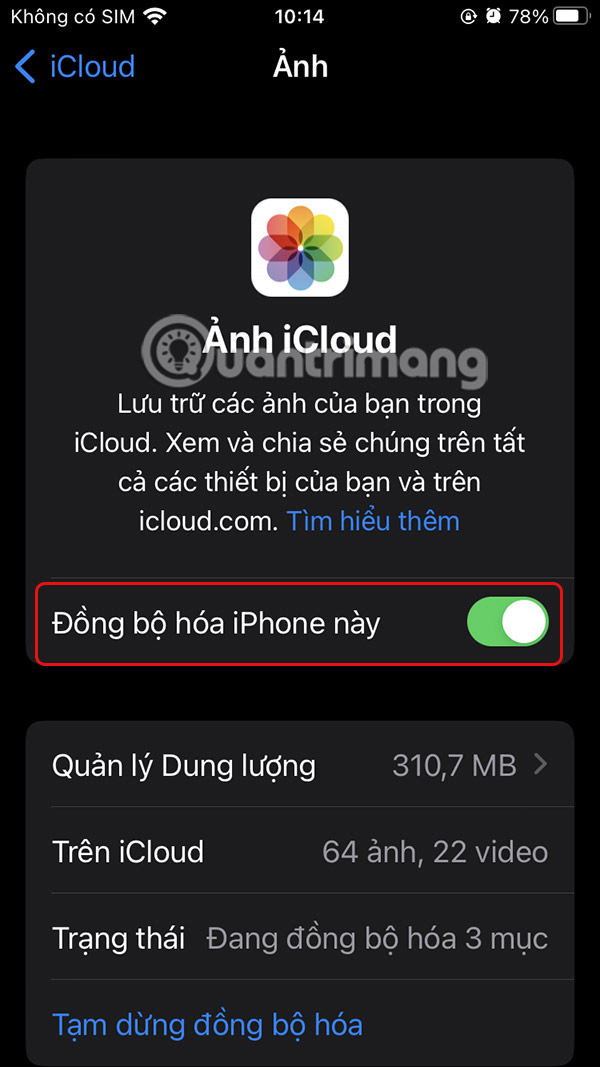
Step 2:
Switch to the new interface, users scroll down to see the Photos section and turn on Sync this iPhone to enable iCloud Photos on iPhone.
How to enable iCloud Photos on Mac
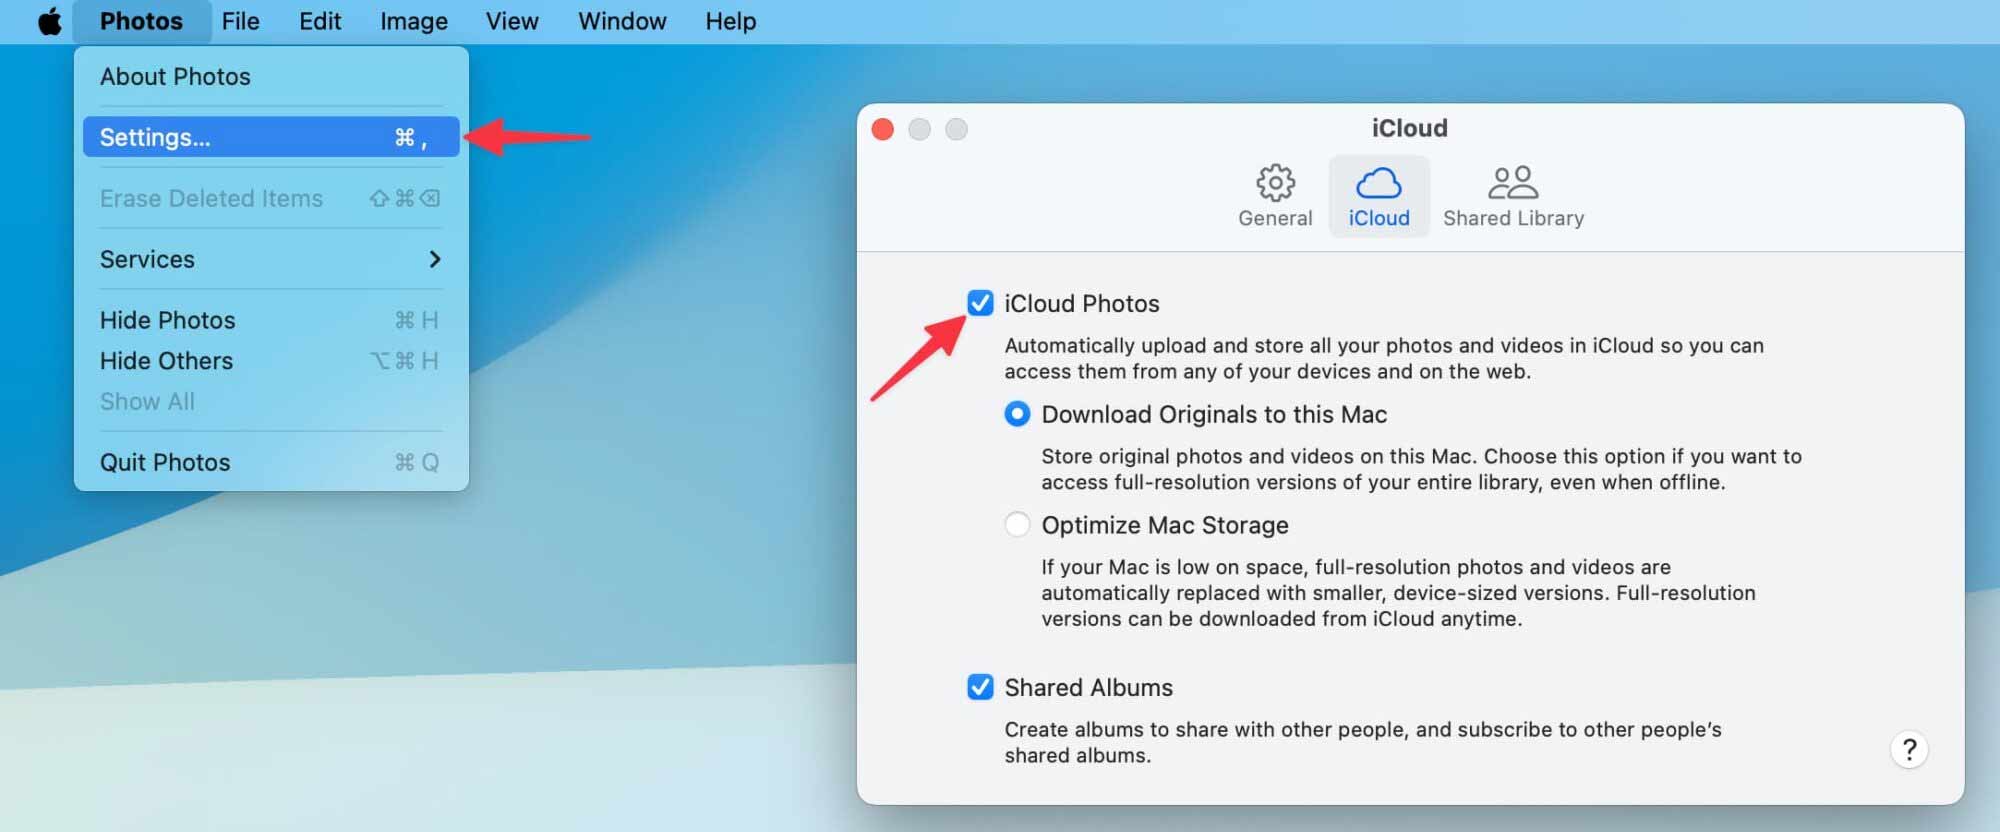
We open the Photos app then click on Photos > Settings displayed at the top. Next, click on the iCloud tab and check iCloud Photos to activate on Mac.
How to enable iCloud Photos on the web
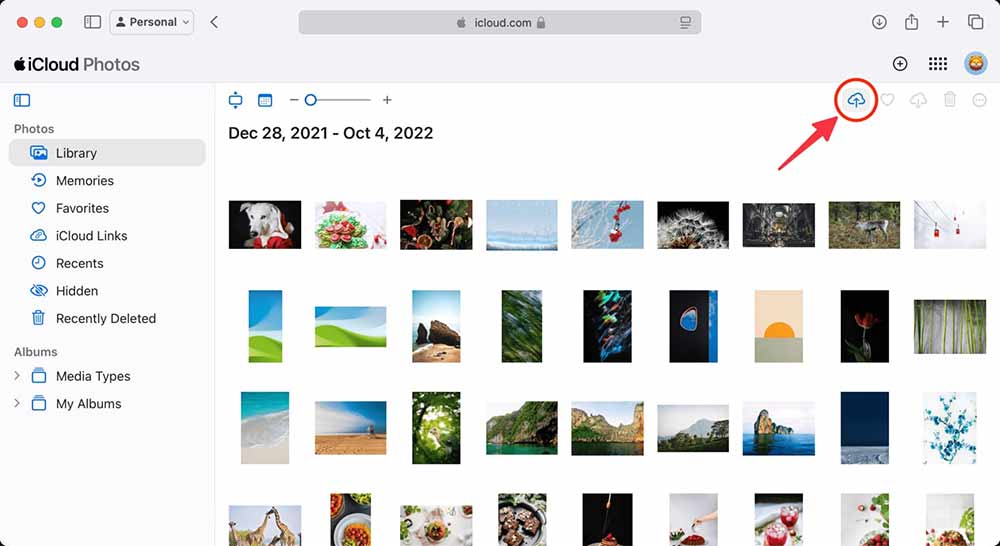
We access the iCloud website via the link below, then log in to our Apple account.
- Access iCloud Photos on the web
In the Library interface, simply click on the cloud icon and select images from your computer or drag and drop them into the iCloud web interface to sync.
What to do if iCloud Photos won't turn on?
There are two main reasons why you can't turn on iCloud Photos: low iCloud storage or system errors.
If iCloud storage is low:
- Delete unnecessary photos, videos, and screenshots from the Photos app. Delete all data in the Recently Deleted album and clear the iPhone/iPad cache. .
- Delete files and backups to free up your iCloud storage .
- Sign up for iCloud+ or Apple One for more cloud storage.
If the reason for the system error:
- Check WiFi connection on device
- Quit and reopen the Settings app or the Photos app.
- Restart iPhone, iPad, Mac
- Update your device to the latest operating system version.
- Sign out of your Apple account, then sign back in.
- Reset all settings and try again.
Was this article helpful?
Your feedback helps us improve.
Related Articles
 How to share photos with temporary iCloud links on iPhone and iPad4 minutes read
 6 Best iCloud Drive Alternatives for iPhone/iPad7 minutes read
 How to download photos from iCloud7 minutes read
 How to share iCloud folder on iPhone and iPad3 minutes read
 Why is Google Photos better than iCloud on iPhone?7 minutes read
 How to set up iCloud email, contacts and calendar on iPhone or iPad1 minutes read
Reader Comments 0
Sign in with email or Google to join the discussion.