How to take photos in Burst Mode on iPhone 11 and iPhone 11 Pro
Burst Mode refers to when the camera on the iPhone takes a series of consecutive photos, at a rate of 10 frames per second. It's a great way to shoot an action scene or an unexpected event, because there's a good chance you'll catch the image you're aiming for.
Apple has changed the way Burst Mode works in the redesigned Camera app for iPhone 11 and iPhone 11 Pro devices. On older iPhones and iPads, simply touch and hold the shutter button at the bottom of the Camera interface for the duration of the scene you are trying to capture.
However, on the iPhone 11 line, you have to press the shutter button and drag it towards the square that shows the nearest image you took. The shutter will stretch elasticly under your finger when you do so.
Note that the counter will increase in the initial position of the shutter as long as you press it down. This section shows how many photos are currently taken in the current shutter. Just remove your finger from the shutter when you want to finish the series.
When you take a series of photos, they will automatically appear in the Photos app under the album Bursts name. You will also find them in the main Photo Library.
How to view photos taken in Burst Mode
1. Launch the Photos application .
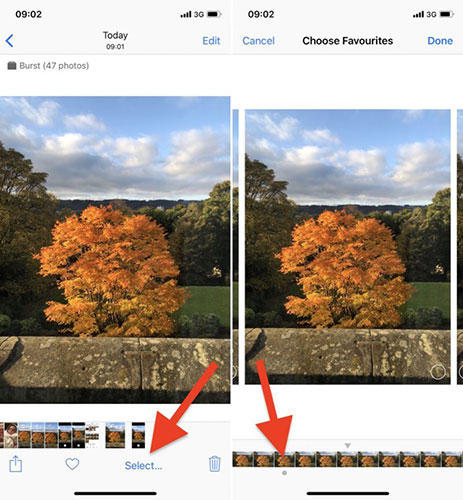
2. Click collections of photos continuously - they appear in the Photos Library as a single image, but if you look closely, you'll see many images are stacked below the top thumbnail image.

3. Click Select at the bottom of the screen.
4. Swipe the image strip like the movie strip below to view other scenes during shooting.

Any dots you see below the image indicate that Apple's algorithms think they have the best focus and detail, but of course you might think otherwise.
How to save individual images taken with Burst Mode in Photos
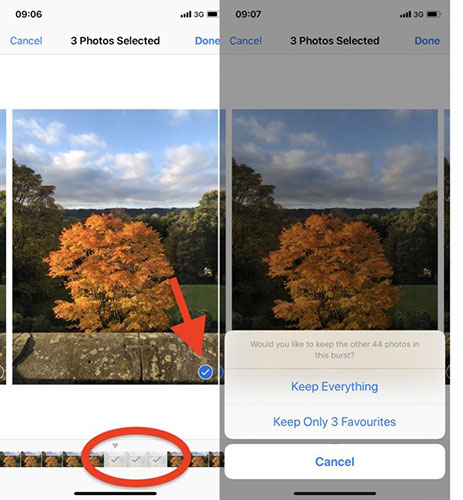
1. Click on the stack of photos taken with Burst Mode in Photo Library.
2. Click Select in the upper right corner of the screen.
3. Click each image in the series you want to keep.
4. Click Done in the upper right corner of the screen.
5. To retain only the images that you have marked in the series, press Keep Only Favorites . If not, press Keep everything.
