How to Position Graphics in Microsoft Publisher
Graphics make publications more visually appealing. Pictures can capture the reader's eye, while graphs and charts can summarize key points of the text. The right graphic, properly placed adds to the quality of a publication, while the...
Table of Contents
Method 1 of 5:
Setting the Object Position With the Format Picture Dialog
-
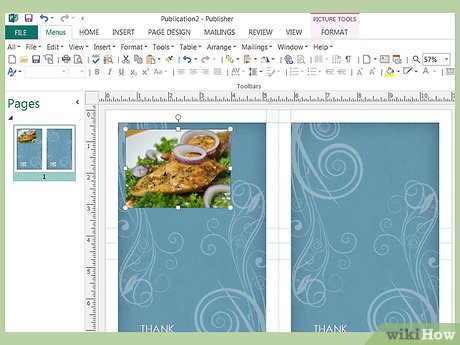 Understand the difference between inline and exact object positioning. Microsoft Publisher graphic images can be positioned either of 2 ways, inline or exact. The type of positioning you want depends on how you will use the graphic.
- Inline graphics are treated as part of the text block they accompany and will move as you type, remove, or replace the text in that block. Inline graphics are best suited for charts, graphs, and example photographs and drawings that illustrate the points made in the text adjacent to them.
- Exact position graphics are placed in a specific location on the page and do not move unless you specifically move them somewhere else. They are suited for such things as byline photos at the top of the first page and attention-grabbing images at the top, center, or bottom of a page. Microsoft Publisher uses exact positioning as its default setting for any graphic image you add to a publication.
-
 Right-click the graphic you want to make an inline graphic. This displays a popup menu.
 -
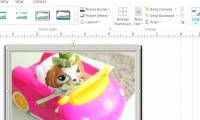
 Select "Format Picture" from the popup menu. This displays the "Format Picture" dialog, which displays a set of tabs at the top.
 -
 Click the "Layout" tab.
 -
 Select the type of positioning from the "Object Position" dropdown list.
- Choose "Inline" to make the graphic an inline graphic.
- Choose "Exact" to make the graphic use exact positioning.
-
 Set the text alignment. The alignment options differ for inline and for exact position graphics, as described below.
- The 3 radio button options under "Horizontal alignment" govern the position of an inline graphic relative to the adjacent text. Select "Left" to place the graphic to the left of the text, "Right" to place it to the right of the text, and "Move object with text" to let the graphic move when the text is edited.
- The 4 boxes under "Position on page" govern the position of an exact positioned graphic on the page. The "Horizontal" and "Vertical" spin boxes specify the numeric distance and the "From" dropdown after each spin box determines whether that distance is from the top left corner, center, or top right corner.
-
 Click "OK" to close the dialog box. The graphic is now of the type and in the position you specified.
Method 2 of 5:
Moving a Graphic With Your Mouse
-
 Select the graphic you wish to move. The graphic will be surrounded by white, sizing handle dots.
 -
 Move your cursor over any part of the graphic other than the sizing handles. Your cursor will change to a 4-headed arrow.
- If your cursor passes over a sizing handle, it will instead change to a 2-headed arrow. If you continue to move your cursor toward the center of the picture without pressing your mouse button, it will change to a 4-headed arrow.
-
 Press and hold your left mouse button.
 -
 Drag the graphic to where you want to place it in the publication.
 -
 Release the mouse button. Your graphic is now in its new position.
- This method produces the same results as using the "Position on page" options in the "Format Picture" dialog to position an exact position graphic. You'll find this method easier to use because you can see where the graphic is being positioned as you move it. You'll also use this method to position copies you make of a graphic in their desired locations.
- You can also move your cursor over the graphic without first selecting it. Your cursor will change to a 4-headed arrow; once you hold down your left mouse button, the graphic will be selected and you can then drag it to its new location
Method 3 of 5:
Resizing a Graphic
-
 Select the graphic you wish to resize. It will be surrounded by sizing handle dots.
 -
 Move your cursor over a sizing handle dot. Your cursor will change to a 2-headed arrow. If you place it over a sizing handle at the top or bottom, it will be a vertical arrow; if you place it over a sizing handle on either the left or right side, it will be a horizontal arrow; and if you place it over a corner handle, it will be a diagonal arrow.
 -
 Press and hold your left mouse button.
 -
 Drag your mouse according to whether you want to enlarge or shrink the graphic. Drag your cursor toward the center of the graphic to make it smaller or away from the center to make the graphic larger.
 -
 Release the mouse button. Your graphic is now resized.
- Be aware that significantly resizing a graphic will change its resolution. Making a graphic twice as large will reduce its resolution by half, while making it half its size will double its resolution. Graphics for printed publications should have a resolution of 200 to 300 dpi, while graphics for the Internet should have a resolution of 72 to 96 dpi. For this reason, it is helpful to choose graphic images as close to the size you need in the beginning so that you have to resize them only slightly, if at all.
Method 4 of 5:
Rotating a Graphic
-
 Select the graphic you wish to rotate. It will be surrounded by sizing handle dots. Note the presence of a green dot above the sizing handles. This is the graphic's rotation handle.
 -
 Move your cursor over the rotation handle. The cursor will change to a circular arrow.
 -
 Press and hold your left mouse button.
 -
 Drag your mouse to rotate the graphic. Drag to the right to rotate the graphic clockwise or to the left to rotate the graphic counterclockwise.
 -
 Release the mouse button when your graphic is rotated sufficiently. Rotated graphics can be more visually appealing than graphics in their normal orientation and provide an illusion of movement without the distraction an animated graphic can produce.
- You can also rotate a graphic in Microsoft Publisher 2003 and 2007 by selecting "Rotate" or "Flip" on the "Arrange" menu and then clicking "Free Rotate" after first selecting the graphic. This will put rotation handles on each corner, after which you move your cursor over one of the handles and drag the picture clockwise or counterclockwise. You can also rotate the selected graphic a set amount by choosing either "Rotate Left 90 Degrees" or "Rotate Right 90 Degrees."
- You can also rotate a graphic in Microsoft Publisher 2010 by using one of the options listed on the "Rotate" dropdown in the "Arrange" group on the "Home" menu ribbon. Select "Free Rotate" to put rotation handles on each corner, after which you move your cursor over one of the handles and drag the picture clockwise or counterclockwise. Select "Rotate Right 90 Degrees" or "Rotate Left 90 Degrees" to rotate the graphic clockwise or counterclockwise that amount. Select "More Rotation Options" to rotate the graphic by the number of degrees you set in the "Rotation" spin box on the "Size" page of the "Format Object" dialog.
Method 5 of 5:
Flipping a Graphic
-
 Select the graphic you wish to flip. It will be surrounded by sizing handle dots.
 -
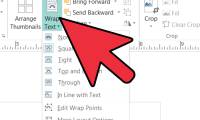
 Decide whether to flip the graphic horizontally or vertically. You'll choose "Flip Horizontal" to flip the graphic side-over-side (around its vertical axis) or "Flip Vertical" to flip the graphic top to bottom (around its horizontal axis). Where these commands are located depends on your version of Publisher.
- In Microsoft Publisher 2003 and 2007, select "Rotate and Flip" from the "Arrange" menu. Select "Flip Horizontal" or "Flip Vertical" from the "Rotate and Flip" submenu.
- In Microsoft Publisher 2010, select "Flip Horizontal" or "Flip Vertical" from the "Rotate" dropdown in the "Arrange" group on the "Home" menu ribbon.
- When flipping a graphic, consider any details that may be reversed when you flip it. Items such as reversed text or even the way clothing wraps around a man's or woman's body can make a flipped graphic look "wrong."
Was this article helpful?
Your feedback helps us improve.
Related Articles
 How to Use Basic Microsoft Publisher6 minutes read
 How to Download Microsoft Publisher6 minutes read
 How to convert Microsoft Publisher files (.pub) to PDF3 minutes read
 How to Add a Photo to a Document Using Microsoft Publisher11 minutes read
 How to Wrap Text Around a Picture in Publisher4 minutes read
 How to Crop Graphics in Microsoft Publisher6 minutes read
Reader Comments 0
Sign in with email or Google to join the discussion.