How to set a static IP on Windows 11 simply
Do you want to change the static IP address on Windows 11, set a static IP for your Win 11 to share the folder with other LAN users, or avoid the same IP that you can't access the network but don't know how? Let's join Taimienphi to set a static IP on Windows 11 through the following article.
Table of Contents
Microsoft developers have changed some features and operating mechanisms, so setting up a static IP on Windows 11 is also different from previous Win versions, so users who are not tech-savvy will not be able to do it. , and for better understanding, we will guide you to assign static IP on Windows 11 with the most detailed illustration.
Assign IP on Windows 11 operating system
The fastest guide to setting static IP on Windows 11
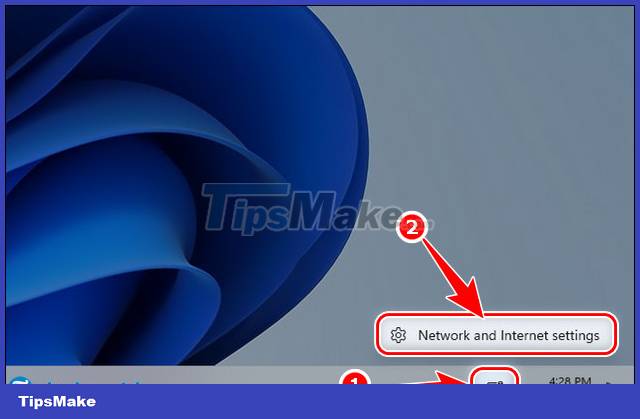
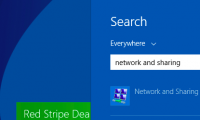
Step 1: Right -click the Ethernet or WI-Fi icon on Windows 11 in the bottom right corner of the screen => select Network and internet settings .
Step 2: At the Network & internet panel, select Properties under the Ethernet or WI-Fi icon (depending on the state you are connecting to the network).

Step 3: In the new attribute table that appears, click Edit of the IP assignment entry .

Step 4: Switch from Automatic (DHCP) to Manual and IPv4 to On .

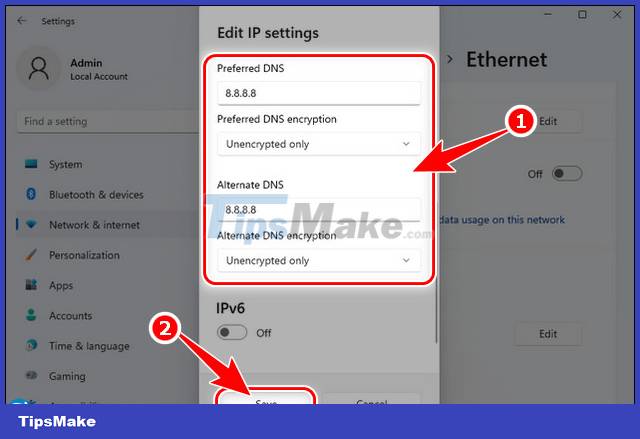
Step 5: Set up the specific data boxes as follows:
- IP Address: Enter the static IP address 192.168.1.X (where X is any number from 1 to 250 in the provided Wifi range, this number cannot be used). duplicate with another machine because if someone already uses this number, you won't be able to access the network)
+ For example: as shown below Taimienphi set the static IP address as 192.168.1.145
- Subnet mask: Enter 255.255 .255.0
- Gateway: 192.168.1.1

- Preferred DNS: 8.8.8.8
- Alternate DNS: 8.8.8.8 or 8.8.4.4
=> Click Save to save information.
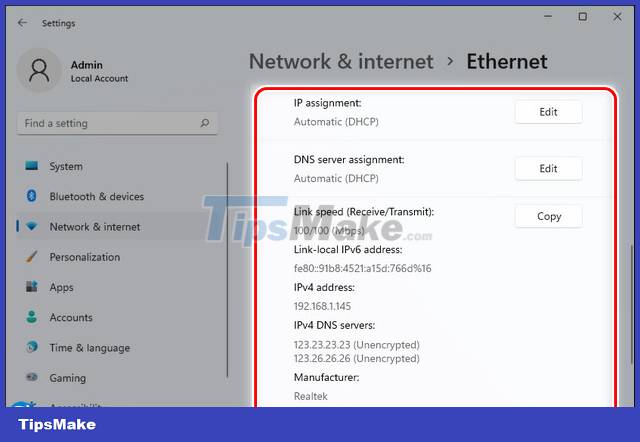
- After setting up a static IP on Windows 11, all information will be displayed as follows
https://thuthuat.taimienphi.vn/cach-dat-ip-tinh-tren-windows-11-68503n.aspx
Through this article, hopefully readers know how to set static IP for Windows 11 computers. Static IP usually more stable than dynamic IP. However, because users pay little attention, we often use the default one (dynamic IP). If you have any questions during the process, feel free to ask in the comments section below.
- Reference: 7 Ways to speed up Windows 11 to run faster
Was this article helpful?
Your feedback helps us improve.
Related Articles
 What is a static IP address?11 minutes read
 How to assign static IP addresses in Windows 7, 8, 10, XP or Vista6 minutes read
 How to set up static IPs for computers1 minutes read
 Static member of class in C ++2 minutes read
 Fix can not change static IP, fix can not change DNS on Windows 106 minutes read
 Set static IP settings for Windows XP, 7, 8, and 8.1 computers7 minutes read
Reader Comments 0
Sign in with email or Google to join the discussion.