Table of Contents
Macromedia Flash - Program Flash Download Design: Step covers the essential facts behind the topic, including what changed, why it mattered, and how it affected users.
Step Overview
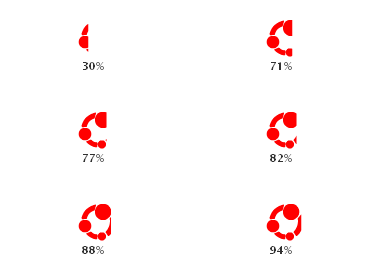
Step 1 Open Flash and create a new file of size 200x100px. Select white as background color and set the Frame rate to 24, then click OK.

Step 2 Use the Oval Tool (O). In the Colors section of the Tool panel, remove the Stroke color by clicking on the small pen icon, then select the small box with the red slash LINE. In Fill color choose # F80000 and draw 3 circles as shown below:

Step 3 After drawing 3 circles, use the LINE Tool (N). Select the stroke color # F80000 and the Solid part to select the stroke with a thickness of 0.5.

Then draw the following figures

Step 4 Using the Paint Bucket Tool (K), Fill color select # F80000 and fill the color created in the previous step.

Step 5 Press Ctrl + A (Select all) and then press F8 key (Convert to Symbol) to convert the entire picture into a Movie Clip Symbol. See the picture below.

Step 6 Double-click the movie clip and you will see the inside of the movie.

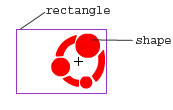
Step 7 Double click on layer 1 to rename. Click on frame 100 and press F5 key. Then create a new layer above the image layer and name it mask. Step 8 Select the mask layer, take the Rectangle Tool (R). In the Colors section of the Tool panel, remove the Stroke color by clicking on the small pen icon and then drawing a rectangle like the image below.

Step 9 Click on frame 100 and press F6 key. Then use the mouse or arrow keys to drag the rectangle over the original drawn image.
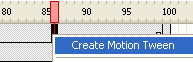
Step 10 Right-click anywhere on the gray area between the two keyframes and select Create Motion Tween from the menu that appears.
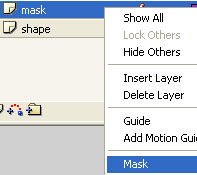
Step 11 Select the mask layer and convert it to a mask by right-clicking on the layer and selecting Mask.
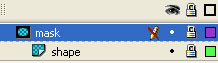
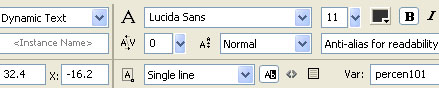
Step 12 Create a new layer above the mask layer and name it percent (percent). Step 13 Select percent layer and click the Text tool (T). Go to the Properties Panel (Ctrl + F3) below and select the following options: a) Select Dynamic Text b) Choose Lucida Sans font c) Select 11 font size and bold type. D) Choose color as # 323232 e) Select Anti-alias for readability f) In Var field: enter percen101
Then enter one into a 99% value below the image.
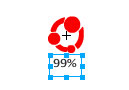
Step 14 Return to the main scene (Scene1)

Step 15 Pick the Selection Tool (V), click once on the preloader to select it and open the Action Script Panel (F9). Then include the following code:
OnClipEvent (load) { total = _root. GetBytesTotal (); } onClipEvent (enterFrame) { loaded = _root. GetBytesLoaded (); percent = int (loaded / total * 100); percen101 = "" + percent + "%"; gotoAndStop (percent); if (loaded == total) { _root. GotoAndPlay (2); } }
So we have completed the preloader. To see how it works, click on the first frame and again use the Action Script Panel tool to bring the following code into:
Stop ();
Then create a new layer above the preloader layer, click on the second frame and press F6 key. Then, Import, position, create effects, photos, movies. And click again on the second frame, enter the stop () command; go to the Action panel. Try running the created file or download the sample file here.
FAQ
What does Macromedia Flash - Program Flash Download Design: Step explain?
Macromedia Flash - Program Flash Download Design: Step covers the essential facts behind the topic, including what changed, why it mattered, and how it affected users.
Who is most affected by Step?
Step Overview Step 1 Open Flash and create a new file of size 200x100px.
What are the key takeaways from this topic?
Select white as background color and set the Frame rate to 24, then click OK.
Related Articles
 Macromedia Flash - Complete Flash Banner Design4 minutes read
 Macromedia Flash - Effects of Lighting on Photos4 minutes read
 Macromedia Flash - the Spotlight3 minutes read
 Macromedia Flash - Self-Designed Animated Menu5 minutes read
 Macromedia Flash - RGB Color Slider: Step6 minutes read
 Macromedia Flash - an Attractive Photo Appearance Effect4 minutes read
Reader Comments 0
Sign in with email or Google to join the discussion.