Table of Contents
This guide explains how to corner in AI, with clear steps, practical tips, and important checks before you begin.
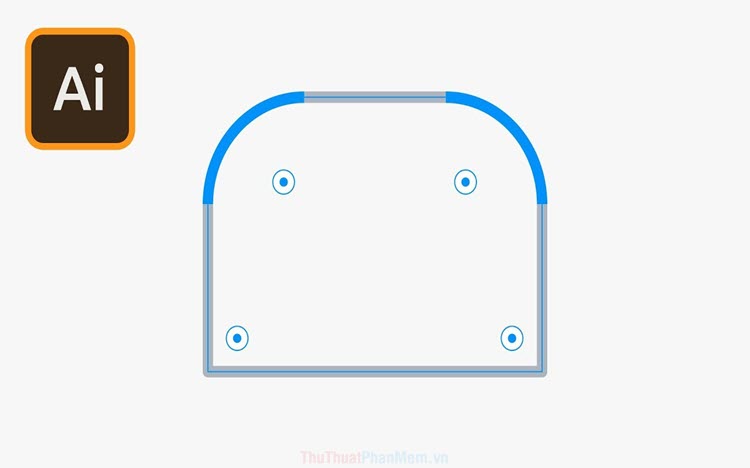
Method 1. Bo corner directly with the Rectangle Tool (Bo all corners)
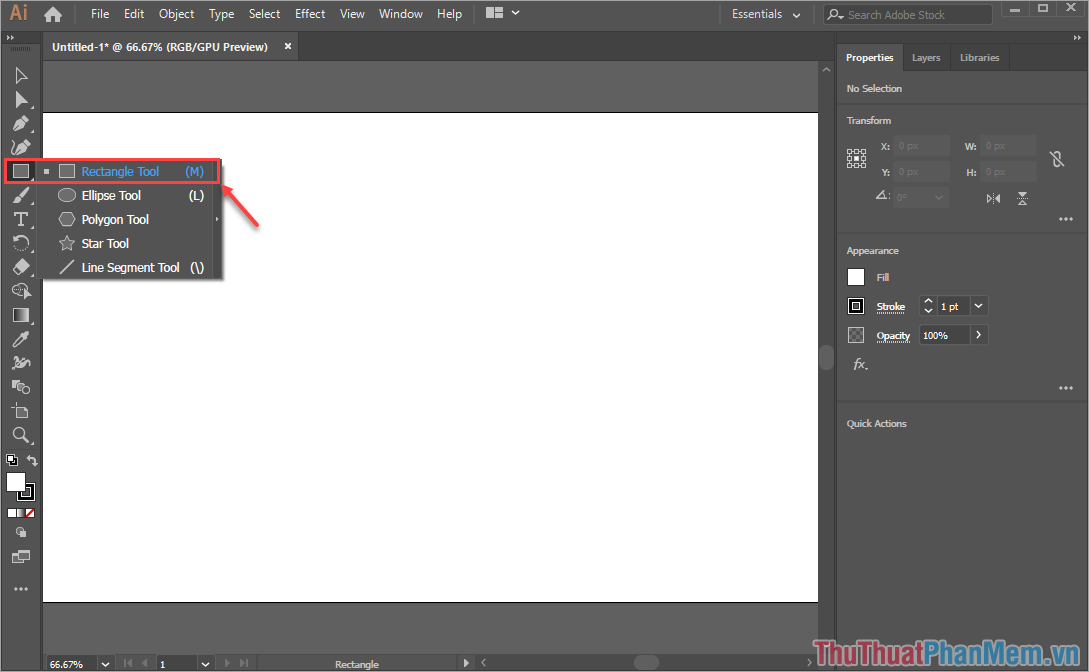
Step 1: Open up Illustrator and select the Rectangle Tool to draw squares / rectangles.
Step 2: After drawing the picture, you will see there are 4 round buttons inside the right angles. You just click on one of the four round buttons and drag them into the center of the image.

Your rectangle will gradually change to a rounded angle according to your hover movement.

For this method, all you need to do is change the angular angle of an angle, then the remaining three corners will change similarly. This is our result after making the corners.

Method 2. Bo corner with Effect tool (Bo all corners)
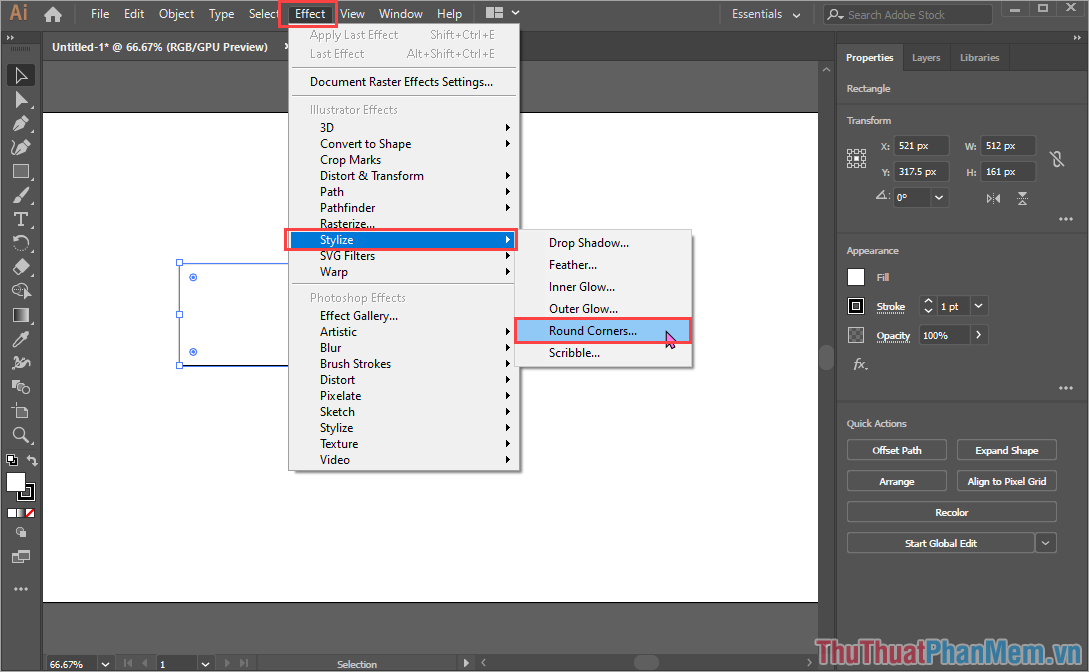
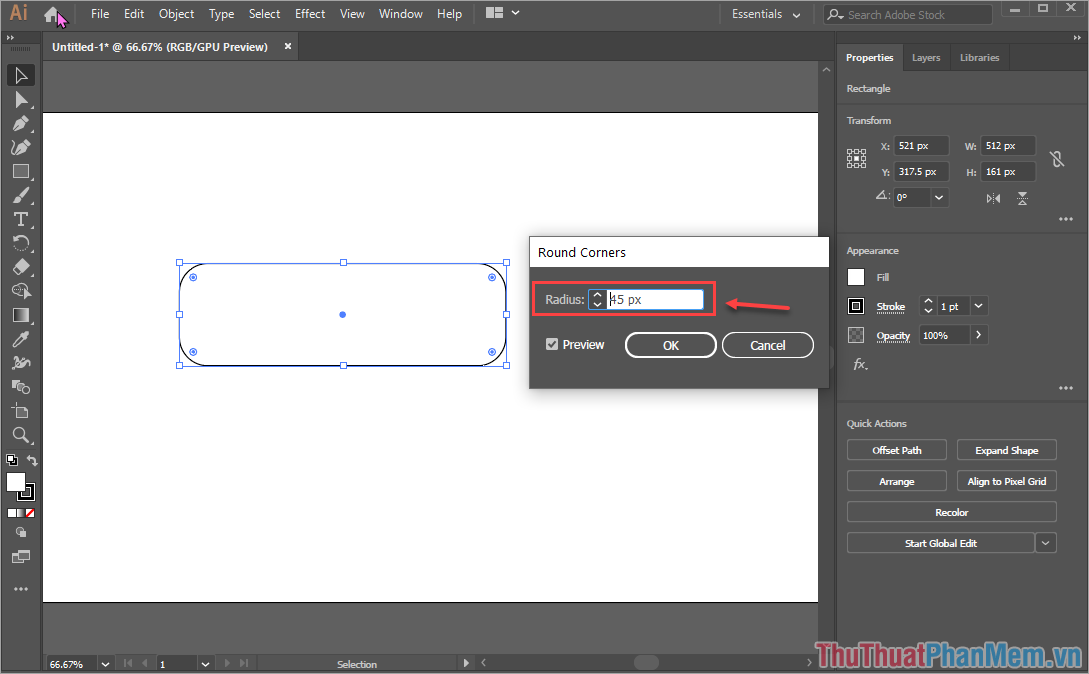
Step 1: You proceed to draw a square / rectangle and click to select. Next, you select Effect -> Stylize -> Round Conners.
Step 2: The first thing to do when the Round Conners window appears is to turn on the Preview feature.
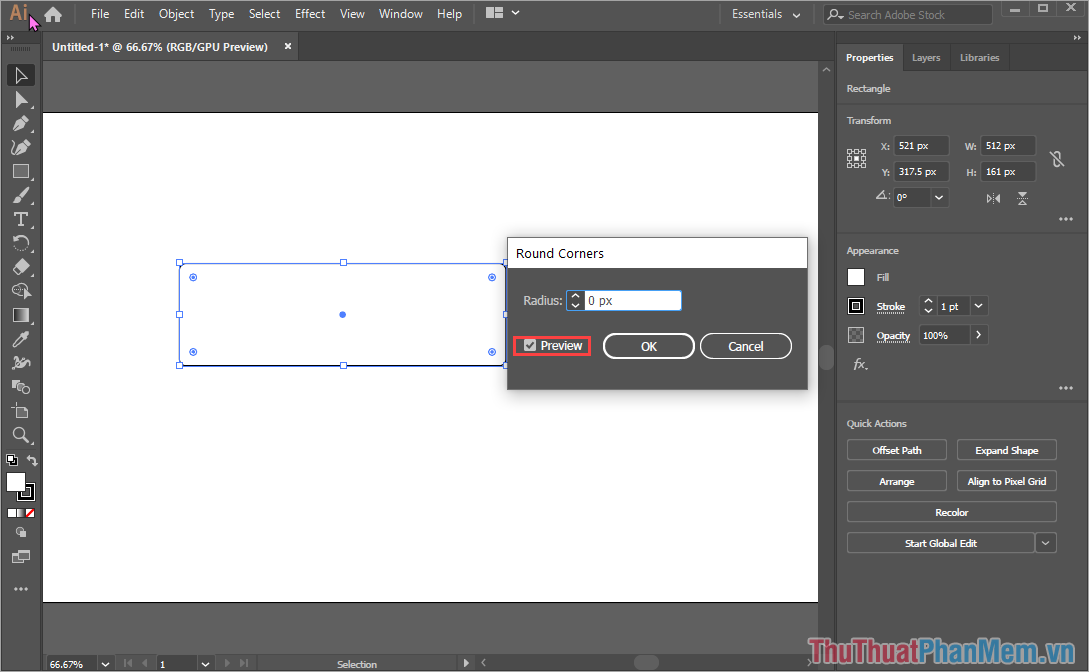
Step 3: Then, you proceed to enter the parameters you want to corner into the Radius line and watch the results change.
Method 3. Bo corner with the Direct Selection Tool (Bo corner by corner)
For this way, you can boil the corners in an image with different levels. However, they will take more time because you have to tweak each corner.
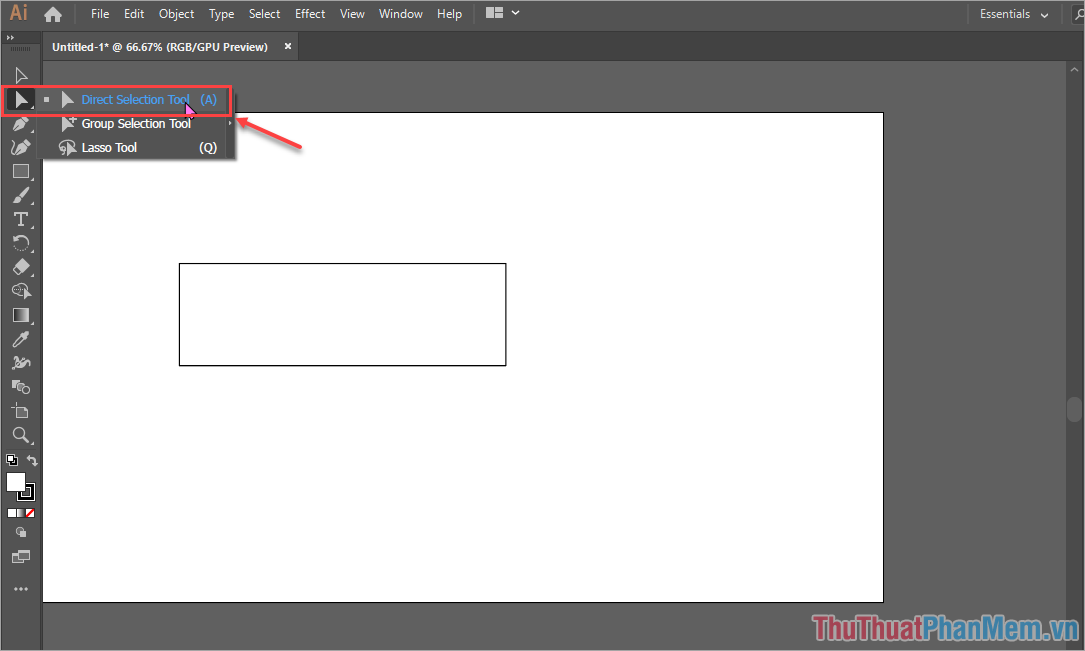
Step 1: You proceed to draw a square / rectangle and then select the Direct Selection Tool .
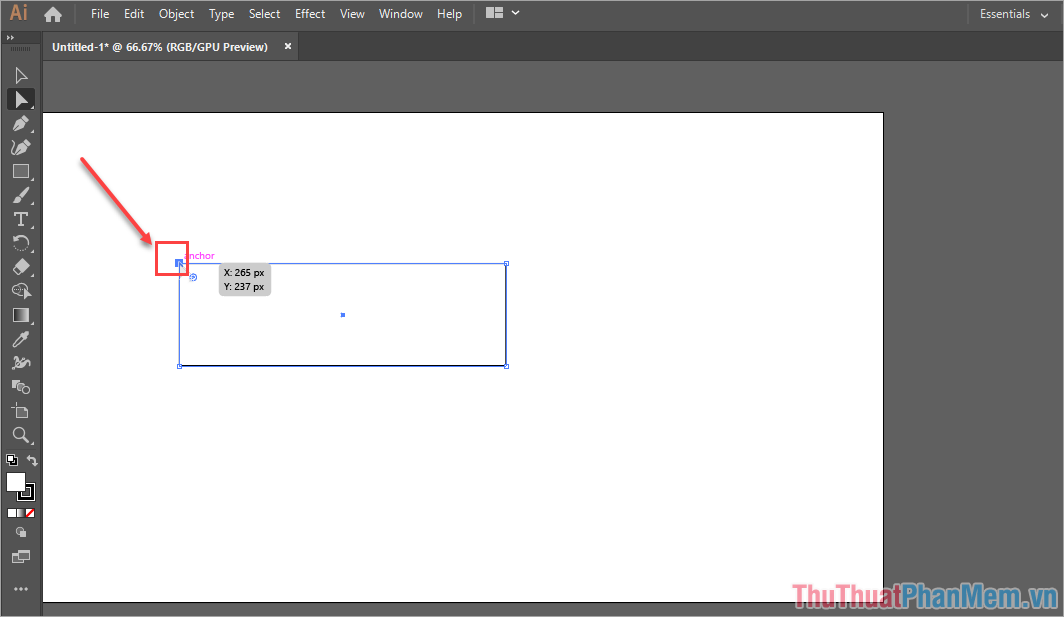
Step 2: Next, click on an angle that you want to corner.
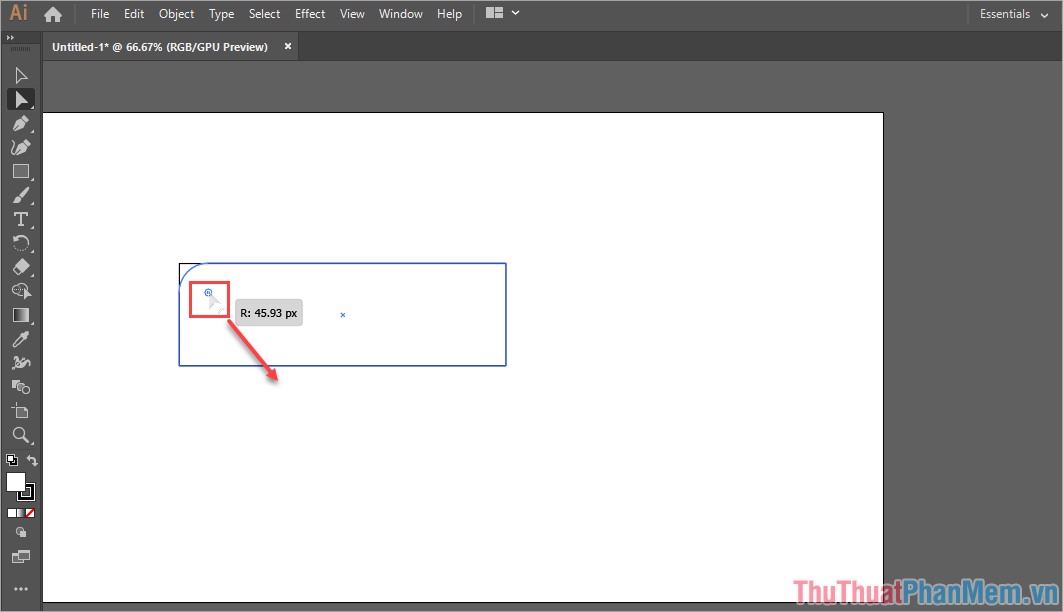
Step 3: After clicking on the corner, you will see circles appear. You hold the mouse to the circle and drag them to the center to change the angle of the corner.
Step 4: You proceed to do the same with the remaining corners in the picture. We will get asymmetrical rounded corners.
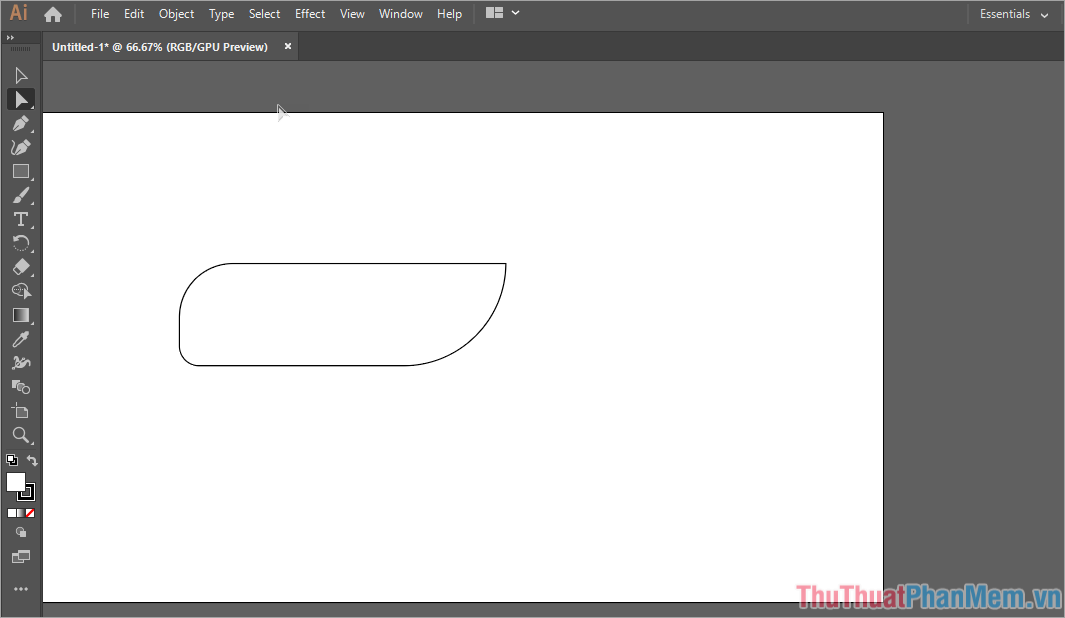
In this article, Software Tips showed you three different ways to corner an image in Illustrator quickly and effectively. Good luck!
FAQ
What should I know about Corner in AI?
Focus on the key features, requirements, limitations, and practical use cases explained in this guide.
How do I get the best results with Corner in AI?
Follow the recommended steps, use current software or information, confirm compatibility, and review settings before major changes.
Are there any risks or limitations?
Potential limitations depend on compatibility, data quality, cost, privacy, support, and how the product or method is used.
Related Articles
 How to Use Hot Corner on Mac4 minutes read
 How to Fix the Activate Windows Watermark Legally3 minutes read
 Click: How to Quickly Open the Launchpad on a Mac3 minutes read
 How to Fix a Black Corner on a Laptop Screen: Step-by-Step Guide8 minutes read
 Rounded Corner in CSS: A Practical Guide4 minutes read
 How to Decorate the Working Corner to Welcome Christmas5 minutes read
Reader Comments 0
Sign in with email or Google to join the discussion.